3.09. Enter outgoing goods (customer invoices)
Now let's suppose we have just received an order as follows: <HTML>
</HTML>
| From: | Blue Cross Hospital |
|---|---|
| Order number: | PO882 |
| Delivery: Express courier please | |
| Item | Quan |
| Amoxycillin 250mg tab/caps | 10,000 |
| Cotrimoxazole 240mg/5mL susp | 120 |
<HTML>
</HTML>
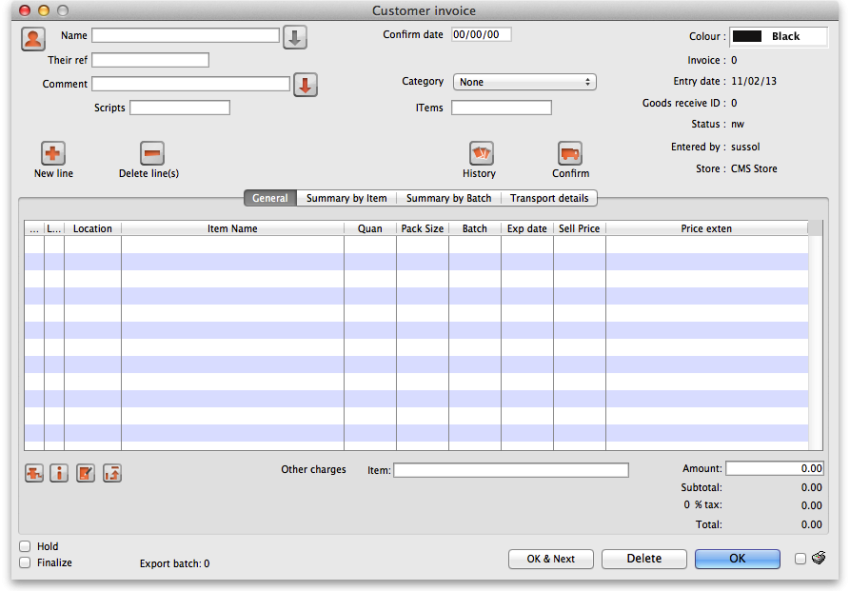
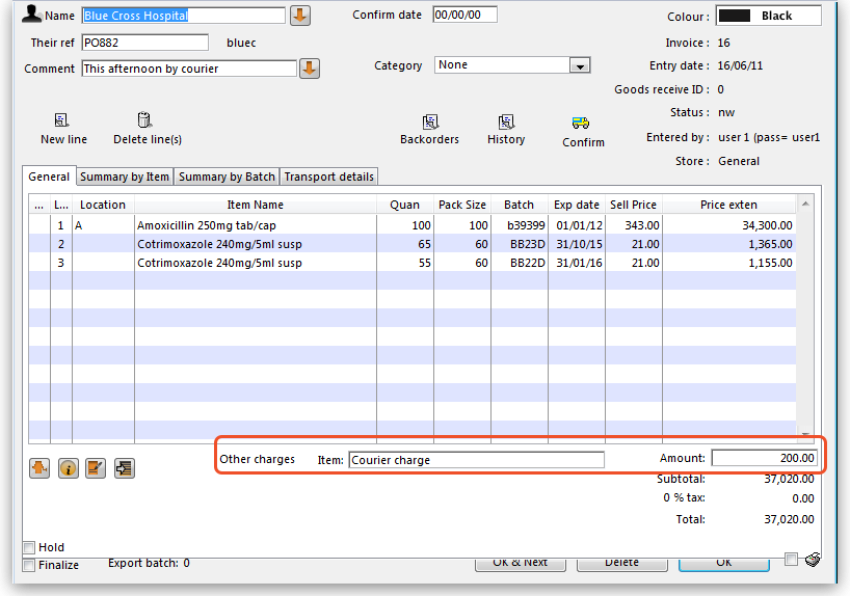
Choose New invoice from the Customer Invoice menu, and the following window appears:
Type b into the Name field, and press Tab. You will be presented with a list of customers whose name starts with “b”. Double-click the Blue Cross Hospital row to select it.
- In the Their ref field enter
PO882. - In the Comment field enter
This afternoon by courier - Click the New line button to add a line to the invoice. You are presented with the Add item window.
Enter the following details:
- Type
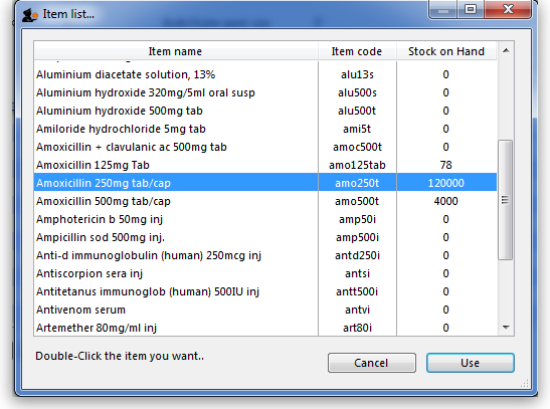
ainto the Name field then press Tab. In the list you are presented with, double-click on the Amoxycillin 250mg tab/cap row.
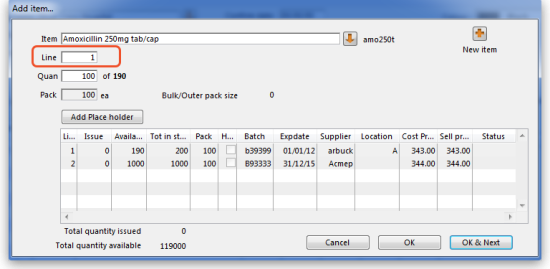
- You will see that a list of available stock has appeared in the window, and the cursor has moved to the Line number field. Enter
2to choose line 2. (The list is sorted so batches with the shortest expiry date are at the top - usually you would choose the shortest expiry batch, but today we're being different!).
- Quantity field - the line we have chosen has a pack size of 100, so you will need to enter a quantity of
100to make a total of 10,000
Click the OK & Next button to add the second line of the order.
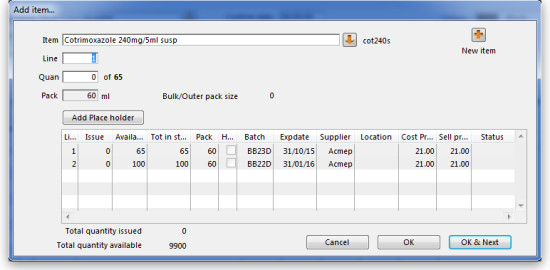
This time enter c and press Tab. Double-click on the Cotrimoxazole 240mg/5mL susp row. The window will close and the list of available batches and quantities will be completed.
Note that in the list of available stock, the stock we entered from “Acme Pharmaceuticals” earlier in this tutorial is at the top of the list. This is because the list is sorted so items with the shortest expiry date are at the top of the list.
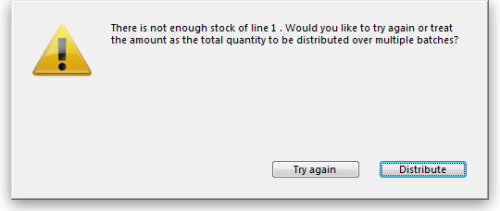
Line 1 is selected, despite the insufficient stock of line 1 to meet the order of 120. Nevertheless, you should enter 120 in the Quantity field, press Tab, and the following message will appear:
For this tutorial, choose Distribute. Distribute is likely to be your normal choice. Distribute will mean that the stock needed to complete the order will be drawn from another batch/batches, starting with the batch which will be the first to expire. There will be occasions, however, when you wish to override this automatic means of distribution. If this is the case, you would select Try Again and manually select the batches from which you wish to meet the order.
Click the OK & Next button
Because the invoice has not been confirmed, the “available” amount for the line is decreased, but the “total stc” (total stock) will remain the same. mSupply includes these lines in the list so you can see stock that has been allocated to an invoice but has not yet left your store. You can then edit the other invoice if stock is urgently needed on the current invoice.
Click OK as we are finished entering lines. You will be returned to the main Customer invoice window.
At the bottom right of the invoice you will see the invoice total.
- As the customer has requested an express courier, we will charge them Rs200 for the service (Rs = rupees the currency in our tutorial).
- At the bottom of the window you will see the Other charges field. Enter
Courier chargeand press Tab. - In the amount field enter 200 and press Tab. The new total should be 37,020.00.
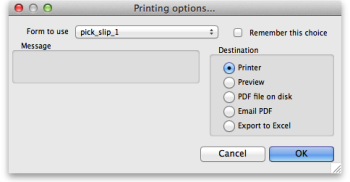
Now we are ready to print a packing slip. Make sure that the Print checkbox is checked in the bottom right corner, and click OK. A window appears displaying your print options.
We want to print a packing slip, so the default settings are correct. You will notice the packing slip printed has a column where you can record the actual quantity packed.
Confirming the invoice
Let's suppose the order was successfully packed according to the packing slip, and you now want to confirm the order and print an invoice to pack with the goods. (We're in a hurry - the express courier is on her way!)
First, we need to look up the invoice.
- Choose Show invoices from the Customer invoices menu.
- If you know the invoice number (printed on the packing slip) you can enter it. Or, to bring a list of the most recent invoices, you enter the number of invoices to view. As we know the invoice we want is the last one to be entered, you can type
1and click OK - you will be taken straight to the invoice.
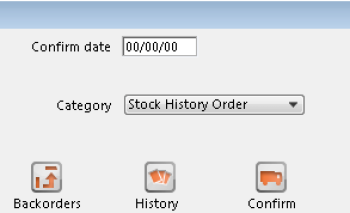
Click the Confirm truck icon.
Today's date will appear in the Confirm date field. Click OK to confirm you want to proceed.
The invoice is confirmed, and you are given the opportunity to print an invoice.
| Previous: 3.08. Enter incoming goods (supplier invoices) | | Next: 3.10. Entering quotations |
