4.07. Building (manufacturing) items
mSupply provides for a mechanism to manufacture (build) a new item from two or more existing items. A build is a way of recording items you have manufactured. That is, raw materials that are in your stock are used (taken out of stock), and a new stock item is created.
Show builds
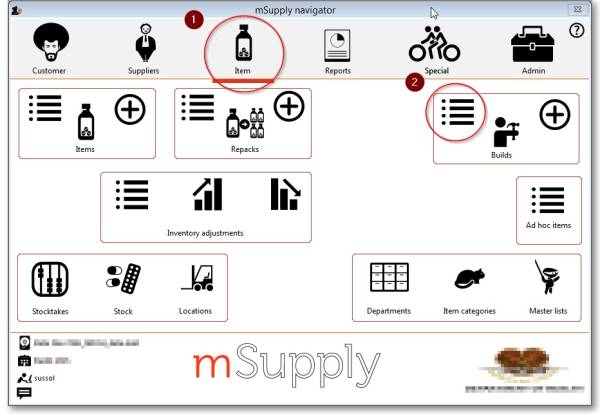
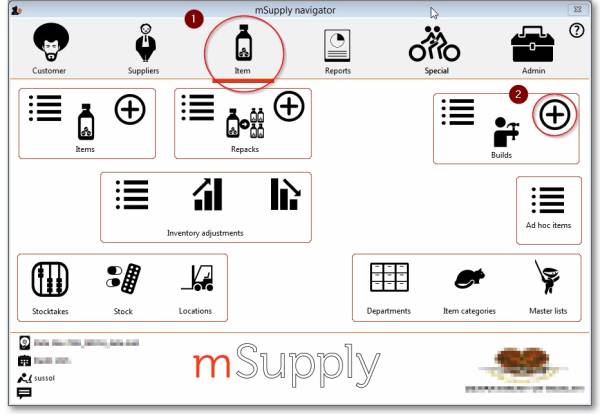
From the Items page of the Navigator, click on the Show Builds button:
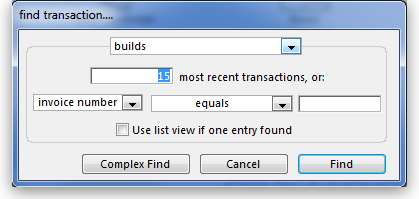
You will be shown the standard find window to enter either the number of recent builds to display, or a particular build number.
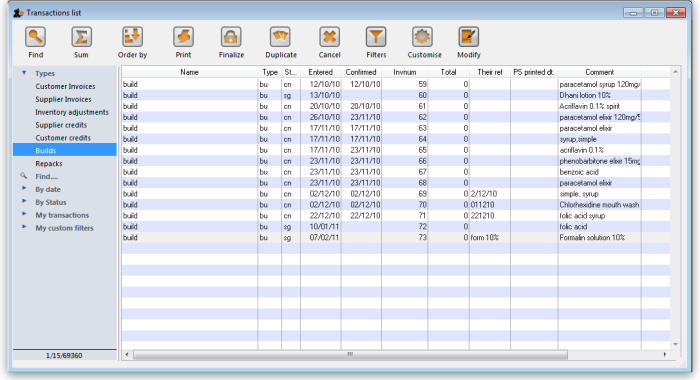
You will then be shown a list as shown below:
From this list you should select the required build by double-clicking on it.
New build
From the Items page of the Navigator, click on the New Builds button:
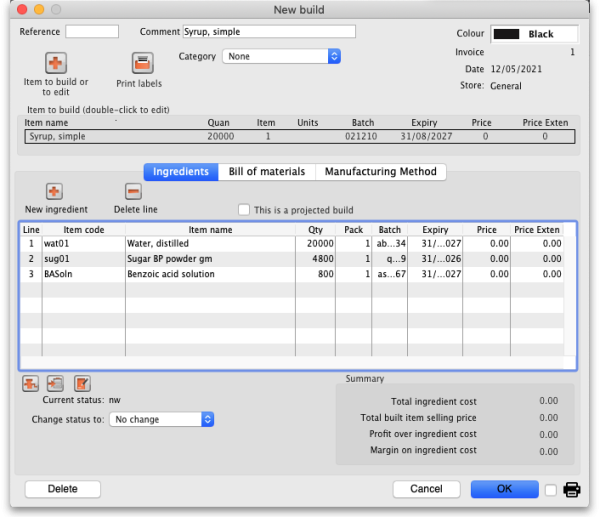
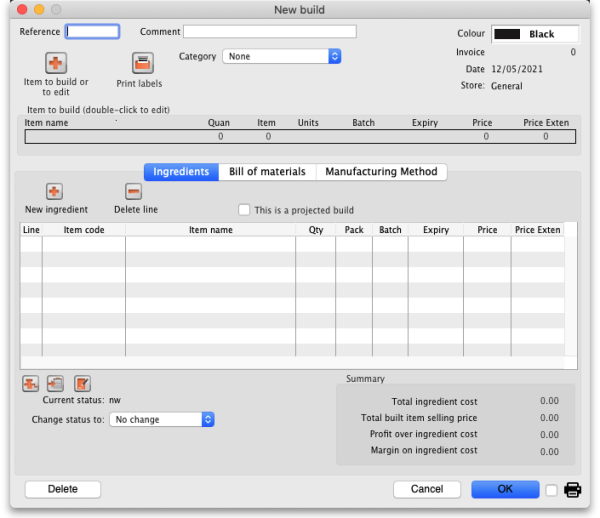
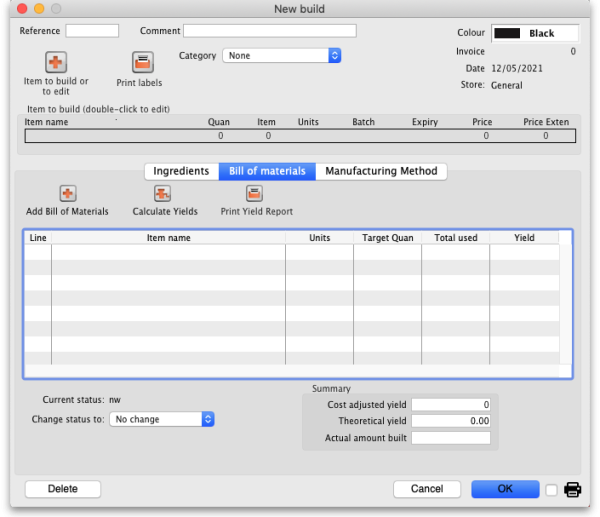
On choosing this menu item you are shown the build entry window:
If you have restricted access to builds, you will not be able to see cost prices or the profit summary window at the bottom.
The build window has two parts:
- The top part of the window records the details of the item to be built
- The lower part lists ingredients that are used in the manufacture of the product.
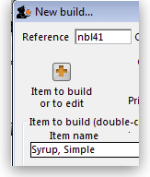
click the Item to build or to edit icon
and in the next window enter the name of the product you're manufacturing (Syrup in our example)
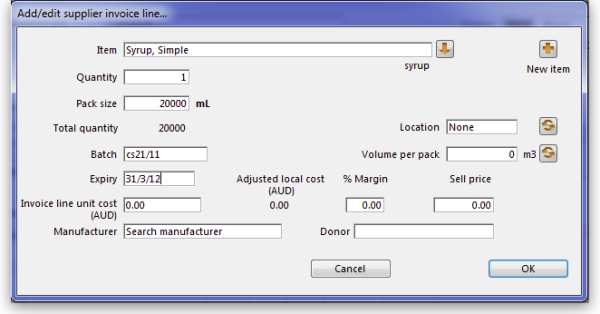
and this window is displayed where you should complete the appropriate fields:
Adding ingredients manually
Note that ingredients can be added automatically from the Bill of materials tab. If you regularly build the same item, we recommend that you enter a Bill of Materials for the item being built, and use the method outlined under the Using a Bill of Materials heading below.
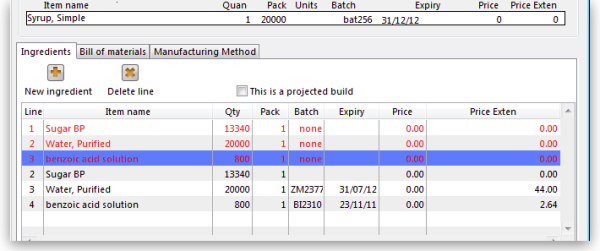
First, if you are entering a projected build (one that you expect to perform in the future), check the This is a projected build check box. If checked, all items added will be placeholder lines rather than actual stock. Doing this allows you to enter your manufacturing schedule in advance of ordering raw materials. The schedule will be taken into account when ordering to ensure that you will have enough materials in stock when the time comes to manufacture.
- To add a new ingredient, click the New ingredient button. You will be shown the standard window for issuing goods from stock:
- Enter ingredients just as you would for entering a customer invoice.
- Once you have finished entering ingredient lines, click OK to return to the main window.
- If you wish to edit a line, double-click it, and change the details.
- To delete a line, double-click it, set it's quantity to zero, then click the OK button.
Adding the item to be built
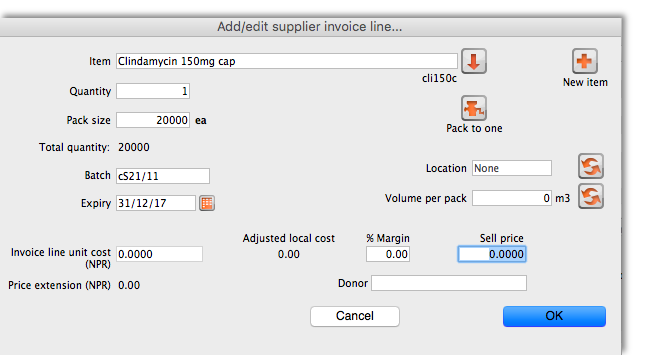
- To add the item to build, click Item to build or edit button. You will be shown the Add/edit supplier invoice line window below for receiving goods.
- The cost price for the item is automatically calculated for you. You may enter the margin or the selling price as you prefer.
- Once you have entered the item to build, click OK to return to the main window.
- If you wish to edit the item, simply double-click inside the “item to build” rectangle.
- At the bottom right of the window in Summary section is a summary of the cost, margin and selling prices for the build.
- Once you are satisfied with the details, click OK to enter the build into the system. You will be asked if you want to enter the details into stock. If you say yes , the newly created item will immediately be available for issuing to customers. If you click later then the stock will not be available until you open the build window at a later date and enter it into stock.
- Note that the ingredients used in a build are considered to have been “sold” for re-ordering purposes, and will be counted in your usage.
Finishing build entry
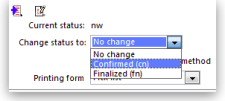
- Understanding build status codes enables you to know what stage each build is at. The codes are the same as for other transactions.
Each build transaction has a status code:
| Code | Meaning |
|---|---|
| nw | A new build is being entered, but has not been saved. |
| sg | “Suggested”. A build has been entered, but has not yet been confirmed. If stock lines have been entered, raw material stock is reduced so that it is no longer available for other invoices, but the new item is not yet entered into stock. You should leave builds with this status while manufactured items are “in process” , or if it is a projected build for a future date. |
| cn | “Confirmed.” The item to build has been entered into stock. |
| fn | “finalised.” The build can no longer be edited |
- When you click the OK button you may be asked if you want to enter the build into stock. You should only do so once the manufacturing and Quality Assurance (QA) process is complete. You will not be asked this question if there are any placeholder lines (those with a batch of “none”) entered as an ingredient. Such builds are presumed to be for projected manufacturing, and are kept with status sg automatically.
- To finalize builds, choose File > Finalize builds when the splash screen is showing.
Converting projected builds into an actual build
- Once your manufacturing of a projected build is about to take place, choose Item > Show builds … to locate the build you want to edit.
- For each line whose batch is equal to “none” (a placeholder line) you will have to double-click it and choose an actual stock line from the item issue window (either by entering the line number or double-clicking the line you wish to use). Once you have done this, the stock you have chosen will be reserved, and manufacturing can take place.
- mSupply® calculates the number of items that will result from your build, and clicking on the Print labels icon prints the correct number of labels.
Using a bill of materials
A bill of materials can be thought of as a “recipe” or “formula” for building an item. It records the ingredients, and the quantity of each required to make the finished product. You should create a bill of materials for an item before you come to this screen. This is done in an item's Item details window: see here for details. Screenshots in this section are using Simple Syrup as an example, and for this product a Bill of Materials has already been created.
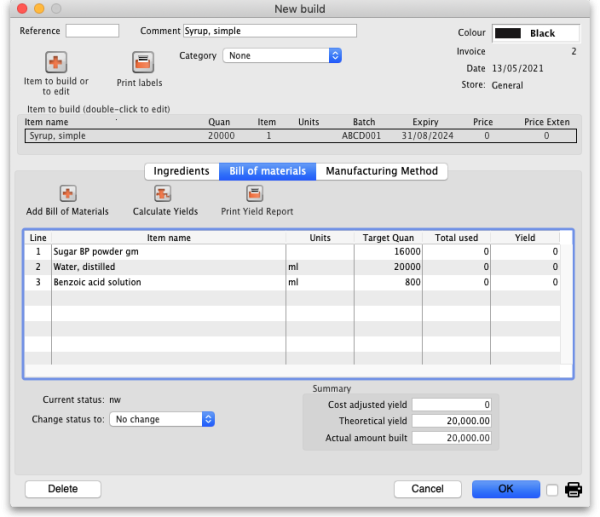
When you click the “Bill of materials” tab in the build window, this window appears:
First you need to choose the item to be manufactured:
in the next window you need to specify the quantity to be manufactured and other details:
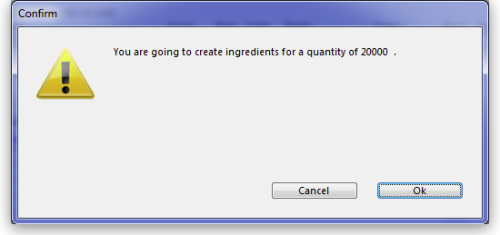
When you click OK, you are returned to the New Build window, and when you click the Add Bill of Materials Button, a window appears where you can confirm or cancel the quantity to be manufactured:
Assuming the quantity is correct, click OK, and you are returned to the New Build window, where the open tab is the Bill of materials tab. Click the Add Bill of Materials button, and the details on the Bill of Materials according to the formula previously entered for Simple Syrup is displayed:
Now click the Ingredients tab, where the ingredients are listed, but no stock is attached to any item - they are placeholder items (displayed in red). This is done as mSupply® cannot take into account all the factors that go into choosing an appropriate batch to use for each manufacturing run (The expiry, amount on hand, etc). click each line in turn to select the quantity and batch number of available stock lines for each ingredient. Note that there is a button displayed Re-distribute all. Clicking this button will take the “total quantity issued” figure and re-distribute it over the available batches, making it easy to move from using a placeholder line to issuing actual stock. The ingredient is repeated in black with appropriate details displayed. At this time (or later) you can also adjust the amount issued to reflect actual issued quantities and the actual batches of raw materials used, as opposed to the theoretical quantities that are initially entered.
If you are manufacturing the product immediately, the status of the build transaction should be changed to Confirmed on completion of the manufacturing process.
Print options
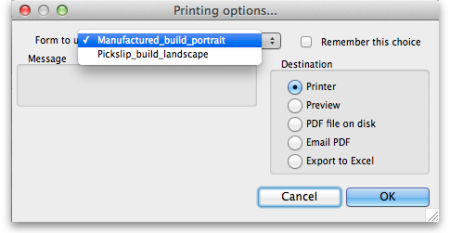
It's possible to print either a Pick list, detailing the ingredients and quantities, or a summary of the manufactured product. To achieve this, check the print icon in the bottom right hand corner of the window and click the OK button. The printing options window will appear and you can choose which document to print:
Calculate Yields button: This button (on the Bill of materials tab) compares the actual quantities issued and the actual final quantity manufactured with the theoretical amounts that should have been used and made. This allows you to monitor production efficiency. Use the Print yield report button to print the yield information if required.
| Previous: 4.06. Stock locations and location types | | Next: 4.08. Merging two items |
