This is an old revision of the document!
Logging in
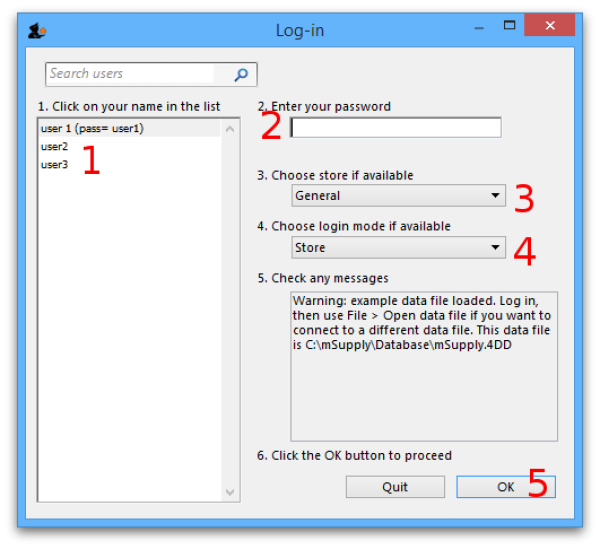
When mSupply starts you will be presented with the log-in window:
This is the window which appears when mSupply is started for the first time
- You should select user 1(pass=user1) from the list
- Enter the password “user1” (without the quotes). When different users with their own level of access have been set up, you will then log-in by selecting your user name and typing your own password.
- From the drop down list, select the store with which you are working. Most mSupply users will be operating with a single store, but for users operating with more than one store, the login screen allows you to select any of the stores to which you have access. If you have been working with one store and want to change to another one see foreign_keys. After selecting the desired store, all transactions will relate to that store until you return to the login screen and select a different store from the drop down menu.
- Supervisors and other Level 1 users will have an additional menu item, Supervisor - All stores . In this mode, all stores are accessible, and you would use this mode, for instance, when placing an order for supplies which will be distributed to a number of stores. Further information is available here: Virtual stores.
- If you have enabled the Hospital Info System (HIS) in the user login permission settings (see foreign_keys), and at least one license is allocated to HIS (see HIS preferences), then you will also see Hospital Info System in the list of stores. If you select this, the login mode automatically changes to HIS mode.
- Choose login mode …., if the store is not Hospital Info System, you have the option to select Store mode or Dispensary mode ; the default can be set in your Preferences
- Finally, click OK to login
Previous: Introduction Next: Tutorial
