This is an old revision of the document!
15.08. Barcode scanning with handheld computers
Added: Version 8.00
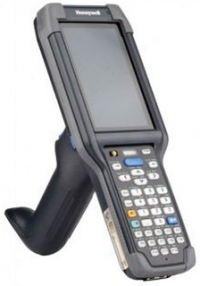
It is possible to use a handheld computer barcode scanner with mSupply. This gives you greater flexibility as you are not tethered to a device running mSupply. A handheld computer barcode scanner looks like this:
Currently mSupply is compatible with Honeywell handheld computer barcode scanners like the CK65 shown in the image above and the only function available on these scanners is goods receiving.
Requirements
- The scanner must be able to connect to the mSupply server used in the warehouse. This is usually achieved using a WiFi network. This WiFi must:
- be available everywhere you want to use the barcode scanner in the warehouse
- be able to connect the barcode scanner to the mSupply server.
- The scanner must be a Honeywell type compatible with mSupply. If in doubt, please check with The mSupply Foundation before purchasing.
Set up
1. Create users on mSupply
The first step is to create users in mSupply for all the users who are going to use the barcode scanners. Follow the instructions here to do that: 25.15. Managing users. The users don't need any particular permissions to use the barcode scanner, they just need to be active and able to login to mSupply.
2. Download the mSupply scanner app
Download the app from here: https://github.com/msupply-foundation/zapp/releases
3. Load the mSupply scanner app onto the scanner
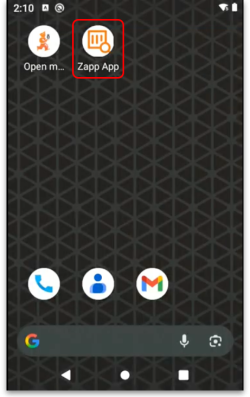
Load the mSupply scanner app (Zapp App) apk file onto the scanner device itself by following the manufacturer's instructions. Find the apk file on the device and tap on it to install it. When you have done that, you will see the Zapp App icon on the scanner's main screen:
4. Open the app
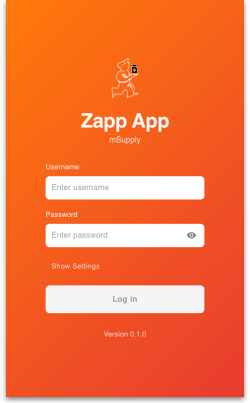
Tap on the Zapp App icon and the app will open at the login window:
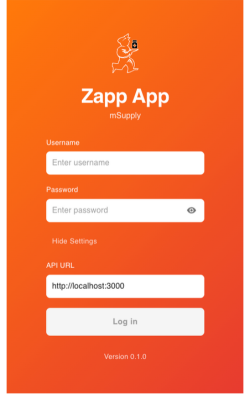
Tap on the Show settings text and the API URL field will be displayed:
Enter the URL of your mSupply alternative server in the field (see the 20.03. Cold Chain App Notifications page for details on how this is set up). You only have to do this step the first time you open the app or if you need to change the URL).
5. Login to the app
Enter your mSupply user name and password in the Username and Password fields. Then tap on the Login button to login to the app. Your credentials will be checked against those stored on the mSupply server found at the URL entered in step 4.
Initial setup is now complete.
Goods Receiving
1. Login
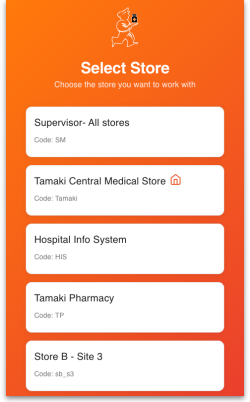
When using the app after initial set up set up has been completed, the first thing you must do is login to the app. Tap on the Zappo App icon on the scnner's main screen and enter your mSupply username and passowrd in the Username and Password fields. Tap on the Login button to login. If you are allowed to login to more than one store you will be shown a list of stores to select from:
Tap on the store you want to login to and you will be taken to the next step (the list of supplier invoices).
If you are only allowed to login to a single store thern this will automatically be selected for you and you will immediately be taken to the next step, the list of supplier invoices.
2. Select the supplier invoice
| Previous: 15.07. Barcode scanning and prescriptions | | Next: 16.01. General preferences |
