This is an old revision of the document!
Adding barcodes to items
Added: Version 4.01
Assigning barcodes to items is an important setup activity. It is this step that enables mSupply to recognise which item a particular barcode belongs to.
You can add barcodes to items before or during the goods receipt process. The process described here is used for both - to see how the goods receipt process fits in, see Barcode scanning and receiving goods.
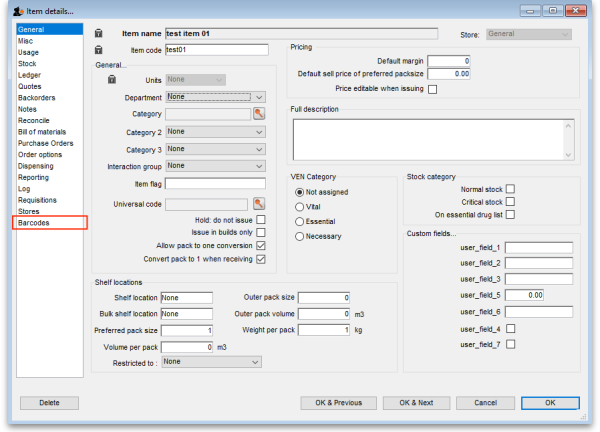
To start the process, view the details page of the item you want to add barcodes to (go to Item > Show items…, click on the OK button, double-click on the item you want in the list). Then click on the Barcodes tab on the left hand side of the details window:
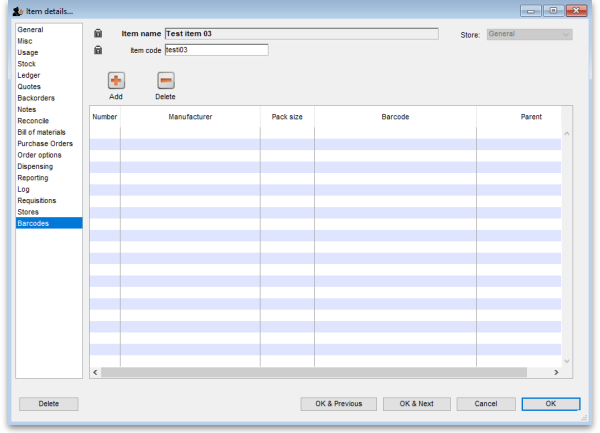
This will show you a list of the current barcodes assigned to the item:
This item currently has no barcodes assigned to it but this is the information each column displays:
- Number: a sequential number for each barcode, starting at 1
- Manufacturer: the name of the manufacturer of the medicine
- Pack size: the number of individual items (tablets, bottles etc.) in the pack this barcode represents
- Barcode: the human readable form of the barcode, just the identifier and the 14 digit GTIN. An identifer of 01 indicates a global GS1 barcode, an identifier of 04x identifies an internal mSupply barcode (assigned because the manufacturer didn't put one on the item's packaging
- Parent: the number (shown in the Number column) of the barcode that is the parent (i.e. has the next largest pack size) of this barcode
GS1 barcodes are unique to the combination of item, pack size and manufacturer.
Previous: Barcode scanning introduction and setup Next: Barcode scanning and receiving goods

