This is an old revision of the document!
19.01. Setting up to use Vaccine Module
There are a few configuration steps needed in mSupply desktop for setting up the Vaccine module to be used in mSupply mobile. This page is all about those steps.
To set up the vaccine module correctly, you need to:
- Enable the vaccine module for the mobile store,
- Set up vaccine vial monitor (VVM) statuses, and
- Set up temperature breach configurations.
Enable the vaccine module for the mobile store
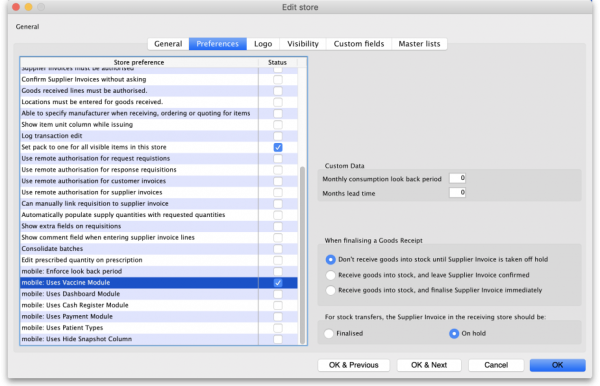
First of all, in mSupply desktop login to the store you want to turn on the vaccine module for. Then go to Special > Show Stores, double-click on the store you are logged into and then click on the Preferences tab. This is the window you will see:
Check the “mobile: Uses Vaccine module” checkbox in the Store preference list and click on the OK button to save the new setting.
Set up vaccine vial monitor (VVM) statuses
First of all, you need to have permission in the system to edit vaccine vial monitoring statuses.
See the 23.15. Managing users page for details on how to set user permissions. You need to turn on the View and edit vaccine vial monitor status permission on the Permissions (3) tab.
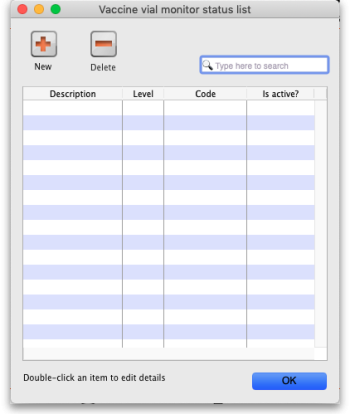
You can access the vaccine vial monitor (VVM) status configuration window by choosing Item > Vaccines > Show vaccine vial monitor status… from the menus. This will open the VVM status window:
The window will show you a list of all the current vaccine vial monitor statuses that have been setup. To edit one, simply double-click on it in the list. This will open the same window as when adding a new status (see below) but populated with the status's current settings, ready for you to edit them.
Adding a VVM status
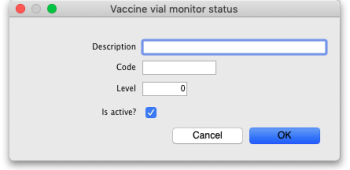
Click the New button. This window opens:
- Description: the name of the status and how it will be referred to throughout mSupply.
- Code: a short code used to refer to the status.
- Level: the numberical level the status belongs to.
- Is active?: checked by default. If this is checked then the status will be available for selecting in mSupply mobile.
Click on the OK button to save your changes or the Cancel button to cancel them.
Deleting a VVM status
You can only delete a status that you have just created. Once this list of VVM statuses has been closed, you cannot delete the status any more. If there is one that you wish to delete but can't then edit it and uncheck its Is active checkbox (as described above). That will effectively delete it because it will no longer be selectable in any mSupply mobile functionality (but it will mean the status is still available for historical records).
If the status you want to delete is newly created:
- Select the status you want to delete by clicking on it in the list
- Click on the Delete button
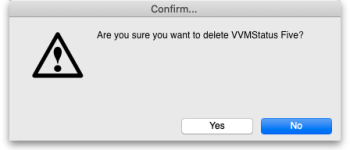
- The window below will appear asking you to confirm the deletion. Click Yes to confirm.
Set up temperature breach configurations
Temperature breaches occur when the temperature detected by a temperature sensor exceeds a certain value for a certain amount of time. This section describes how you define temperature breaches in mSupply.
First of all, you need to have permission in the system to configure temperature breaches.
See the 23.15. Managing users page for details on how to set user permissions. You need to turn on the View and edit temperature breach configuration permission on the Permissions (3) tab.
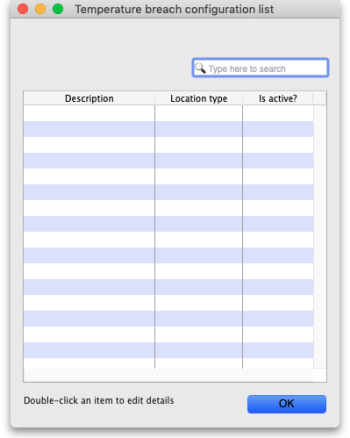
To see the current temperature breaches go to Item > Vaccines > Show temperature breach configuration…
This window will appear:
The window will show you a list of all the current temperature breaches that have been setup. To edit one, simply double-click on it in the list. This will open the same window as when adding a new temperature breach (see below) but populated with the breach's current settings, ready for you to edit them.
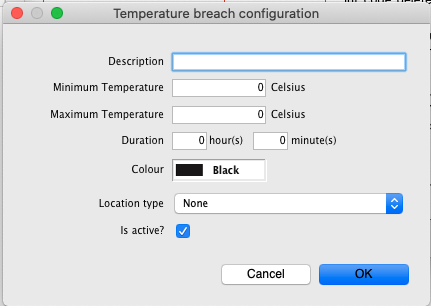
To create a new temperature breach configuration
- Click the New (+) button
- Input the required fields: Description, Minimum & maximum temperature, Duration. The maximum temperature must not be less than the minimum temperature.
- Choose a Colour - this will be set to Black by default.
- Choose Location type - this will be set to None by default. (To set up location types, refer to the Location type documentation
- The record will be set to Active by default.
To delete a temperature breach configuration
You can only delete a newly created record. To delete a record:
- Click the record you want to delete and click the Delete (-) button
- A confirmation dialog will appear asking if you want to delete the record. Click Yes to confirm.
| Previous: 19.11. mSupply sync API | | Next: 20.03. Cold Chain App Notifications |
