4.05. Programs
There are a number of ways of modelling programs in mSupply:
- completely separate sets of virtual stores for each program (see section 22.08. Virtual stores)
- tag stock with different program labels in the same store (see section 7.06. Custom stock fields)
- use the donor field as the program label (see section 7.07. Managing donors)
- and probably a few more ways you can think of!
You can also manage requisitions by program. This involves using some special settings for master lists. In this method, a program is an extension to a master list. A program includes a standard list of items as well as:
- Order Types: defined categories setting the maximum number of orders and quantity of stock to be ordered per period.
- Period Schedules: defined time intervals when orders can be placed; schedules and periods must be set up before creating programs.
- Regimen Data: a defined list of additional information that may need to be provided by a customer when making a program requisition.
Examples of items commonly managed by programs include Malaria, HIV and TB medicines and medical supplies.
4.05.01. Creating a program
A program is defined by additional settings made to a master list:
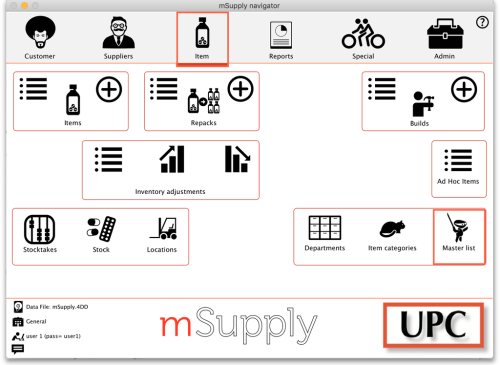
1. Navigate to the Item tab and click the Master List icon:
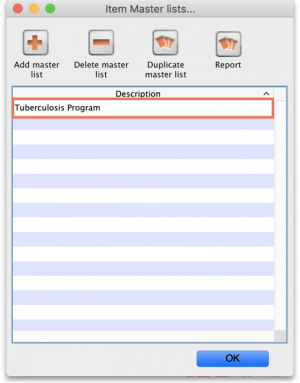
2. Double-click on a master list to open it (or create a new master list):
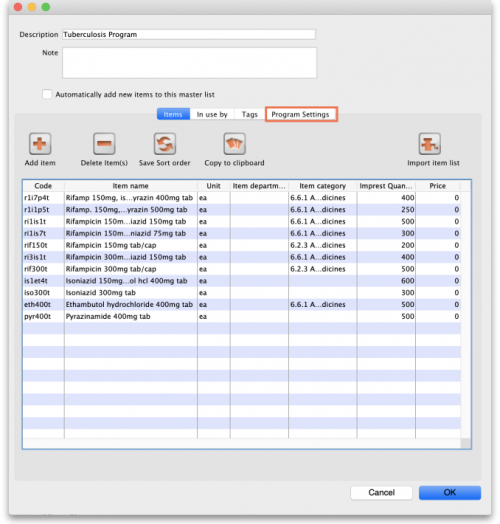
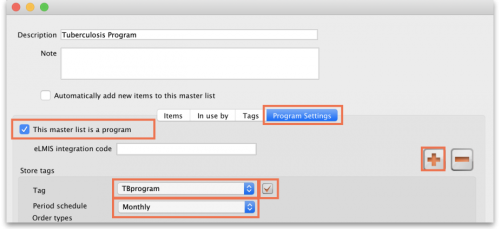
3. The Master list details window opens. Click on the Program Settings tab:
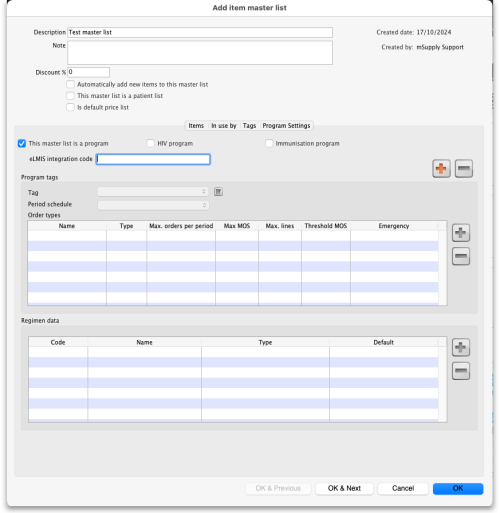
4. This shows all the settings available for a program:
5. Tick the This master list is a program checkbox to enable the program based features for this master list.
- The HIV program and Immunization program checkboxes now appear. Check the HIV program checkbox if this is to be an HIV program (means extra indicators will be enterable when the program is being used). Check the Immunization checkbox if this is to be used as an immunization program to drive the immunization card functionality in Open mSupply (see the Open mSupply Immunizations page for details).
- When you click on the OK button any new tags you have created will be saved and will appear in the name tags list (see the 5.05. Name tags page for details).
You can edit the tags entered here until you close this window. After that, you cannot edit existing ones, you can only delete them and add new ones.
Any customers or stores that have a name tag matching the tag you set here will be able to use this program and the schedule you have set for that tag.
You can define multiple tags for each program.
For each tag, you set up both a schedule and order types- so for one program, you can have different facilities on different schedules
6. Select the Period Schedule from the dropdown list (you must have set up the schedules and periods first):
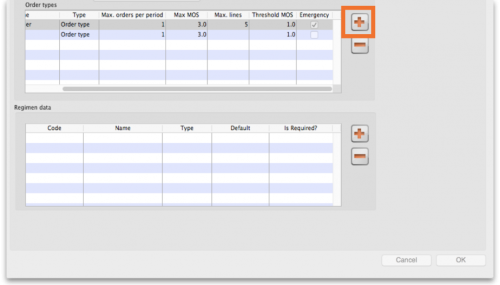
7. For each period schedule, one or more Order Types can be created - these set the parameters for program requisitions. Add order types by clicking the plus icon.
8. Give each order type a unique name and set its parameters:
- Emergency: check this box if the order type is for emergencies.
- Max orders per period: maximum number of orders that can be placed in a given period.
- Max MOS: maximum number of months' stock to be kept for each item. Used in the calculation of the suggested amount to order.
- Threshold MOS: items with a number of months' stock less than this value will appear in the order by default.
- Max lines: maximum number of items allowed to be ordered for an emergency order (default = 5); an alert will appear if the user tries to exceed the maximum number of items allowed.
4.05.02. Adding indicators to a program
Indicators are used for reporting on the performance of programs, e.g. the number of patients treated. Each indicator value provides data on a metric for a particular store and regimen over a given period. Indicator values are recorded while creating a program requisition.
Indicators can record any relevant programme data, including that data that may be used to select a regimen (defined as a treatment plan that specifies the dosage, the schedule, and the duration of treatment.) The country that funded this feature uses the term Regimen data for all these indicators, and so that term has been used in this window.
Indicators allow an organisation to analyse regimen performance and determine what further data should be collected, stored and processed.
To add indicators to a program:
- Open the program via the Master List (Click on the Master list icon on the Item tab of the Navigator).
- Click on the Program Settings tab.
- In the Regimen Data table add fields for the data that should be provided to the supplier with each program requisition
- Check the HIV program checkbox if you want a fixed set of HIV-related indicators to be entered for this program.
- If the customer must provide this information for supply to occur, tick the Is required? box to make this a mandatory requirement.
4.05.03 Connecting a program to a store
To allow a store to place program requisitions:
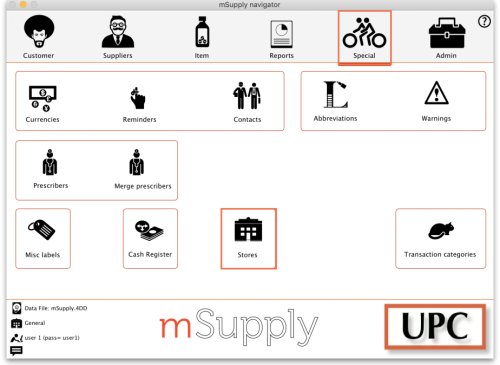
1. Navigate to the Special tab and click on the Stores icon:
2. Double click on the store.
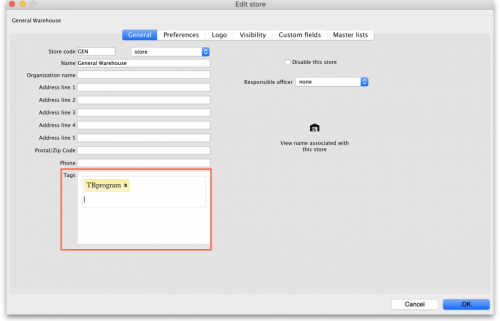
3. In the Tags field, type in the Store Tag you set for the program and schedule above then press Tab.
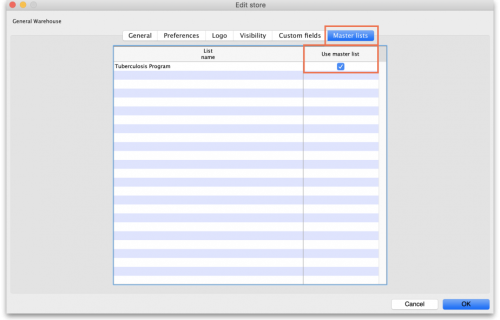
4. Click on the Master Lists tab, check the Use master list box next to the program master list to be used:
5. All done - the store is now connected to the program you have created so click on the OK button to save all the settings.
4.05.04. Creating a program requisition
Once a store has been connected to a program, it can then place program requisitions:
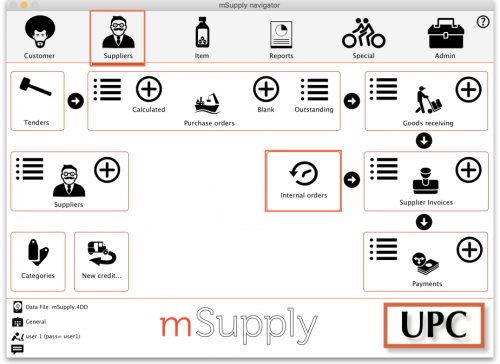
1. In the customer store, navigate to the Suppliers tab and click on the Internal Orders icon:
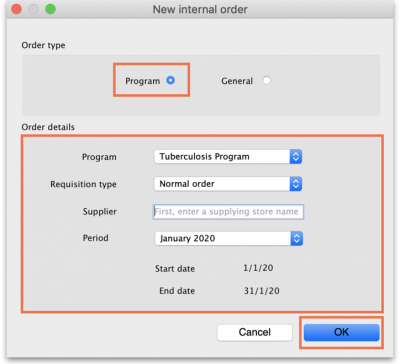
2. Click New Internal Order. When a store uses programs, they will have the option to create a Program order or General (regular) order:
Check the Program button to create a program requisition.
3. In the Order Details section, select the Program, Requisition Type and Period from the dropdown lists. Enter the Supplier by typing the first few letters, pressing Tab and selecting the supplier from the list of those starting with what you typed. These details need to be entered sequentially as the program uses them to determine the requisition type, which in turn determines the period.
The maximum number of program orders that can be requested within a given period is set when the program is created (Max. orders per period).
If you try to create another order for the same period which exceeds the maximum number, an error message will appear and you will not be able to proceed.
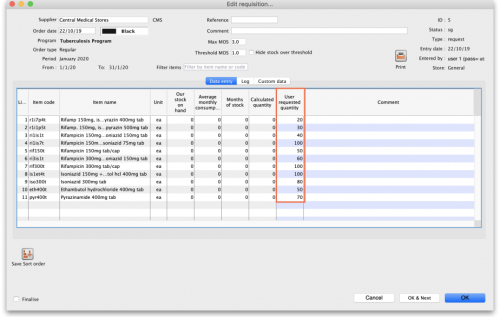
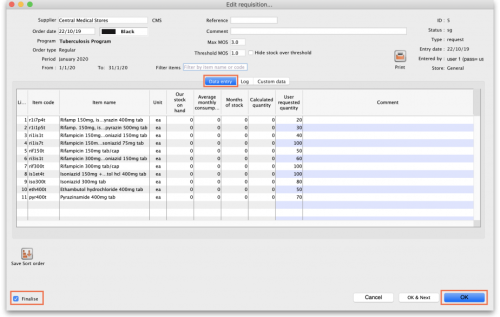
4. Click OK to generate an internal order with all the items listed in the program master list. The details relating to the program order are in the top left. Review the data in the table, then enter the quantity of stock to be ordered in the User requested quantity column:
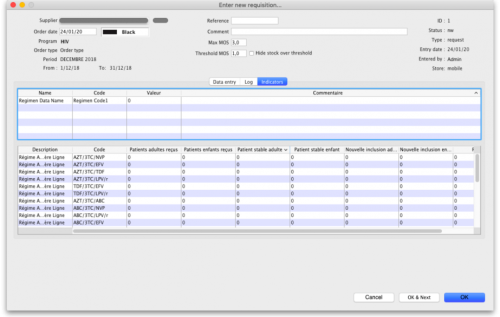
5. Click the Indicators tab to enter the additional data defined for the program:
This data will be sent to the supplier with the requisition when the requisition is finalised.
6. To send the program requisition to the supplier, return to the Data Entry tab, check the Finalise box and click OK.
4.05.05. Creating a program stocktake
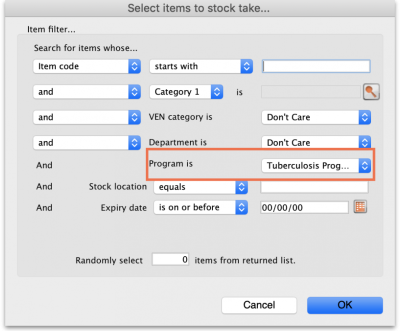
Creating a stocktake with items from a particular program is just the same as creating a normal stocktake. The only difference is that you select the program in the Master list (or Program) filter:
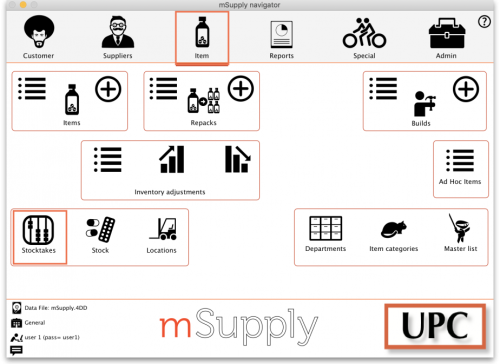
1. Navigate to the Item tab and click the Stocktakes icon:
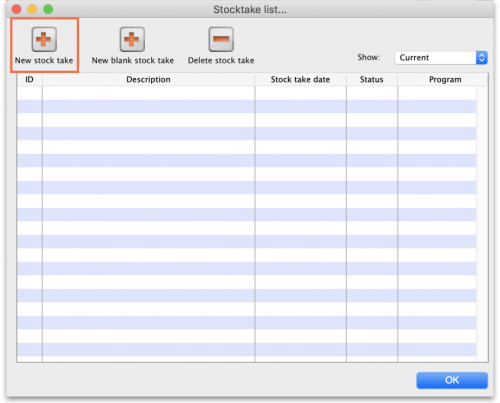
2. The list of stocktakes window opens. Click the New Stocktake icon:
3. Select the program from the Program is (or Master list is) dropdown menu and click the OK button to pre-populate your stocktake with items from the program:
Note: To further refine the selection of stock appearing in the stocktake you can also select other filter items at the same time.
For detailed information on how to complete the stocktake, refer to the 4.17. Stocktakes section.
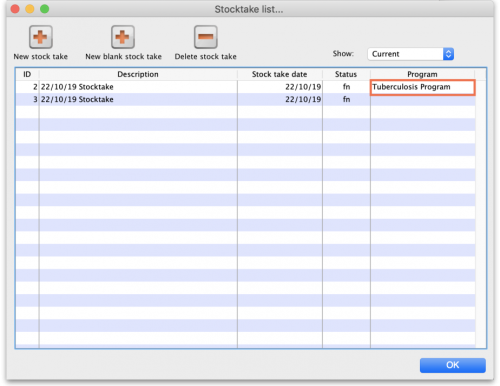
Tip: In your stocktakes list, you can easily identify program stocktakes by referring to the Program column:
| Previous: 4.04. Item master lists | | Next: 4.06. Stock locations and location types |
