19.04. mSupply customer web interface: guide for customers
The first section of this page covers the use of the interface itself by the customer. There is a small Back at the supplying store... section at the end which describes what happens in mSupply in response to the orders sent by the customer.
Logging in
You will be given an website address for the customer interface. e.g. http://example.com:8080/customer/. Go to that address using an internet browser running on a smartphone, laptop, tablet or desktop computer etc.
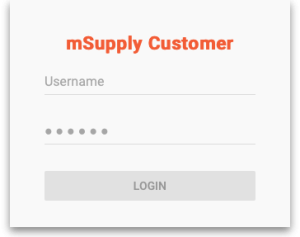
When it has loaded (the time this takes will depend on the speed of your internet connection), you will be shown the login page:
Enter your username and password and click Login
The navigator
You are now shown the mSupply customer navigator screen:
Here we are logged in as user “afms” who works for the customer “Ames Free Medical Clinic”.
The “Ames Free Medical Clinic” is set to use the store “General Warehouse” as their supplying store.
Click on:
- Show Orders to view a list of orders that have been created but not yet completed.
- Create Order to create a new order for stock from the supplying store.
- Search Items to search a list of Items available in the supplying store.
- Show Invoices to search for and view a list of invoices from the supplying store.
Show orders
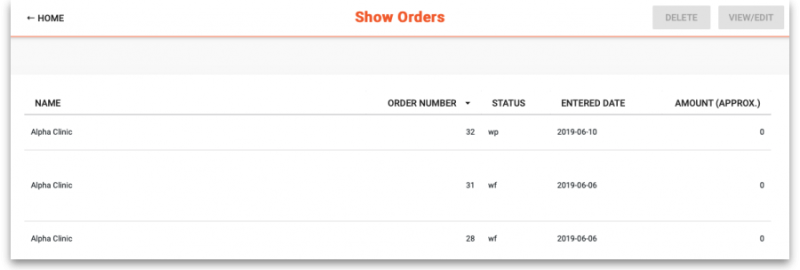
Select Show Orders to display a list of orders that have been created.
To view or edit an existing order, click on the order in the table to highlight it, then click on the View/Edit button (top right)
To delete an existing order, click on the order in the table to highlight it, then click on the Delete button (top right)
Status wp indicates web interface orders that have been created and are still in progress (not yet finalised). These can be edited/deleted.
Status wf indicates web interface orders that have been finalised by the customer. These can be viewed, but not edited or deleted.
Click on HOME (top left) to return to the main options screen.
Create orders
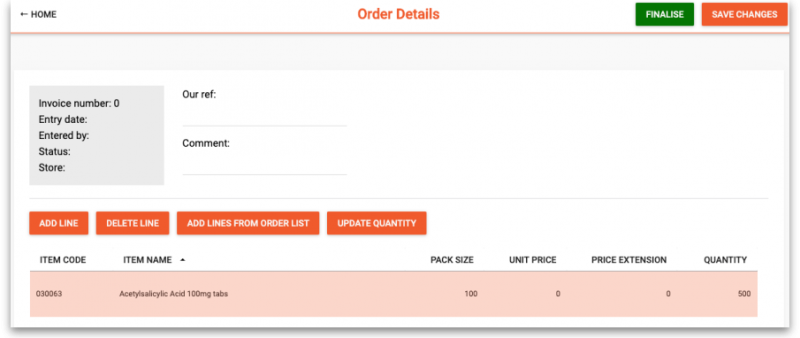
Click on Create Order to display the screen for entering an order:
To add an item to the order, click the Add line button.
In the pop-up window clicking the Item name field will open a drop down list to select from
 Enter the quantity and click Add to order to proceed
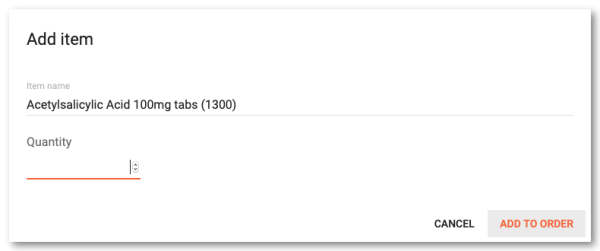
Repeat this to add further items to your order.
Information can be entered in the fields Our ref and Comment, but these are optional.
If you wish to continue working on the order later, click the Save changes button.
When you have completed the order, click on the Finalise button. This will submit the order to the supplying store in mSupply and no further changes will be possible. It will now be visible under the Show Orders option until the supplying store processes it. It is also visible and available for processing in mSupply at the supplying store.
A note for the mSupply user processing the order in the warehouse:
- The customer's order will appear in mSupply Desktop as a Customer Invoice with status of
wf(web finalised). This means that while the customer can no longer edit the order, the supplying store's desktop user can. - The customer invoice displays the customer's order with placeholder lines by default. This gives the mSupply Desktop user control to choose the stock for the customer's order. To apply stock to the placeholder lines, refer to Redistribute placeholder lines.
- When stock has been applied to the various lines, the invoice is processed in the normal way (refer Issuing goods to a customer (customer invoices)) to create the picking list and dispatch note as required before the goods are dispatched to the customer.
Using an order list
If you have been assigned an Order List of the items you are allowed to order, this can be used when you are creating an order. Clicking the Add lines from Order list button will display the items on the list(s) defined for the customer logged in.
For setting up a default order list, see Names: Using, adding and editing
The list will be displayed with the items in the same order as was specified when setting up the list in mSupply.
Search items
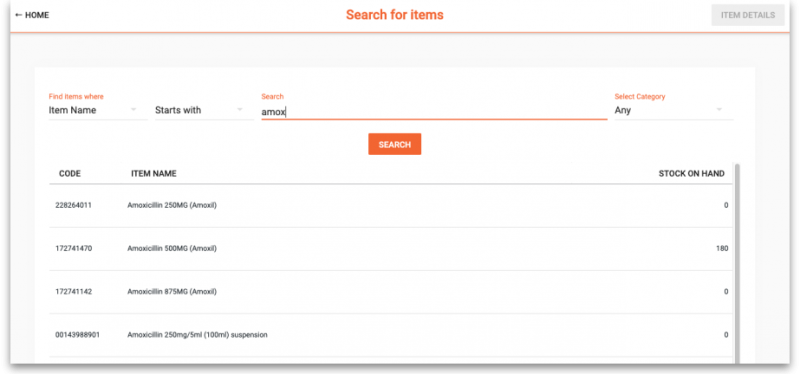
Click Search Items to make a search of items available in the supplying store. It will display this screen:
Choose your search options using the selectors and enter something to search for in the textbox (or leave it empty to list all the items). Click on Search and the search will be made. When the search is complete the list of items matching your search criteria will be displayed:
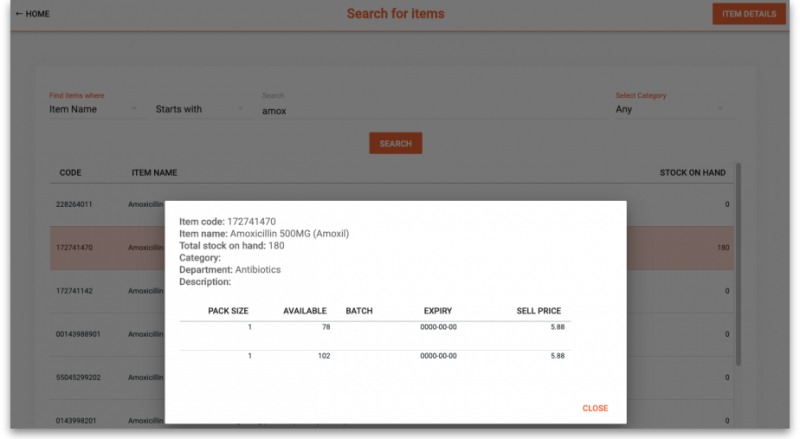
Click the row of a specific item and click on Item details to see the details:
Note: The Stock on Hand figure is the supplying store's stock on hand, not the Customer's stock on Hand.
Show invoices
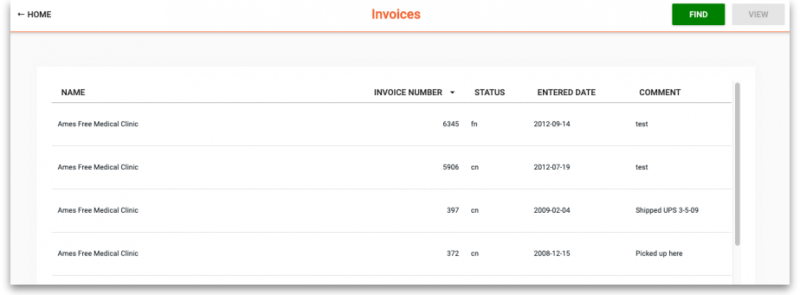
Select Show Invoices to display a list of invoices that have been created in the supplying store for you:
Columns
Name
The Name of the customer. If this isn't the customer's name, then there is a problem - contact support@msupply.org.nz
Invoice Number
The Invoice Number as recorded in the supplying store
Status
The Status indicates at what stage each invoice is in processing:
sg(suggested): The supplier has started to process it, but is not finished.cn(confirmed): The supplier has completed processing the order but has likely not yet dispatched it.fn(finalized): The supplier has likely dispatched the order and the stock should be on its way to you.
Depending on the configuration of mSupply, it is possible to dispatch an order without actually finalizing it. So you may find yourself receiving an order that hasn't actually been finalized.
Entered Date
Date that the invoice was first entered in the supplying store.
Comment
Comment added by the supplying store
Find invoices
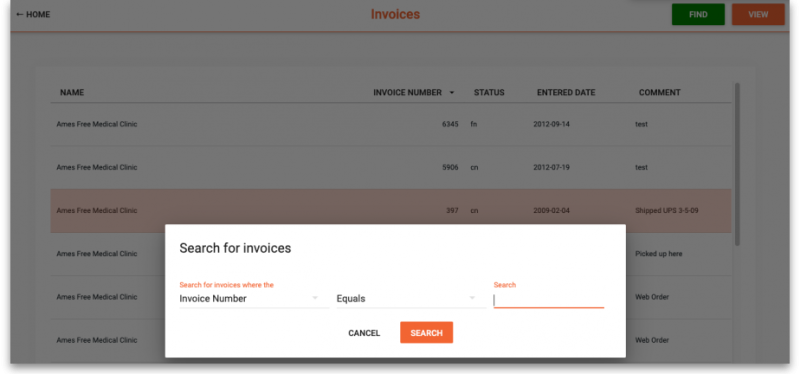
To find a particular invoice:
- Click on the FIND button at the top right
- Fill in the details in the search options provided
- Click on the SEARCH button
View invoice details
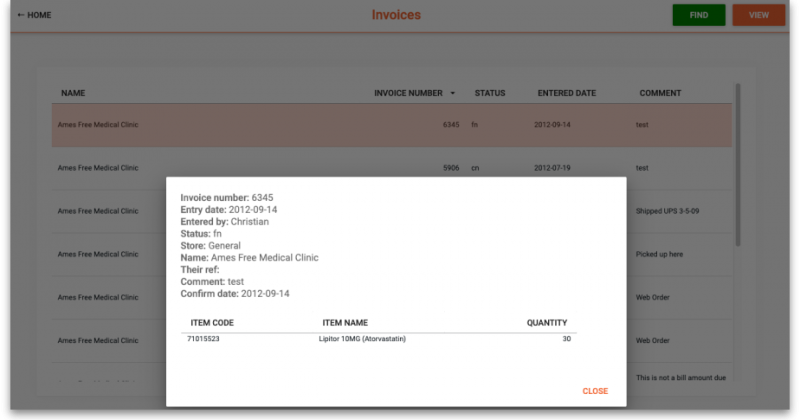
To view details of an invoice:
- Click the row of a specific invoice
- Click on the VIEW button at the top right
| Previous: 19.03. mSupply customer web interface: setting up customers | | Next: 19.05. Web Dashboard |
