Table of Contents
16.11. Custom fields
In a synced system, Custom fields must be added on the central server and will then sync to other sites where they will apply to all stores on each site.
Only edit custom fields if you are confident with the information in this page and fully understand the content. Otherwise you could cause some things to stop working in your copy of mSupply! This is true for all settings, but please be especially careful with custom fields.
You can create custom fields that appear in different areas in mSupply. These allow you to record additional information and customise mSupply for your needs.
You can create custom fields in the following areas:
- Customer invoice
- Supplier invoice
- Store
- Item
- Item category
- Quote line
- Name (of customers, suppliers, prescribers etc.)
- User
- Purchase orders
- Transaction categories
- Item Category Level 1
- Transaction lines
Creating custom fields
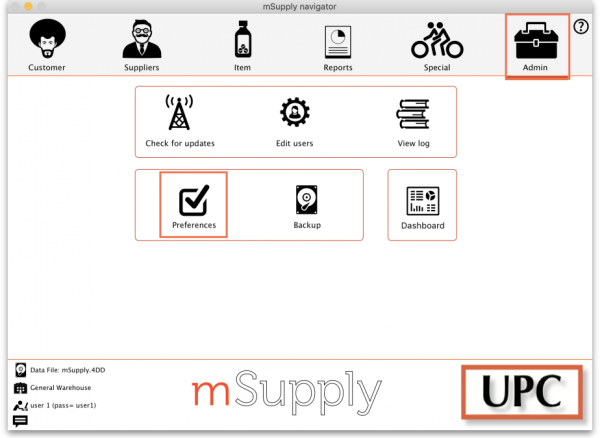
1. Navigate to the Admin tab and click the Preferences button.
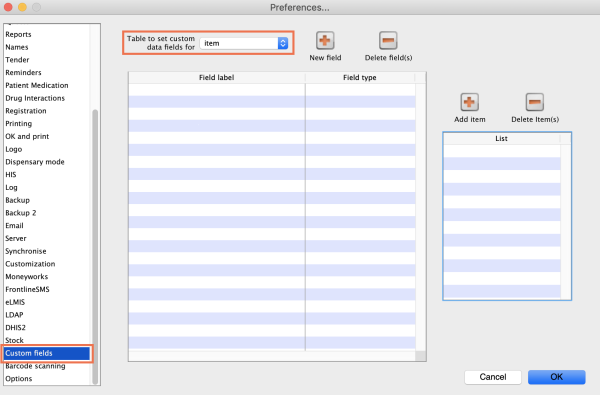
2. Select Custom Fields from the list on the left.
3. Select the area requiring custom fields from the Table to set custom data fields for dropdown list.
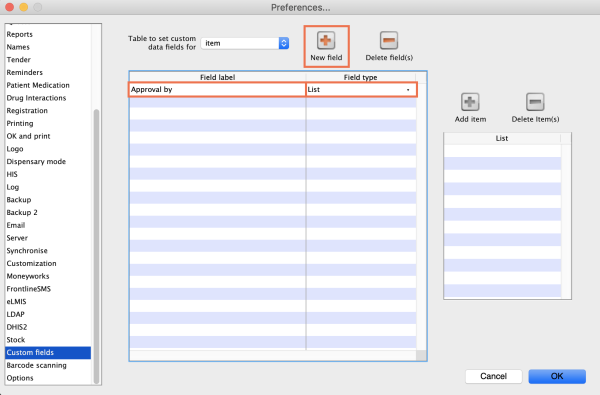
4. Click the New Field button.
5. Click on the new line in the Field Label column to change the name of the custom field.
6. Click the small arrow in the Field Type column and choose from the drop-down list. The options for your new field are:
- Text: User can type free text.
- Number: User can only type a number.
- Boolean: User can tick a checkbox.
- Date: User can only enter a date.
- List: User can only select an option from a list.
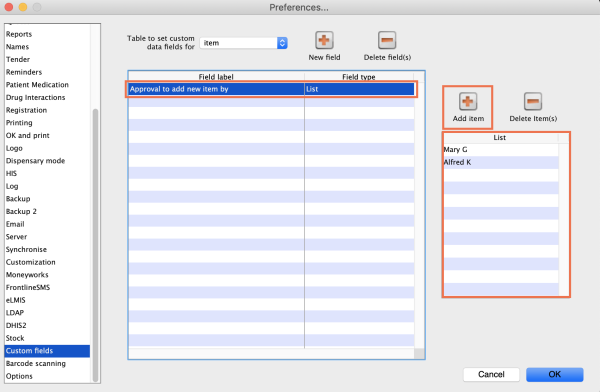
6. If you choose a List field type, highlight the line and click Add Item to enter the options that will appear in the list. To delete an option, select it in the list and click Delete Item(s).
7. Click OK.
If you want to delete a custom field, highlight the line and click Delete field(s).
Using custom fields
This section shows how custom fields appear after they are created.
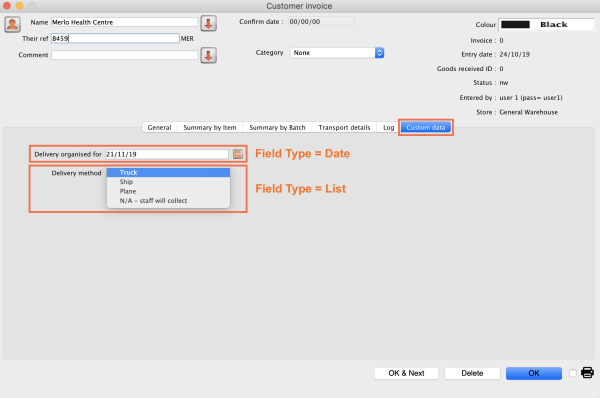
Customer invoices
When creating a customer invoice:
Click the Custom Data tab.
In this example, we added two custom fields: a Date and a List field type.
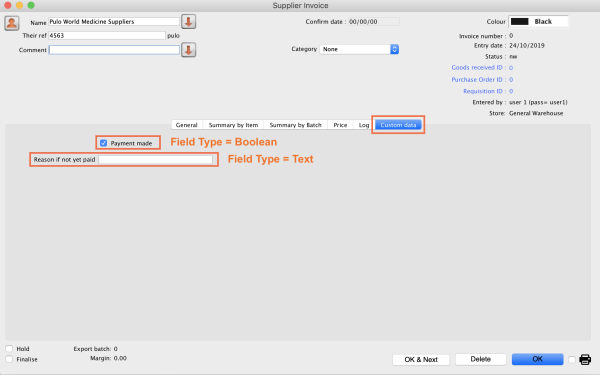
Supplier invoices
When creating a supplier invoice:
Click the Custom Data tab.
In this example, we added two custom fields: a Boolean and a Text field type.
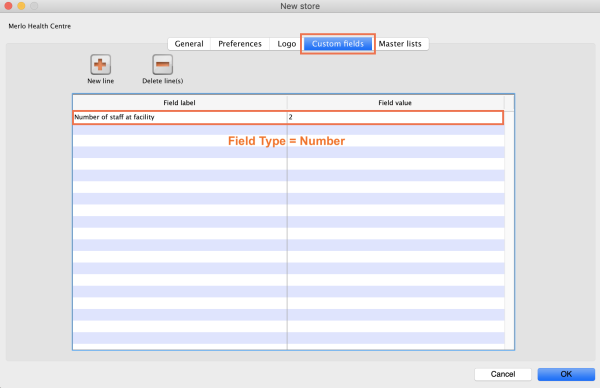
Stores
When creating a store:
Click the Custom Fields tab.
In this example, we added one custom field: a Number field type.
| Previous: 16.10. Options (standard reasons) | | Next: 17. Data Import and Export |
