This is an old revision of the document!
16.20. Exporting to the dashboard
Function added: mSupply version 4.04.00
This information is for sending data from your mSupply database to the mSupply dashboard database. The dashboard has a separate Postgres database so that its use does not slow down or interfere with your use of mSupply.
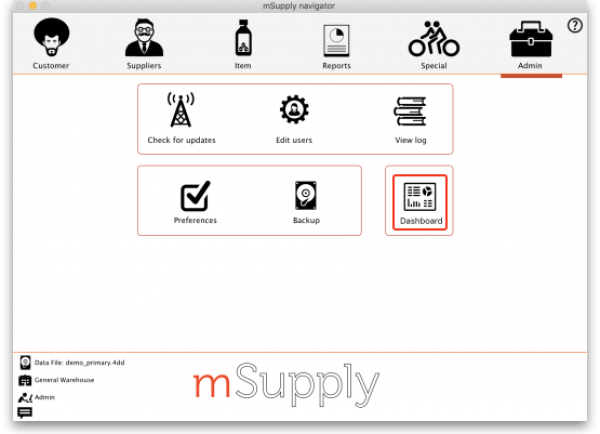
To access Dashboard export settings (administrators only), click on the Admin tab of the Navigator and click on the Dashboard icon:
Click on the Export Settings tab and you will see this window:
Postgres server section
In here you enter the details of the dashboard database server:
- Server: the URL or IP address of the dashboard database server
- Port: the port on the server that the database is listening for connections
- User: The user name that mSupply will use to access the Postgres database
- Password: The password mSupply will use to access the Postgres database
- Database Name: The name of the database that mSupply is to access
To make sure the details are correct and your copy of mSupply has access to the dashboard database, click on the Test connection button. A message will tell you whether the connection is successful or not.
Once the dashboard is enabled and the correct Postgres settings entered, there will be an automatic (scheduled) export every 24 hours. The next scheduled export is shown in the Next scheduled export field.
Export settings section
This section enables you to select exactly what data is exported to the dashboard.
The table contains a list of all the database tables in mSupply that can be exported to the dashboard. Simply check the checkbox in the Export column to set that table to be exported to the dashboard. The All/None checkbox is a quick way of toggling between all tables selected and non tables selected.
The time and date of the next scheduled export of the selected tables to the dashboard database is shown in the Next scheduled export field.
The Default button will select a default set of tables to be exported to the dashboard database. Useful if you want to undo any changes made and reset the export back to default settings.
The Export button gives you a way of exporting the data immediately, without waiting for the next scheduled export. Useful if you want the dashboard ot be updated immediately. When you click on it you must enter your authorisaiton code before the export will be carried out.
By default, transaction and requisition data is only exported incrementally — that is, only transactions and requisitions that are new or have been changed since the last export are exported, which saves a substantial amount of time in the export process. All other tables are re-exported from scratch each time.
In order to force a full export of transactions and/or requisitions, check the Force full export checkbox before a manual export, or leave it checked and exit (click the OK button) to cause a full export on the next scheduled export. The full export will only happen once — the option will be automatically turned off for subsequent exports.
Click on the OK button to save your changes and the Cancel button to cancel any changes you have made.
| Previous: 17.21. Exporting assets | | Next: 18. Tenders |

