This is an old revision of the document!
17.02. Importing stock
The Import stock function allows you to import stock into a store after the items have been created (manually or by using the item import function).
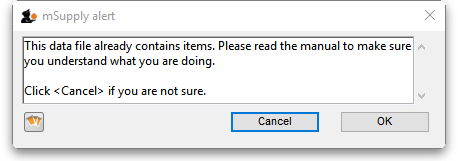
Choose File > Import > Import stock from the menus. You will be shown a warning:
This is telling you to take care! The stock you are importing will be imported on top of the stock you already have in the store you are currently logged into. If you are not sure what you are doing, stop and make sure!
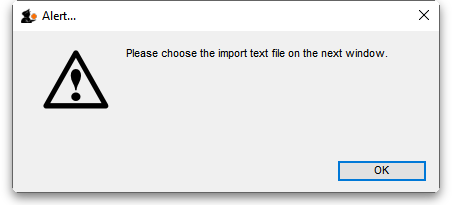
After clicking the OK button you will be told the next step is to select the import file:
Click the OK button on this window and an operating system window will open for you to select the import file. Find the file and double-click on it or click on it and click the Open button.
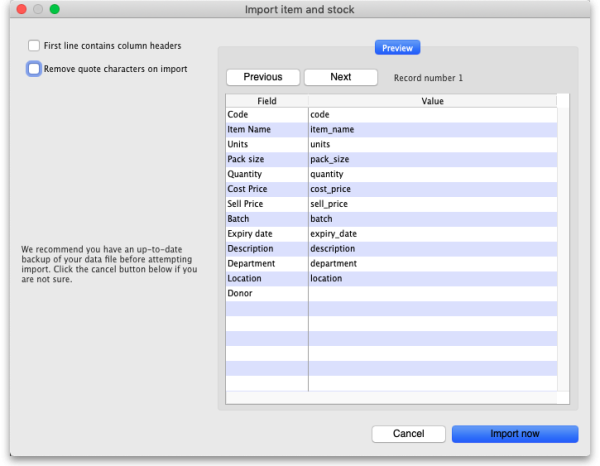
This window will open:
- First line contains column headers checkbox: Check this by clicking on it if the first line of your file contains the column headers. If this checkbox is checked, mSupply will ignore the first row of the import file and only import from the second row onwards.
- Remove quote characters on import checkbox: Check this if you want mSupply to remove quote (
“) characters from the various fields as it does the import. This is often needed if your import file has come from Excel or another spreadsheet application. You can check if there are unwanted quote characters in the fields using the preview Next and Previous buttons (see below). - Next and Previous buttons: Use these to move through the rows in the import file. mSupply will show you the information is is going to import from each field in the import file. You will be shown a warning if you try to view lines before the start or after the end of the file.
If you spot any problems, click on the Cancel button, fix them and try again. If all is well, click on the Import button and mSupply will carry out the import. A progress bar will show you how far through the whole process mSupply is. When it gets to the end you will be shown a message telling you how many lines were imported successfully and how many were skipped (because the item could not be identified - because the item code was missing or did not match an item in your datafile).
Import file format
The import file must be a tab delimited text file. The first row can contain the column titles but all other rows in the file should contain data to be imported. These are the fields you should have (and the order they must be in) in each row of the file:
| Column | Field | Description |
|---|---|---|
| 1 (A) | Item code | Mandatory, Text, up to 18 characters. mSupply uses this to recognise which item this row of stock belongs to. If this code is missing or does not belong to an item already in your datafile, this line of the import file will be skipped. |
| 2 (B) | Item name | Optional, ignored during the import. Text, up to 80 characters. The name of the item, here for reference so you can easily tell which item each row refers to. |
| 3 (C) | Units | Optional, ignored during the import. Text up to 60 characters, for your reference only. The unit the item is to be measured in e.g. Tablet, Each, ml, g, bottle, vial, Ampoule. |
| 4 (D) | Pack size | Mandatory, Integer. The number of units in a single pack for this stock line. |
| 5 (E) | Quantity | Mandatory, Integer. The number of packs (containing the number of units in column 4) in this stock line. Equal to the total quantity if the Pack size is 1. |
| 6 (F) | Cost price | Optional, Real number. The price you pay for one pack. |
| 7 (G) | Sell price | Optional, Real number. The price the customers of this store pay for one pack. Set this to the same as the cost price or leave it empty if you do not actually sell the stock that you issue. |
| 8 (H) | Batch | Optional, Text, Up to 20 characters. The batch of this stock line. |
| 9 (I) | Expiry | Optional, Text, in short format (dd/mm/yy or mm/dd/yy, depending on the format set in your computer's operating system). The date this stock line will expire. |
| 10 (J) | Description | Optional. Text, Up to 32,000 characters. The full description of the item. Be careful not to have any carriage return characters in the text though, or the import file will not be valid! |
| 11 (K) | Item Department | Optional, Text, up to 30 characters. If you import a department name that doesn't exist, the department will be created. |
| 12 (L) | Shelf Location | Optional, Text, Up to 60 characters. The code for the shelf location of this stock line. |
| 13 (M) | Donor | Optional, Text, Up to 60 characters. The name of the donor of this stock line. If the donor doesn't exist, it will be created. |
Here is a blank spreadsheet you can use with the right columns: msupply_stock_import.xlsx
Note: the first row of data in red is an example row - delete it before you import it!
In order to create a text file for importing purposes, first you need to enter your stock details into a spreadsheet (e.g. Microsoft Excel). It is useful for the first row to be populated by column descriptions. If you do this, remember to tick the relevant tick-box during the import process.
More than one batch of an item
It is possible to enter in various batches of an item separately. For example, if your import file contains two batches of “ace250t” on separate rows. mSupply will first fill in the item description and code and then enter in the stock for the first batch the item. For the next line of data, mSupply carries out a search for the code, and adds another batch as the same item already exists, and then updates the total quantity.
It is not necessary to group the same batches together, but making sure that various batches of the same item have the same identical code is important, otherwise extra items will be created. The actual full name of the product is taken from the first batch the program encounters; subsequent batches that have the same code as an item that already exists in the data file will use the item name of the exisiting item. (You can even leave the item name blank for subsequent lines if you want to).
Make sure every line has an item code assigned: any lines without an item code will be skipped when importing.
Once you have completed the spreadsheet list:
- Save the file as a tab-delimited text file.
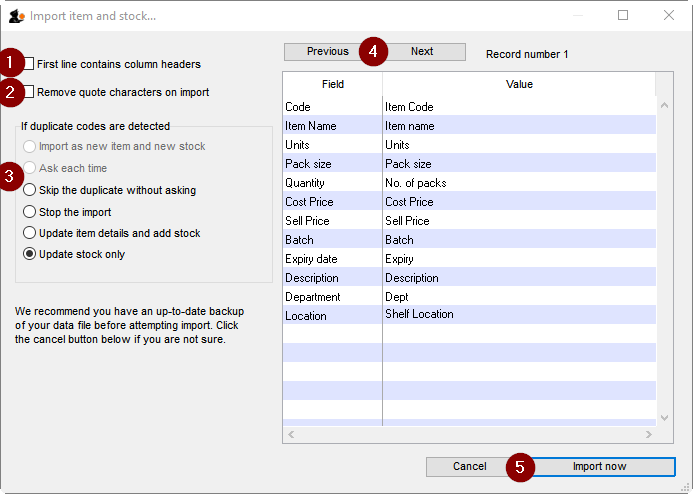
- Open mSupply and choose File > Import items & stock.
- The following alert windows pop up, click OK to proceed on each one.
- Tick this box if the first line of the import file contains column headers. This is normally the case
- Tick this box to remove quote characters on import. Quote characters will be added by Excel or other equivalents if there is a space character in the field, which is often the case for the Item name field. Quote characters are not normally part of a valid item description. It is generally safer to tick this tick-box.
- Tick the radio-button accordingly. If you are loading stock into the store for the first time, and you have not already defined / loaded the items with Importing Items (refer tip box below), then you should tick the Update item details and add stock radio button. If you are just loading stock in to a store and you don't want any new items created, the default option of Update stock only is appropriate.
- Clicking on the Previous and Next buttons allows you to step through the import file so as to review what will be imported, and particularly that the fields have matched up correctly.
- Click Import now to proceed, or Cancel if you have cold feet…
mSupply allows the Import Items and Stock function to both add new stock to the store, and add new items to the whole system. Particularly in multi-store environments, it is good practice to separate these two processes.
- Importing stock into a store, which may be done relatively frequently - every time a new store is added to the system.
- Creating new items, which should be done rarely and with care, and not accidentally while importing stock!
It is therefore important which radio button is selected in the above dialogue box.
mSupply does a quick scan of the import file, and may come up with the following alert:
This is not necessarily a problem. In fact, you will always get this message if the import file was created by MS Excel and you haven't manually edited out the <CR><LF> at the end of the last line of data! If you have edited out the last <CR><LF> (recommended), then you likely have a problem with your import file which needs to be investigated. Unfortunately, you are committed to doing the import at this point. That's why you are testing this on a dummy version of your data file, right? 
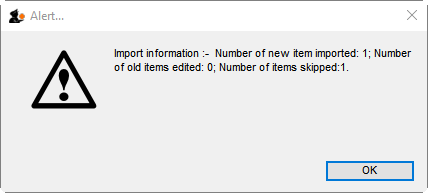
The import process will show a progress bar and then the following message once the import is complete:
This message needs interpreting:
- Number of new items imported: This should only be >0 if you selected the Update item details and add stock radio button
- Number of old items edited: This should only be >0 if you selected the Update item details and add stock radio button
- Number of items skipped: This should be =1 if you did not edit out the last <CR><LF> in the import file. If it is >1, then some lines of the import file have a blank name or code, which is likely a problem and needs to be investigated.
If there are non-printable characters before or after the item name they will be removed. Any non-printable characters in the name will be replaced with an underscore (_).
| Previous: 17.01. Importing items | | Next: 17.03. Importing names |
