This is an old revision of the document!
17.02. Setting up mSupply mobile
Note - we will complete these steps for you. The following instructions are for your information only.
Requirements
- A server running mSupply with a web server license registered
- Sync server has a static IP and any network permissions required configured
- A mobile tablet fitting the recommended specifications here
Adding a store
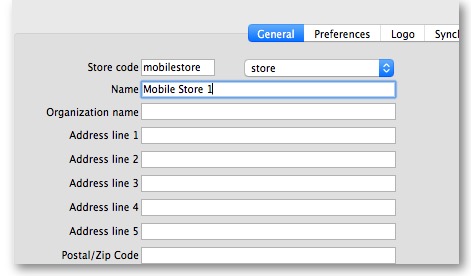
On mSupply desktop go to Special > Stores > New Store
Enter the Store Code and Store Name
Click on the Master List tab and select a Master List
Click OK
Click OK again
User Access
Next you need to make the current user have access to the store you have just set up.
Go to Admin > Edit Users
Select the user and go to Login Rights.
Select the new Store
Logging in to the Store
Now, you need to log in to the new Store
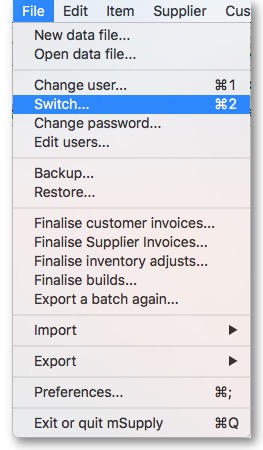
Go to File > Switch (or ‘cmd 2’ (apple) or ‘ctrl 2’ (windows))
Log in
Setting up a Sync Site
On the Synchronise tab on the left-hand side and click on the unlock button and enter the password
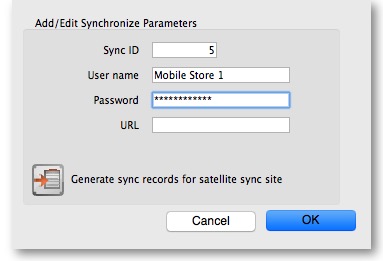
Add new Sync Site
Enter ID, Username and Password and click OK
Note - Keep track of these details, if they are lost you'll have to resynchronise from scratch! Sussol will typically have them securely stored if Sussol has done the sync setup.
Log in to the Store
Go to Special > Stores
Double-click the Store
Click the unlock button and enter password
Set Synchronisation type to active store
Select store (as local)
Click OK
Click the unlock button and enter password again
Set Sync type to Collector and sync type to Active/Collector
Click OK
Click OK again
Start the web server
Initialising mSupply Mobile on Device
After installing the app, you must do an initialisation of the data for the store the tablet is going to be used in. All above steps must be complete for this to work. The first screen upon opening the app looks as follows:
 You must enter:
- The correct URL for your mSupply server, usually using SSL/HTTPS protocol for security.
- Sync site name as defined above in this guide.
- Password for the sync site name
 Once you have entered the information, click “Connect” to start sync:
 Initialisation can take between 1 and 15 minutes, depending on the number of records on the server related to the site being synced. Once the server has found all the records to sync, mSupply Mobile will start pulling them adaptively between 20 and 500 records at a time depending on the connection speed. If connection is lost or you closed the app, you can resume sync where it stopped by entering the exact same details (will go back to square one if you get it wrong).
 Once complete, you will be taken to the login screen. For guidance beyond here see the mobile usage guide.
Note that the login details here are for the mSupply user that can login into the synchronised store, not the store details that were entered for sync above.

Limiting Initial Sync Record Count
If the amount of records to sync are greater than around 50,000 it may take over an hour to sync on a good connection. Many hours on a slow connection. For this reason it is possible in mSupply to limit the amount of records up to a specified amount of months ago.

- You need to change the store synchronisation type from “collector” to “active” or “none” to unlock adding custom data
- Add a custom data row with “Field label” `syncMonths` and the numeric value desired in “Field value”
- Change the store synchronisation type back to collector
Now when you do initial sync, the store will only get transactions and stock takes for as far back as specified from the current date.
| Previous: 17.01. mSupply mobile 2.0 user guide | | Next: 17.03. mSupply Mobile Demo] |


