
Training Handout: basic skills
3.02. Logging in
When mSupply starts you will be presented with the login window:

This is the login window for when mSupply is started for the first time.
Username
Select your username from the list.
- Only users from your facility will be displayed. If the list is long, you can type the first few characters of your username in the Search users field to shorten the list to usernames that begin with what you have typed, sorted alphabetically.
- If you're just opening mSupply for the first time after installing it, select user 1(pass= user1).
- Each time it opens, mSupply will default to the user who last logged in.
Password
Enter your password. When this window opens, the focus is on the password field. This allows the user who last logged in to be able to quickly log in again.
If using the user 1(pass= user1) name, type user1 as the password.
Store
Select the store you want to log in to from the drop-down list.
- Most mSupply users will only be able to access a single store. For users who have access to more than one store, the login screen allows you to select any of the stores to which you have access. Once you have logged in you can switch the store without logging out - see Switching stores.
- After selecting the desired store, all transactions you process will relate to that store.
- Supervisors and other Level 1 users will have an additional menu item, Supervisor - All stores. In this mode, all stores are accessible. You would use this mode, for example, when placing an order for supplies that will be distributed to a number of stores or for reporting on more than one store - see 26.07. Virtual stores.
- HIS - if you have enabled the Hospital Info System (HIS) in the user login permission settings, and at least one licence is allocated to HIS (see HIS preferences), then you will also see Hospital Info System in the list of stores. If you select this, the login mode automatically changes to HIS mode.
In a synchronisation system (29.01. Introduction to Synchronisation) the user will see a list of all the active stores they have permission to log into in this datafile.
Messages
View any messages that might be displayed.
Click OK
Finally, click OK to login. If login is successful you will be taken to the navigator screen.
As with all windows in mSupply, pressing the Enter key at any point produces the same result as clicking on the highlighted button, which, for this window, is the OK button. This facilitates fast keyboard control.
There are various options that can be set that cause a user to be taken to other screens or shown other information after logging in successfully. For example, Reminders or Invoices preferences.
Journal file
If one has not already been set up and if you are using a single user copy of mSupply, after logging in you will be asked to select the location for the journal file. A good place is to put it in the same folder as the datafile. You will only be asked to do this once.
The journal file is a place that mSupply records every database transaction that occurs after the last backup. It is used for repairing a damaged datafile and for investigating some types of errors.
| Previous: 3.01. The tutorial like no other | | Next: 3.03. Opening the example data file |
3.01. The tutorial like no other
For a glossary of terms please refer to section 1.05. Terms, definitions and conventions used in this user guide
Only mSupply®'s basic features are covered in this tutorial. The enhanced features are covered in-depth in later sections of the user guide.
mSupply explained
This chart shows the common steps in most pharmaceutical supply processes. The manufacturing step only applies to manufacturers.
mSupply work flow diagram
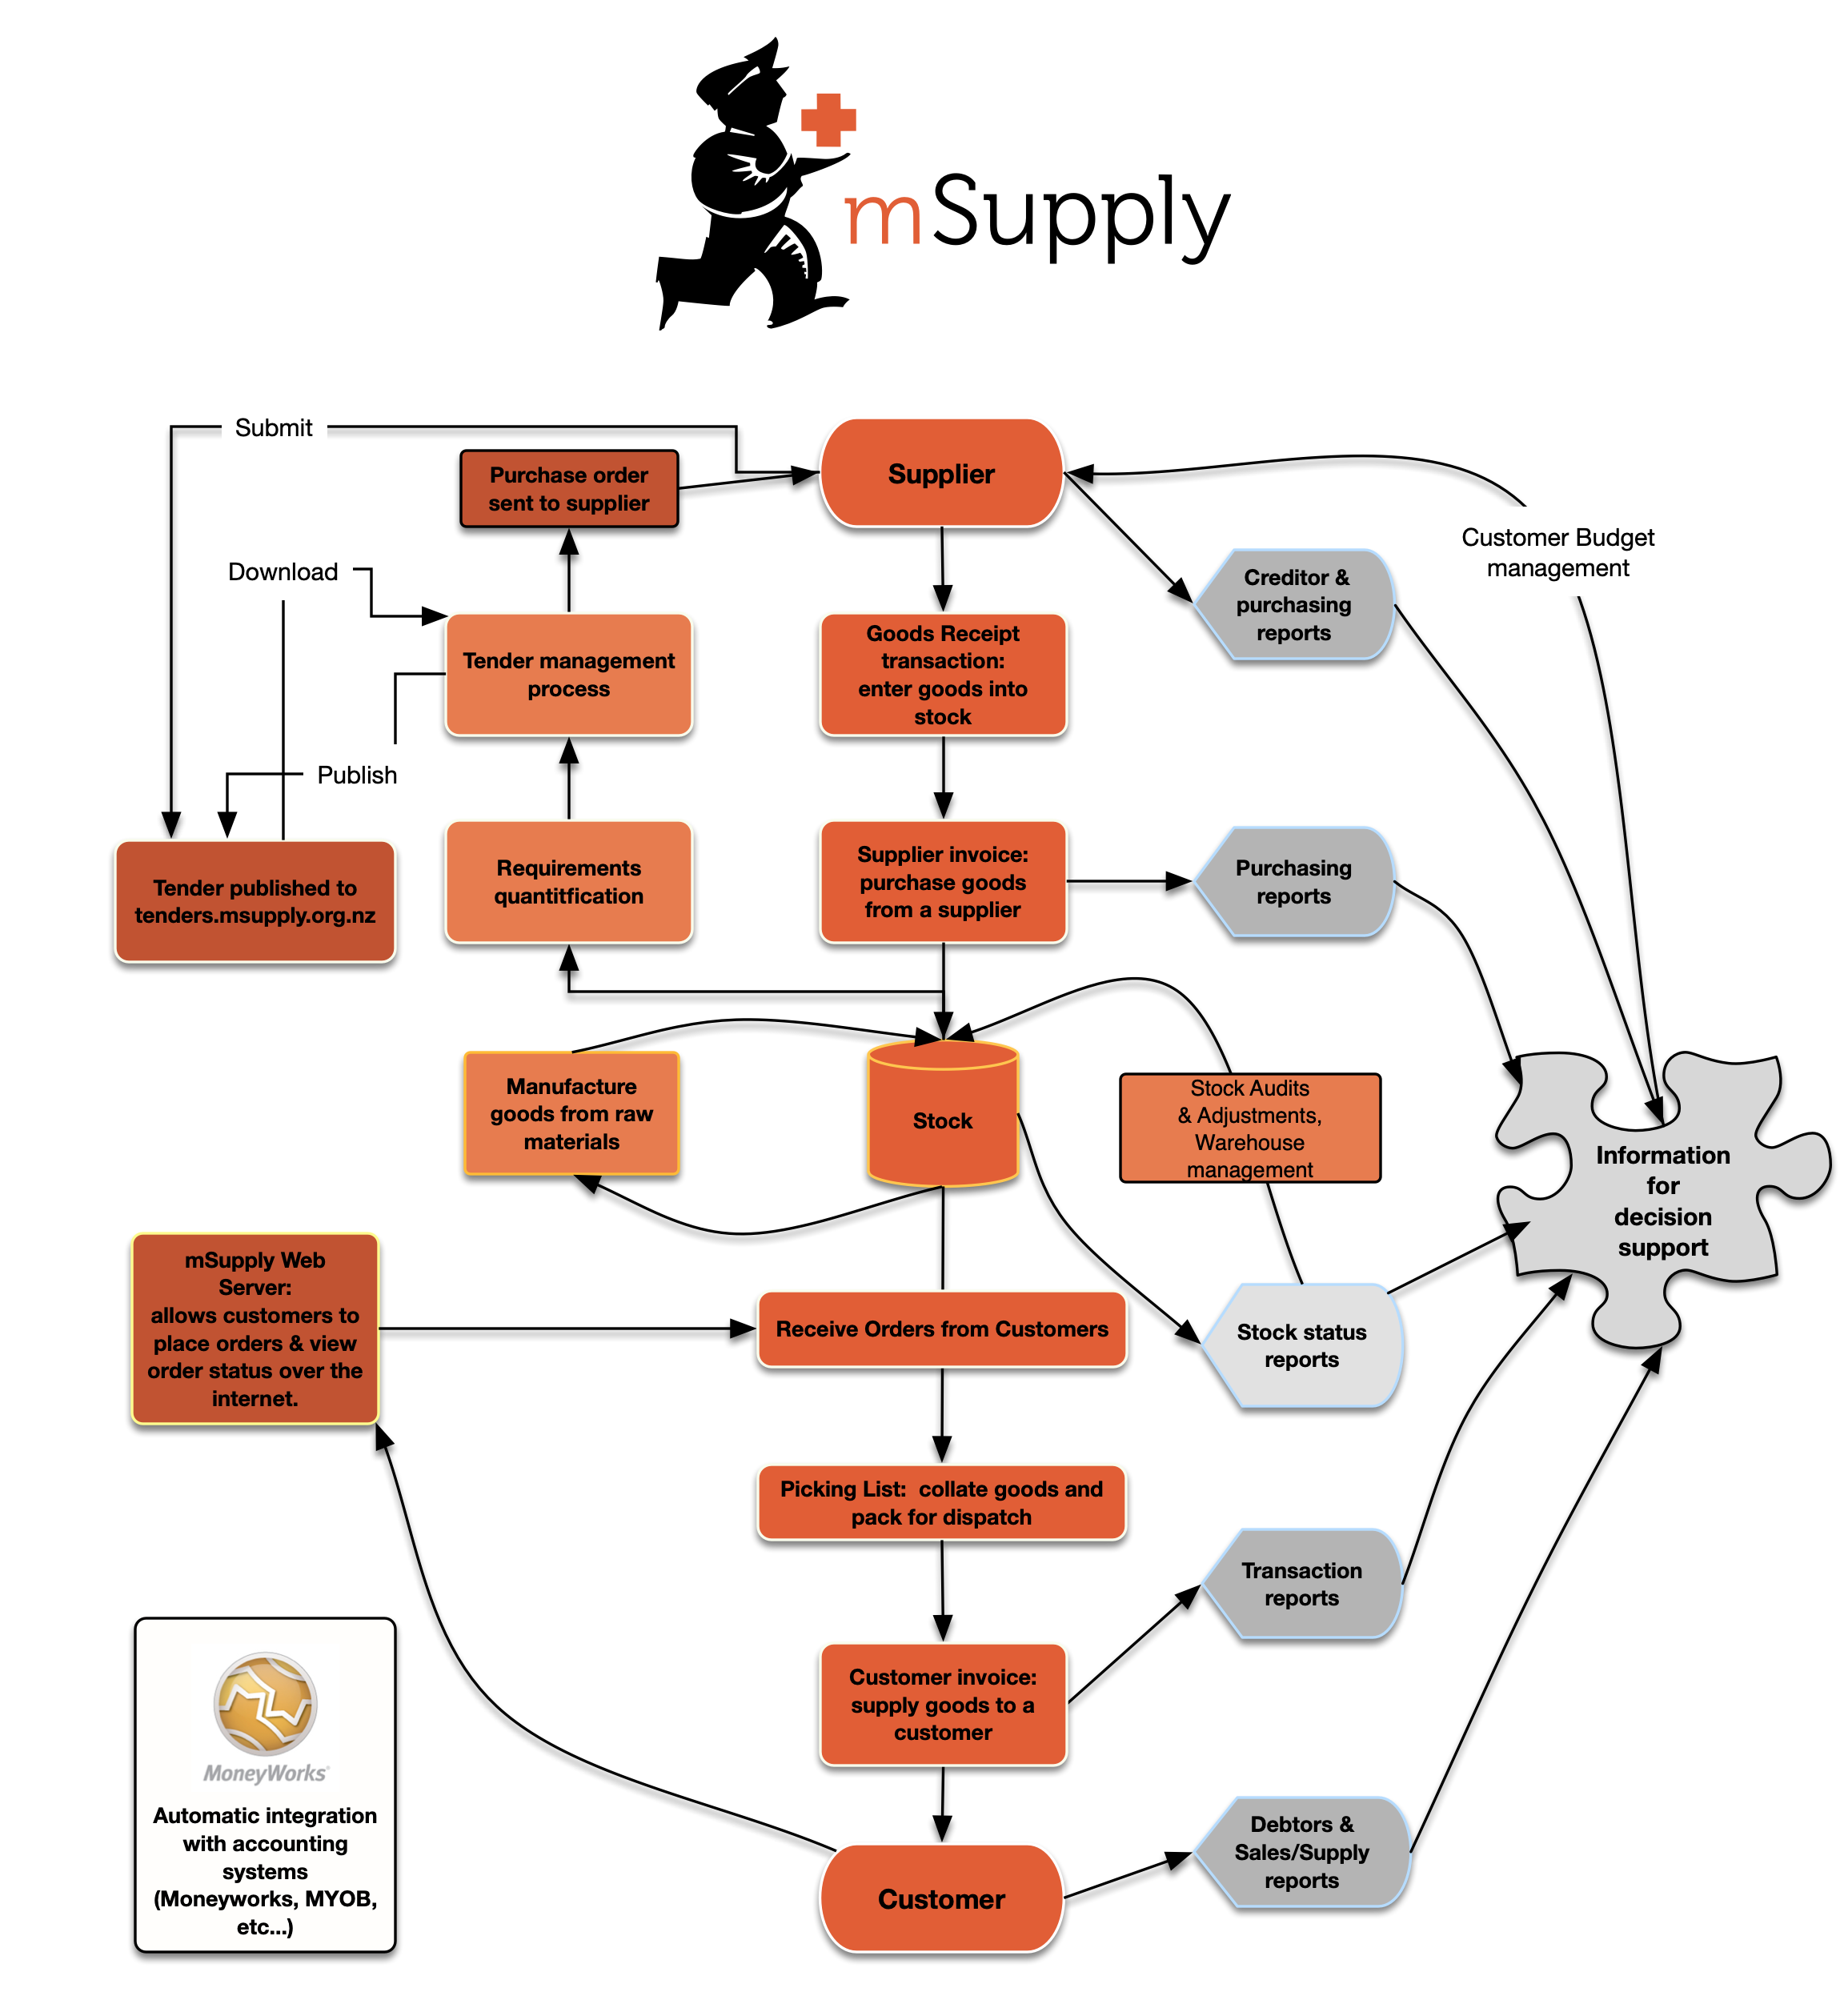
The two most common transaction types in mSupply are the supplier invoice (si) and the customer invoice (ci). These transactions record stock purchases from suppliers, and stock supplies to customers respectively. mSupply records stock adjustments through these two transactions. So, given an opening balance of stock, mSupply will show a series of transactions that result in the recorded closing stock.
Of course, there is much more to it than that, but these two transactions are the core of the system.
Note that mSupply has dozens of preference settings (File>Preferences) which change the behaviour of many aspects of the software. If you have changed the preferences from their default settings, some parts of this tutorial may not be as stated below. To work through the tutorial, we recommend you start with a fresh copy of the example data to ensure the preferences are set correctly.
Before starting the tutorial, you will need to have installed mSupply and opened the example database. If you haven't done so, see section 2.02. Installation.
mSupply runs best with a screen resolution of 1024 x 768 or greater. If you have your screen set to 950 x 850 or lower, some windows will not fit on the screen. To change screen resolution:
- Windows: right-click anywhere on the desktop, select Properties > Settings, and make the necessary changes.
- Macintosh: Choose Apple > System Preferences… then click on the Displays icon and set a new resolution
| Previous: 3. Tutorial | | Next: 3.02. Logging in |