13.12. Manage reports
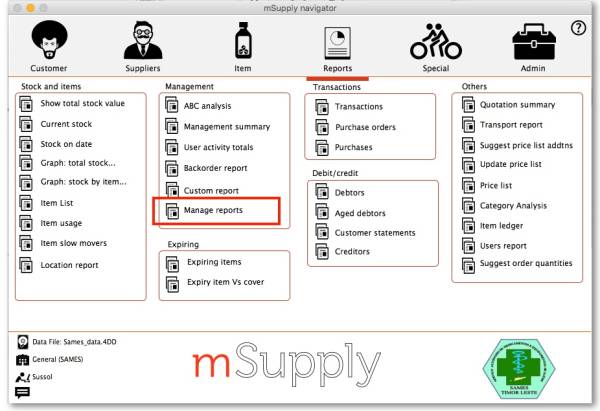
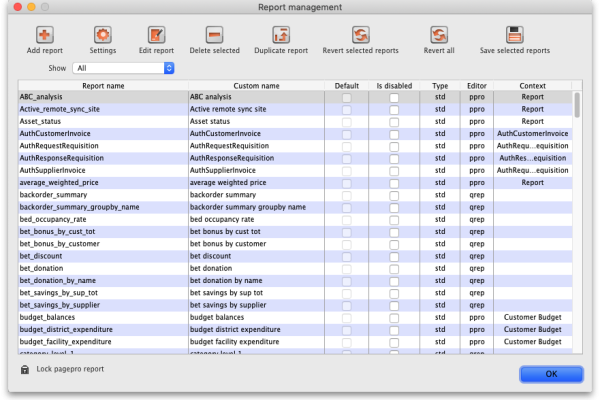
Choosing this item shows a list of built-in reports and any custom reports which have been added to your system:
The built-in reports may well be sufficient for your needs, but mSupply's versatility allows you to add and manage custom reports to meet any specific requirements you have.
Options in the Report Management window:
Delete selected reports
Report(s) no longer required may be selected and deleted from mSupply. This only applies to custom reports (cus in the Type column); standard reports (std in the Type column) cannot be deleted.
Disable reports
You can disable reports that you no longer wish users to be able to select when printing. Do this by checking the checkbox in the report's Is disabled cell. This applies to ppro type reports only (see the Editor column); qrep type reports cannot be disabled.
Duplicate report
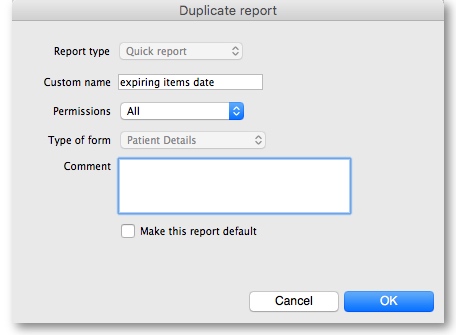
Should one of the built-in reports not quite meet your needs, you have the opportunity to create a duplicate of that report, and then modify it to meet your needs. The first step is to select the closely matching in-built report; in our example we'll use the expiring_items_date report, then click on the Duplicate report button;
the window that appears has already selected a name for your report, using the name of the in-built report prefixed by “my_ ”; you may change this name should you wish. The Permissions drop down list allows you to specify users having access to your report; the options are All users , or Only me . Should you wish your report to become the default one rather than the in-built report, then check the Make default checkbox. When you click on OK, the report you have just created now appears at the foot of the list of reports from the item on the menu Report>Manage reports.
Edit report
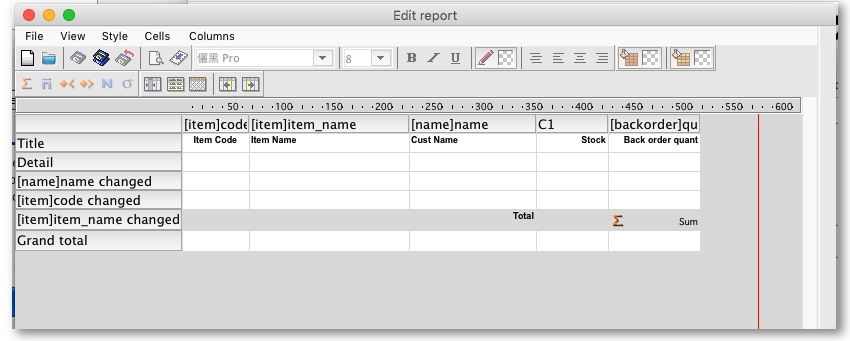
The editing of reports using the powerful editor has been extensively covered earlier in this section.
Using the report editor is complex, but it has the potential to produce a wealth of useful information. Contact Sustainable Solutions for a link to download a separate manual on the subject.
Note that in a multi-user installation, changes you make to a report will affect all users, so don't change a report without some forethought.
Add report
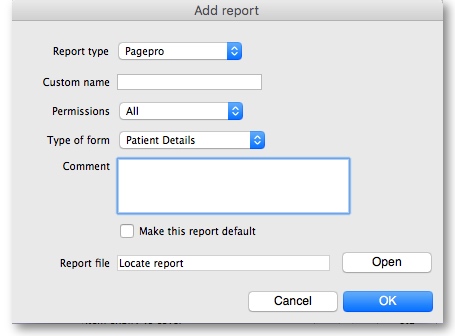
Click on this button, and the following window appears:
Report type: Select the type of report you are going to add; PagePro if it was created using the PagePro editor, Quick Report if it was created using the Quick Report editor (shown in the Edit report section above) or PPro Multiple if you want to select 2 or more previously created PagePro reports to be printed out at the same time.
Custom name: Enter the name the report will have in the system. Users will select this from the appropriate list to run the custom report.
Permissions: Defines who has permission to edit this report, you only or everyone who has the Edit reports permission (“All”). Normally you would set this to “All”.
Type of form: This defines where your report will appear in the system i.e. its context in the report manager list (Note: this only applies to PagePro reports, not Quick reports - Quick reports do not have a type). For example, if you select “Pick list” then the custom report will be available when a printing a suggested status customer invoice, if you pick “Supplier invoice” it will be available when printing a supplier invoice. If your custom report should be available as a normal report and not for some specific purpose in the system then select “Report” here.
Comment: Enter anything here that you want to remember about the report or to help you recognise it in the future. The comment will only appear in this window, when you open it to edit the settings of the report in the future.
Make this report default: Check this box if you want your report to be the default one of this type for all users of the system. You would check this if, for example, you were adding a new supplier invoice printout that everyone should use.
Report file: This is the actual file containing the report. Locate it on your computer using the Open button.
Revert selected reports
This button allows intrepid souls to save face by undoing the damage they have done to a particular report! The report that was installed with mSupply will be reloaded from the disk, and any changes you have made to the version stored with the data will be discarded.
Revert all
This button returns all in-built reports to their original state when you installed mSupply; exercise caution when using it. Custom reports which you have designed are not affected.
Save selected reports
All reports are automatically saved by mSupply in the default folder. There may be occasions when you wish to save one or more reports on a removable storage medium - e.g. a pen drive - and this button allows you to do this; a window appears allowing you to specify the location in which you wish to save the selected reports.
| Previous: 13.11. Other reports | | Next: 13.13. Saving report templates |
