21.01. Assets setup
Before you can start managing your assets you need to setup things like statuses, conditions, types and properties. Please note that these settings can be created automatically if you import assets (see Importing assets for details).
You manually create and edit the various asset settings by going to Special > Show asset settings in the menus.
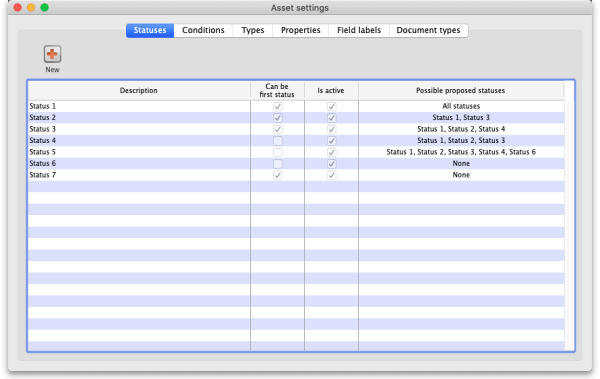
When you do that, the settings window will open at the Statuses tab:
Statuses
You can define as many statuses as you like. If you wish you can also define which statuses can be selected from any other statuses, so that assets follow particular status “paths”.
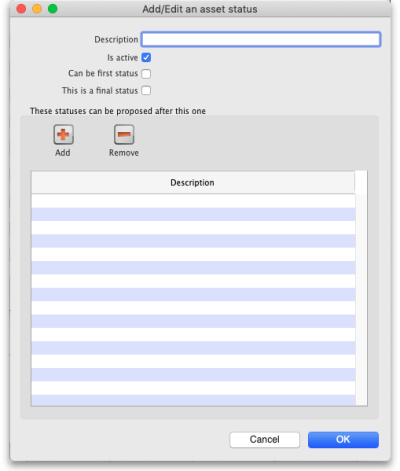
To add a status, click on the New button. This window will open:
- Description: The name of the status and how you will see it referred to throughout mSupply. This is a mandatory field and mSupply will tell you if you do not fill it in.
- Is active: Will be checked by default for a new status. If this is checked, it means the status is available for selecting. If it is not checked the status will not appear anywhere for selection, it will only appear in existing assets where it has already been chosen. Statuses you no longer wish to use are not deleted, they are made inactive by unchecking this checkbox.
- Can be first status: If this is checked it means that this status can be selected when first creating an asset.
- This is a final status: If this is checked it means that this status is final and an asset cannot be changed to another status once it has been assigned this one.
- These statuses can be proposed after this one: In this section you set the statuses that can be selected as proposed statuses when this status is the current one. This is how you construct status “paths” that assets can take. If you enter no statuses in this table then there is no restriction and all statuses will be proposable when this status is the current one. To add a status to this list, click on the Add button. This will add a drop down list to the table which will contain all the available, active statuses you can select. To remove a status from the list, select it in the table and click on the Remove button.
Click on the Cancel button to close this window without saving any of the changes you have made to this status or click on the OK button to save any changes. Clicking on either will take you back to the list of statuses, which will have been updated to reflect any changes you made.
If you want to edit a status, simply double-click it in the list. This will open the same window as above populated with the status's current values and you can edit them as you require.
Note: The Possible proposed statuses column in the list of statuses will show:
- “All” if no proposable statuses were selected in the status's These statuses can be proposed after this one list
- “None” if the asset is a last status (i.e. This is a final status is checked)
- A list of proposable statuses if any were entered in the status's These statuses can be proposed after this one list
Conditions
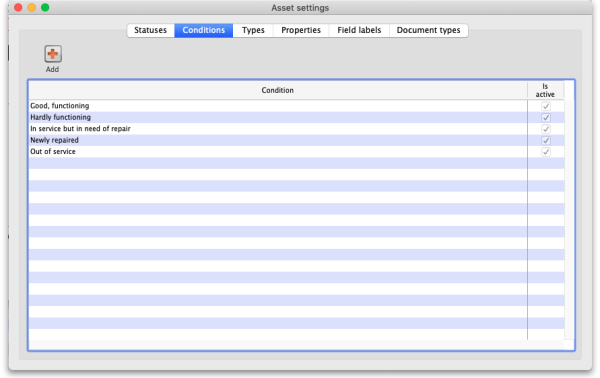
Clicking on the Conditions tab will show the list of conditions:
To add a Condition, click on the Add button. This window will open:
- Description: The name of the condition and how you will see it referred to throughout mSupply. This is a mandatory field and mSupply will tell you if you do not fill it in.
- Is active: Will be checked by default for a new condition. If this is checked, it means the condition is available for selecting. If it is not checked the condition will not appear anywhere for selection, it will only appear in existing assets where it has already been chosen. Conditions you no longer wish to use are not deleted, they are made inactive by unchecking this checkbox.
Click on the Cancel button to close this window without saving any of the changes you have made to this condition or click on the OK button to save any changes. Clicking on either will take you back to the list of conditions, which will have been updated to reflect any changes you made.
Types
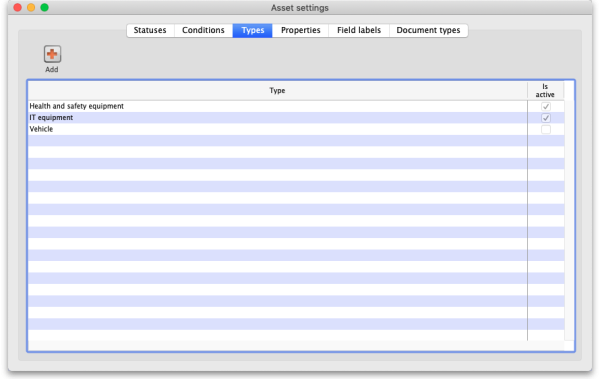
Clicking on the Types tab will show the list of types:
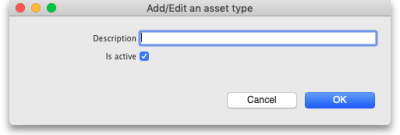
To add a type, click on the Add button. This window will open:
- Description: The name of the type and how you will see it referred to throughout mSupply. This is a mandatory field and mSupply will tell you if you do not fill it in.
- Is active: Will be checked by default for a new type. If this is checked, it means the type is available for selecting. If it is not checked the type will not appear anywhere for selection, it will only appear in existing assets where it has already been chosen. Types you no longer wish to use are not deleted, they are made inactive by unchecking this checkbox.
Click on the Cancel button to close this window without saving any of the changes you have made to this type or click on the OK button to save any changes. Clicking on either will take you back to the list of types, which will have been updated to reflect any changes you made.
Properties
You can think of properties as user-definable fields that you can add to assets. They give you the ability to add extra drop down lists, dates or text fields to capture information that isn't covered by the standard fields provided in mSupply.
Clicking on the Properties tab will show the list of properties:
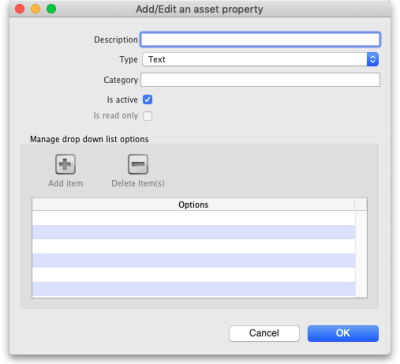
To add a property, click on the Add button. This window will open:
- Description: The name of the property and how you will see it referred to throughout mSupply. This is a mandatory field and mSupply will tell you if you do not fill it in.
- Type: Select the type of property this is; a Date, Drop down list or Text field.
- Category: Enter the category of the property here. Can be used with custom functionality for changing where certain properties are displayed for example, but otherwise not used in mSupply at the moment.
- Is active: Will be checked by default for a new property. If this is checked, it means the property is available for selecting. If it is not checked the property will not appear anywhere for selection, it will only appear in existing assets where it has already been chosen. Properties you no longer wish to use are not deleted, they are made inactive by unchecking this checkbox.
- Is read only: If this is checked, this poperty is read only and none of its settings will be editable. It is used to protect properties that are used in custom functionality and you cannot manually change this setting; it can only be changed by Sustainable Solutions.
- Manage drop down list options: This section is only enabled if the Type is set to Drop down list and is used to add and remove options that will appear in the drop down list. Click on the Add item button to add an option to the drop down list; this will add a default named option to the list which you can edit by clicking on it and changing to the desired name. To delete one or more items from the drop down list, select them in the list and click on the Delete item(s) button.
Click on the Cancel button to close this window without saving any of the changes you have made to this property or click on the OK button to save any changes. Clicking on either will take you back to the list of properties, which will have been updated to reflect any changes you made.
Field labels
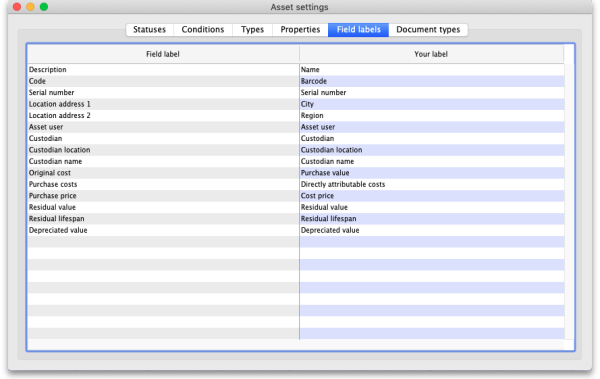
We know not everyone calls things the same name so we've added functionality for users to select their own labels for some of the asset fields. The Field labels tab is where you can define what these fields are called:
The Field label column on the left contains the default label applied to the field. The Your label column on the right contains what label will be used by mSupply for this field.
To edit the label, simply click on it in the right hand column and change it to what you want it to be called. As soon as you leave the field (by pressing the Tab key on the keyboard for instance), the change is saved.
Document types
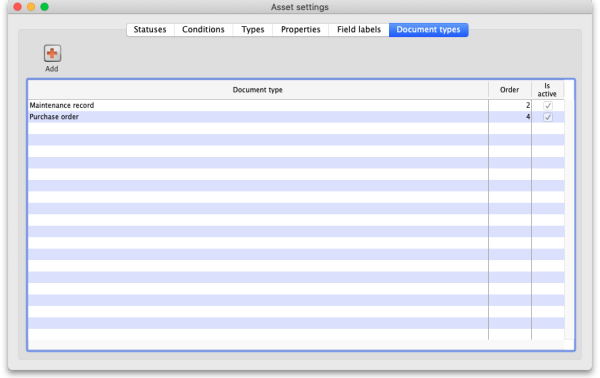
You can upload documents to assets. Each one you upload must have a particular document type and this tab is where you manage those types:
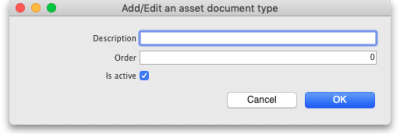
To add a document type, click on the Add button. This window will open:
- Description: The name of the document type and how you will see it referred to throughout mSupply. This is a mandatory field and mSupply will tell you if you do not fill it in.
- Order: The order the document type will be displayed in. The smaller the number, the nearer the beginning of any list the document type will be displayed.
- Is active: Will be checked by default for a new document type. If this is checked, it means the document type is available for selecting. If it is not checked the document type will not appear anywhere for selection, it will only appear in existing assets where it has already been chosen. Document types you no longer wish to use are not deleted, they are made inactive by unchecking this checkbox.
Click on the Cancel button to close this window without saving any of the changes you have made to this document type or click on the OK button to save any changes. Clicking on either will take you back to the list of document types, which will have been updated to reflect any changes you made.
Permissions
You also need to setup the permissions users have concerning the asset functionality. See the 23.15. Managing users page for details on the permissions you can set.
Preferences
There are some preferences (e.g. sending emails when assets approach their insurance renewal date) that you can set that also affect the way the assets module works. See the General preferences page for details on those.
| Previous: 20. Cold Chain Equipment | | Next: 21.02. Asset management |
