This is an old revision of the document!
10.01. Dispensary mode
Dispensary mode allows you to use mSupply to issue medicines to patients. It is ideally suited for pharmacies, clinics, hospital dispensaries, and facilities where medicines are supplied to individual patients.
The particular benefits of using Dispensary mode include:
- Prescription data can be entered into mSupply including:
- Item directions which can be quickly selected from standard abbreviations, and edited as necessary. Item directions do not need to be printed in English.
- Labels can be printed with:
- Item description and quantity issued
- Patient name
- Prescriber name
- Directions
- Institution name
- More…
- Patient Histories are recorded, allowing repeat prescriptions to be:
- Use of Dispensary mode depends on your mSupply registration type. Contact Sustainable Solutions if you wish to upgrade your registration.
- Regardless of mode, each user can only use those functions for which they have permission, according to the permissions set for that user. See Managing Users
- In client-server versions of mSupply, different users can be logged in in different modes at the same time, allowing you to dispense to patients and supply wards, stores, clients or cost centres simultaneously.
- Users whose permissions allow them to operate in either Store mode or Dispensary mode may change from one to the other by pressing Ctrl+2 on the keyboard. Re-entry of the user's password is not necessary.
Activating dispensary mode
Prior to version 3.5 you controlled dispensary mode for each user, and had to choose File > Edit users…
Now it's a setting for a store.
- Choose Special > Show stores…
- Double-click on the store you want to set to dispensary mode.
- Select Dispensary in the drop down list next to the store's code field. When you log out of the store and back in, you'll be in the new mode.
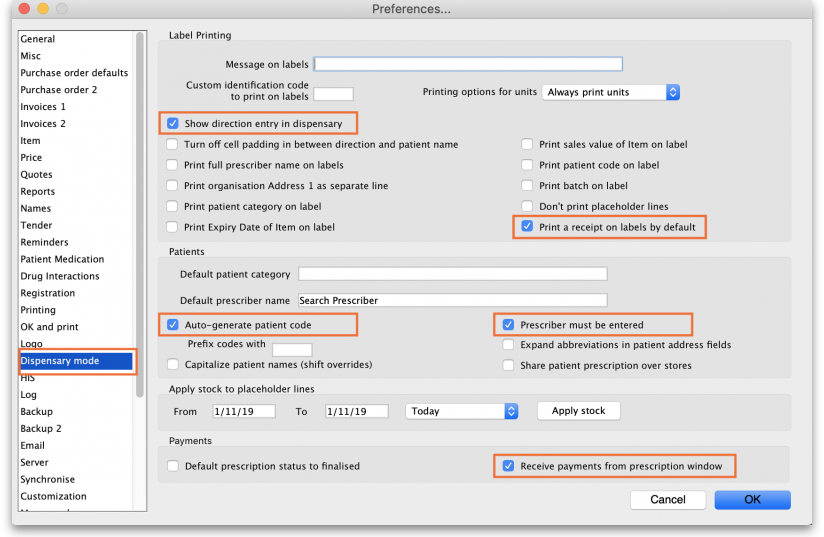
- Choose File > Preferences > Invoices 2 then check the Show direction entry in dispensary mode box.
What is a "name"?
In mSupply a “name” can be a customer, a supplier, both or neither. A “customer” can be anyone you supply goods to - e.g. another organisation, or a ward in your hospital, or a patient.
What changes in dispensary mode?
Different menus
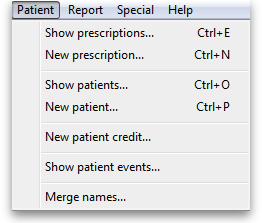
Some of the menus in dispensary mode have different names. For example, the Customer menu becomes the Patient menu.
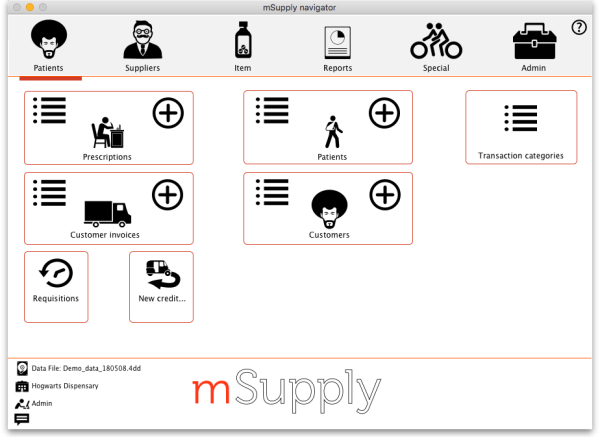
But most of the things you can do in store mode are also available in dispensary mode. In fact, the navigator looks much the same. The only difference is the Customers tab, which is renamed to the Patients tab and has a slightly different selection of icons:
The functionality of the common icons is the same as in store mode and applies mostly to customers not patients (a dispensary mode store can still distribute stock to customers (not patients) and handle customers' requisitions). For details of those functions, see the other sections of this guide.
Different windows
The windows displayed are appropriate for dispensing medicines to individual patients; in addition to the ability to record individual patient's notes (e.g. allergies), prescribers details are maintained. A patient history is maintained and other features specifically related to dispensing activities are maintained.
Press the tab (not 'return') key after making the entry to show a list of matching prescribers. If only one presciber matches, the name will be entered directly without the list being shown.
Note that there is a setting on the Dispensing page of the mSupply Preferences that affects whether or not you can accept and print a prescription without entering a prescriber.
Printing labels
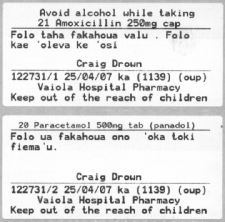
Patient labels are printed when the Print labels option is checked in the Prescription Entry window. Sample labels, produced by the Zebra TLP2844 printer are reproduced below:
mSupply currently is designed to work with the Zebra TLP 2844 label printer. The Zebra is a very nice printer. It can use either thermal labels or a thermal ribbon which gives non-fading results.
We currently support plain 90 x 40mm label stock as this is cheap and readily available. The Zebra printer is auto-sensing of the ending of a label, so you can most likely used labels longer than 40mm with no problems.
- Label specifications:
- 90mm x 40mm high
- White Matt Thermal Transfer Paper
- Wide Edge Leading
- 1 Across on a roll
- Perforation between each label
- Produced on 1“ core to suit TLP2844
We are happy to support other printers if you use a different brand.
Reprinting labels
If you need to print the labels for an item again, choose Patient > Show Prescriptions to locate the prescription entry.
In the list of items dispensed, click on the line you wish to reprint, and then click OK (with the printing checkbox checked)
If you wish to reprint labels for all the items on the prescription, first click in the list of items below the last item so that now one item is highlighted. Then all labels will be preinted when you click OK
Printing multiple labels
If you want to print more that one label for an item, hold down the Alt key ( Option on Mac) as you click the OK button. You will be asked for the number of labels required as the label is about to print.
What if there is not sufficient stock of one batch?
As the quantity of a particular batch of an item gets used up, you will need to issue stock from more than one batch to a patient. mSupply handles this when printing labels, and combines the totals for any item on a prescription so that only one label is printed for the total quantity.
The directions for the item with the first line number will be used, so enter directions for the first batch you dispense, and leave the directions empty for subsequent batches.
Note: if you have the rare situation where you need to issue the same item to one patient with different directions you should either combine the directions onto the one label, or enter two prescriptions with the directions entered differently on each prescription (That is enter the line, then print the label(s), then choose Patient > New prescription and issue the item again with the second set of directions).
Printing receipts
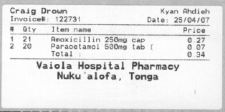
When the Print Receipt option is checked in the Prescription Entry window, the printer will, after printing the medicine labels, produce a patient receipt as shown below.
Should you wish to use a different printer for receipts, this option can easily be incorporated in mSupply if you advise us of your requirements.
