4.14. Repacking items
Creating a new repack
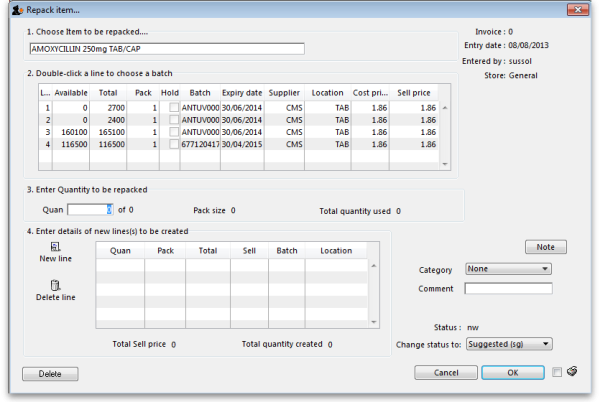
The command Items > New repack will display a window where you can repack a particular item into smaller or larger packs and/or move all or part of a batch to another location. It is a more complex version of the split functionality and will allow you to handle several batches at a time.
There are 4 steps for creating a repack. The window is numbered from top to bottom to help you follow the correct steps:
- Choose item to be repacked: At [1.] type the first characters or code of the item to be repacked, then press the Tab key. If only one item text or code matches your entry, it will be filled in automatically, otherwise you will be shown a standard choice list from where you can select the item.
- Choose a batch: At [2.] double click a line to choose the batch; for repacking, batches cannot be mixed, and a single batch must be used.
- Quantity to be repacked: At [3.] enter the quantity which is to be repacked; the pack size field is automatically completed.
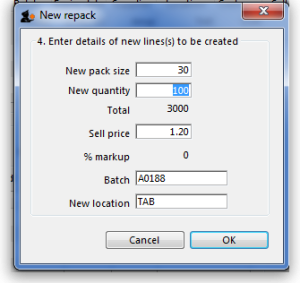
- Details of new line(s) - i.e. the repacks: At [4.] click the New line icon to bring up this window calling for the details of the repacks, and enter the details as appropriate.
Note that repacks of different sizes may be created at this stage - e.g. 5,000 Paracetamol tablets may be repacked into 40×50 and 30×100. The Sell price, the Batch number and the New Location are automatically completed, but all these fields may be edited as required.
Not infrequently, because some tablets may be broken, for example, the total quantity of the item re-packed will be less than the quantity selected for re-packing at [2.]. To maintain the accuracy of your stock record, an inventory stock adjustment should be performed - see section 4.19. Inventory adjustments for this.
Printing a repack
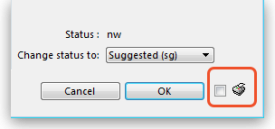
While the status of the repacking transaction is suggested (sg), checking the box beside the print icon will produce a picking slip of the number and size of packs of the original item; once the status is finalised, the same operation will give you the choice to produce a detailed record of the re-packs or a stock movement report (for when you're moving stock - perfect for giving to the people physically moving the stock in the warehouse because it shows what is to be moved to which location).
On clicking the OK button, a transaction is created showing the original line taken out of stock, and the new line(s) put into stock. The total value of the transaction is always zero.
You cannot edit a repack transaction after you have clicked the OK button, so get it right the first time! Tip: You can always “re-repack” an item to adjust a mistake however! 
Deleting a repack
If you click on the Delete button, then the repack will be deleted. Only repacks whose status is “sg” (suggested) or “nw” (new) can be deleted.
Viewing repacks
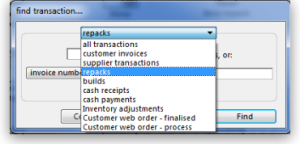
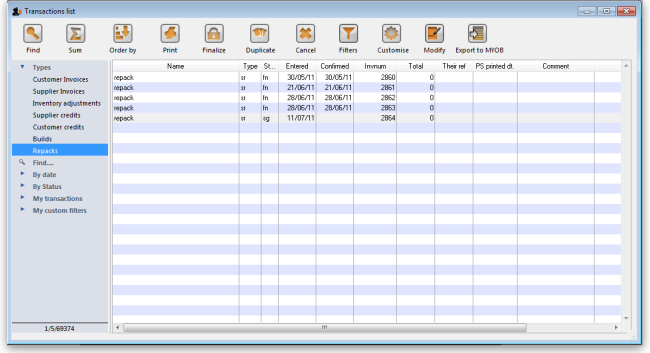
Repacked items can be viewed in the normal transaction list window - (Item > Show repacks) and select Repacks from the drop down list
Note that repacks created with versions of mSupply® prior to v1.4 will not show up using the “recent transactions” section of the window- you will have to enter the number directly.
| Previous: 4.13. Prices in mSupply | | Next: 4.15. Show items with stock |
