
Training Handout: Procurement
6.01. Ordering stock from suppliers
The discussion here is focused on ordering stock from suppliers outside of your mSupply system, though the same principles apply when Ordering from one store to another.
Introduction to ordering
mSupply provides ways for you to generate a Purchase Order with manually or automatically calculated quantities. Each organisation tends to have different requirements for their ordering process, so we have tried to strike a balance between providing different methods and making the ordering module so complex that it is of little use to anyone. mSupply has two general methods for generating a purchase order:
- Creating a new calculated purchase order. We recommend that you use this method since it will save you time and avoid mistakes.
- Creating a blank Purchase Order. This method allows you to create a purchase order manually, which is useful if you think the information entered in mSupply is not complete or accurate or you want to base it on calculations of quantities you have made yourself or using other tools.
Whichever way you create a purchase order, the purchase order window looks like this:

There is some read-only information at the top of the window which cannot be edited:
- Order num: This is the purchase order's number. It is automatically generated and increments by 1 for each new purchase order. It is unique within a store only so it is possible for purchase orders in different stores to have the same number.
The PO counter may get re-set to 1 under certain extreme circumstances like restoring the database from a backup on a new version of the mSupply software. This can result in the PO number not being unique in the same store. If you experience this, and want the PO numbers to continue in sequence from the last number, please contact support@msupply.foundation for assistance.
- Confirm date: The date the purchase order was confirmed. If it has not been confirmed yet, this will be “00/00/00”.
- Status: The current status of the purchase order - refer Purchase order status explained below.
- Store: The name of the store the purchase order belongs to.
Creating a new (calculated) purchase order
Before launching into creating a new (calculated) Purchase Order, it is important to understand the logic that mSupply uses.
Logic used for calculating purchase order quantities
There are three distinct steps required to arrive at Purchase Order quantities for each line of stock:
mSupply uses this methodology to produce a suggested order quantities in a number of other places including:
To assist in understanding these calculations, an example will be developed through the following sections. Amoxycillin 250mg tabs/caps is being ordered at the end of December 2015. Historical consumption data is as follows:
| Month | 2013 | 2014 | 2015 |
|---|---|---|---|
| Jan | 200 | 1,000 | 1,000 |
| Feb | 250 | 1,050 | 1,100 |
| Mar | 300 | 950 | 900 |
| Apr | 350 | 1,000 | 1,000 |
| May | 400 | 1,200 | 1,400 |
| Jun | 450 | 800 | 600 |
| Jul | 500 | 1,000 | 1,000 |
| Aug | 550 | 1,150 | 1,300 |
| Sep | 600 | 850 | 700 |
| Oct | 650 | 1,000 | 1,000 |
| Nov | 700 | 1,100 | 1,200 |
| Dec | 750 | 900 | 800 |
From this data, the following historic AMC (Average Monthly Consumption) calculations can be made.
| Period | AMC |
|---|---|
| Last 36 months (Jan 2013 - Dec 2015) | 825 |
| Last 24 months (Jan 2014 - Dec 2015) | 1,000 |
| Last 12 months (Jan 2015 - Dec 2015) | 1,000 |
| Last 6 months (Jul 2015 - Dec 2015) | 1,000 |
A more detailed analysis of this historic consumption shows a steady increase through 2013, and then the AMC sits at 1,000 per month in 2014 and 2015. In this case, we have an historic AMC of 1,000 per month regardless of whether we look at 6, 12 or 24 months of historic consumption data.
Forecast future consumption
See Quantification for a more detailed discussion of the various possible methods of quantification available in mSupply. For this discussion, the default 'Don't Adjust AMC' method is used, where the historic consumption is summed up for the number of months specified (defaulting to 12), and divided by the number of months. The assumption here is that future consumption will continue at the same level as historic consumption. mSupply has a number of other options for making a forecast of future consumption match what you think will happen or for accommodating features of your consumption data. The 4.21. Forecasting page contains a general descripotion and links to further detail.
Calculate required stock quantity
mSupply does not use set 'minimum' & 'maximum' stock levels as its primary means of determining order quantities. Conventional minimum and maximum stock levels are calculated using the methods described here, but it is problematic to try and fix these values, because:
- The parameters will keep on changing and therefore so will the values,
- It takes a lot of manual work to calculate,
- The assumptions made in calculating them are often lost.
The ‘good’ reason to use ‘minimum’ & ‘maximum’ stock levels is if you don’t have a calculator like mSupply that can quickly and easily calculate the right amount of stock to order. Be assured that the system that mSupply uses will give you much better inventory control!
Having said that, mSupply does allow for minimum stock levels so as to allow you to ensure a minimum quantity of rarely used items. e.g. essential emergency supplies - see the Other information on the stock details page section on the 4.01.05. Items - Stock tab page for more information. These minimum stock levels should not be used for most items.
The amount of stock you require to have is based on the forecast of future consumption (previous section), modified by a range of factors including:
- The Lead time: The time delay between carrying out the quantification analysis and when the stock is delivered to the store.
- The Ordering cycle: How often you plan to order this item
- The Buffer stock: How much of this item you plan to have on hand just before your next order arrives.
All of these are measured in months.
Some agencies recommend that Buffer stock (months) = 2 x Ordering cycle. If you have a central store with an annual order cycle, this means keeping two years worth of stock as a buffer. Expiry dates should not generally be problem, as a central store should definitely not be ordering stock with less than 3 years expiry. However, central stores may have limited storage capacity…
Stock required = Lead time + Ordering cycle + (months of) buffer stock
For example:
- Lead time = 3 months
- Ordering cycle = 6 months
- Buffer stock = 12 months
From the equation above, Stock required is calculated as:
- = Lead time + Ordering cycle + buffer stock
- = 3 + 6 + 12
- = 21 months.
So, 21 months worth of stock is required.
The amount of stock required is almost certainly NOT the amount of stock to be purchased! See the next section: Calculate purchase order quantity for an explanation.
Calculate purchase order quantity
Purchase Order quantities are based on the amount of stock required, normally expressed as a number of months of AMC, modified by factors including:
- The current stock level (note: stock with no expiry date is counted as current stock for this calculation!).
- The amount of stock on backorder to customers (if you are running the backorder feature).
- The amount of stock already on order from Suppliers, but that has not yet arrived in your store.
Purchase order quantity = stock required - current stock level + stock on backorder to customers - stock on order from suppliers.
If the current stock levels and / or stock on backorder from suppliers is high enough, the above equation produces a negative number. This means that this item does not need to be procured during this ordering cycle. So, for the purposes of this mSupply calculation, the Purchase order quantity = zero or the value of the above expression, whichever is the greater. This is expressed mathematically as:
Purchase order quantity = MAX(0,stock required - current stock level + stock on backorder to customers - stock on backorder from suppliers)
It could be important to consider the months of anticipated stock-out (MOASO) - that is, the situation of running out of stock before the order arrives. There are (at least) two ways of dealing with MOASO:
- Consider it: Reduce your order quantity by the MOASO because:
- You will either obtain the shortfall through another purchase order (an emergency order, or from another supplier), or you will simply run out of stock.
- Your customers will not increase their demand in the time immediately after you receive the stock from this purchase order to compensate for the stock being unavailable prior to the new order arriving.
- Ignore it because:
- Your customers will be using up their buffer stocks while you were out of stock, and so they will increase their demand in the time immediately after you receive the stock from this purchase order to re-build their buffers.
- MOASO is too complicated to consider and explain!
It can be seen that
- MOASO = the Lead time - Current stock level + stock on backorder to customers - stock on order from suppliers
If the above equation produces a negative number, this means that there will be no stock-out, and the anticipated stock-out will have no impact on the Purchase order quantity. So, for the purposes of this mSupply calculation, MOASO = maximum of zero and the above expression. This is expressed mathematically as:
MOASO = MAX(0,Lead time - Current stock level + stock on backorder to customers - stock on order from suppliers)
The automatic calculation of stock to order in mSupply does not include MOASO: it is only described here so that you can manually compensate for it in your choice of months of stock to order if you choose to do so.
Continuing our worked example, suppose:
- Current stock levels = 5 months
- Stock on backorder to customers = 3 months
- Stock already on order from Suppliers = 2 months
Then, MOASO is calculated as:
- = MAX(0,Lead time - Current stock levels + stock on backorder to customers - stock on backorder from suppliers)
- = MAX(0,3-5+3-2)
- = MAX(0,-1)
- = 0
and Purchase order quantity is calculated as:
- = MAX(0,stock required - current stock level + stock on backorder to customers - stock on backorder from suppliers - MOASO)
- = MAX(0,21-5+3-2-0)
- = MAX(0,17)
- = 17
So 17 months worth of stock to be ordered. Compare this with the 21 months worth of stock required calculated in the previous section!
To demonstrate the impact of a stock-out, let us suppose that we have only 1 month's worth of stock on hand:
- Current stock levels = 1 month
- Stock on backorder to customers = 3 months
- Stock already on order from Suppliers = 2 months
Then, MOASO is calculated as:
- = MAX(0,Lead time - Current stock levels + stock on backorder to customers - stock on backorder from suppliers)
- = MAX(0,3-1+3-2)
- = MAX(0,3)
- = 3
and Purchase order quantity is calculated as:
- = MAX(0,stock required - current stock level + stock on backorder to customers - stock on backorder from suppliers - MOASO)
- = MAX(0,21-5+3-2-3)
- = MAX(0,14)
- = 14
So, due to the 3 month anticipated stock-out, only 14 months worth of stock are to be ordered.
Create a purchase order
Choose Supplier > New Purchase Order from the menus. The following window will be displayed:

This window allows for a number of factors to be entered.
Types of order available from the popup menu
Firstly, you have the opportunity to select the order types:
Order for all suppliers
- All items in the database will be evaluated to see if they need ordering. This is the default option
- If you have a large number of items, this may take a few minutes.
- By default, a single order will be generated. You have the option to generate a separate order for each supplier by checking the Separate order for each supplier box. In this case, mSupply will
- For each item, look to see whether a supplier has been identified as preferred on a current quote
- Create a separate order for each supplier.
- Items without a preferred quotation will all be placed together in a single order.
Order for some items only

- Either click on the Query items box, to bring up the Query Editor window, and enter the required parameters, or select one or more criteria by placing check marks as appropriate in the three boxes; use of the Query Editor is described in detail in the Reports chapter. See Using the Query Search editor. Please note that all items with the Never order this item checkbox checked will not be included in automatically generated purchase orders.
Order for one supplier
- This method is the best method to use for ordering from a particular supplier (you might have guessed that!)
- Enter the supplier code, and press the tab key. The supplier name will be filled in, or you will be given a list to choose from.
- Any items that have a quotation from that supplier that is marked as “preferred” will be evaluated to see if they need reordering.
Calculate forecast
Secondly, the forecast of future consumption will be calculated in accordance with each item's settings as documented on the 4.21. Forecasting page. The only forecasting factor that can be adjusted here is the number of months of historical consumption data that will be used to calculated historical AMC.
- The bigger the number you enter here, the more accurate mSupply is likely to be, provided that consumption has been reasonably stable over that period. Entering a large number will slow down the calculation.
- Also, beware of extending this time period to a time in the past when data is inaccurate or non-existent. This will be detrimental to the quality of the forecast.
From our worked example above, consumption has been stable at 1,000 per month for the last two years (2014 and 2015), but was significantly lower in 2013. Putting 36 months would result in a lower AMC than has been the case for 2014 and 2015.
The number of months of historical consumption data to be used to calculated historical AMC will be ignored for those items that are configured not to use AMC in the forecast - see the 4.21. Forecasting page for details.
Calculate months of stock required
The months of stock required can be entered directly into the Months of stock required field. However, as demonstrated in the Calculate Purchase Order quantities section above, a more reliable way of getting to this figure is to use the Lead time, order cycle and buffer stock parameters. Clicking on the Calculate button brings up a window allowing you to enter these values, from which mSupply will calculate the quantity required and the Expected delivery date.
Using the same figures as in our worked example above:

- Orders take three months to arrive from your supplier (Lead time = 3 months).
- You order every six months (Ordering cycle = 6 months).
- We want a buffer stock of at least 12 months when a Purchase Order arrives (Buffer stock = 12 months).
When you click on the OK button, mSupply will automatically calculate the Expected delivery date as the current date + the lead time (so, if the current date is 12th April and the lead time is 3 months, the Requested delivery date will be set to 12th July). This is important because mSupply assumes that your current stock will last until the end of the lead time and will not order stock for that period. So, even if the Months stock required is 9 months, if the lead time is 3 months (and so the Requested delivery date is set to 3 months in the future), then only 6 months of stock will be ordered. Of course, you can manually edit the Requested delivery date to alter the months of stock that are ordered.
The Requested delivery date field is set to the current day by default. If you manually enter a figure in the Months stock required field without using the Calculate button the Requested delivery date will not be automatically updated. So the order will be for the full number of months you enter in the Months stock required field.
- The Requested delivery date affects the amount of stock that is ordered because mSupply assumes that your current stock covers that period and therefore does not order for the period up to the Requested delivery date.
Other settings in the create order window
AMC adjustment for out of stock
This field gives options for adjusting the consumption calculation if items are not fully in stock over the period of interest. See the 13.04. Purchasing reports page for a full description of what the various options are and what they do.
Comment
Add a comment (note) to the order should you so wish.
Exclude transfers from usage calculations
This option is only applicable if you are running multiple (virtual) stores. If you have more than one store, this option controls whether inter-store transfers are taken into account when calculating historic consumption. The default setting is not to exclude transfers. That is, stock transfers will be included in the calculation.
Include usage for build ingredients
Selecting this option ensures that any items that were used in builds (i.e. manufactured items) will be taken into account when calculating historic consumption.
Builds can be entered with placeholder lines to reflect a projected manufacturing schedule. If the Include usage for build ingredients check box in the “new order” window is checked, the proposed order quantity for each item will be adjusted by the amount of the item that is required for all projected builds, multiplied by the “times covered” value you have entered.
Using our worked example:
- Let us say that we wish to 'build' a kit which includes 100 x Amoxycillin 250mg tabs/caps.
- We have a projected build for 200 of these kits.
- This will consume 20,000 Amoxycillin 250mg tabs/caps.
- We enter 1.5 in the times covered box
- Then the additional quantity of Amoxycillin 250mg tabs/caps that will be added to the order will be:
- = 100x200x1.5
- = 30,000 tabs/caps
- In our worked example, ignoring projected builds, 14 months usage was to be ordered.
- The AMC is 1,000 per month.
- Without taking into account projected builds, this would result in an order of 14,000 tabs/caps.
- When we add the usage of the projected builds, the amount to be ordered will be:
- =14,000+30,000
- =44,000 tabs/caps
Include items with suggested zero order quantity
If mSupply calculates that any of the lines from the supplier are not required, when this box is checked such lines will appear on the Purchase Order, the order quantity being 0.
Expiry consideration
The checkbox to Exclude stock that will expire within 3 months of projected consumption date is a new updated feature to accurately predict amount of stock that is likely to be wasted due to expiry and current consumption rate. In this current example, mSupply will only aim to distribute stock if the expiry is more than 3 months away. This updated feature is only available in mSupply v7.12 or later.
This topic is huge so it may be worth reading this topic Stock wastage prediction for ordering
Create order button
Once you have entered the details, click the Create order button. Order generation may take a couple of minutes, depending on how many items need to be evaluated. You will then be presented with the following Alert box:

Clicking on OK will close the Alert box and return you to the Navigator.
Creating a blank purchase order
Choose Supplier > New blank Purchase Order . You are presented with a blank order form, to which you can add items. This form only allows the choice of one supplier.
Name
The name field is where you choose the supplier you are ordering from (type in the first few characters of the supplier's name and press the Tab key on the keyboard, then select the right supplier from a list of those beginning with what you typed - if there's only one that matches, it will be automatically chosen for you).
Donor
If it has been set in Preferences, the Donor field will appear, and the donor details may be entered here (in the same way as entering the supplier name - type the first few characters of the donor's name and press the Tab key to select from a list of donors starting with what you typed). Setting this preference is described in Supplier Invoices.
Reference
The Reference field allows you to enter any relevant information. Anything you type in here will be carried through to the Their ref field on the Goods Received note and Supplier Invoices created from the Purchase order (but can be overridden if required). This is true whether the purchase order is created manually or calculated for you by mSupply (as described above).
Requested delivery date
The Requested delivery date (RDD = contract delivery date  ) field is for the date you have requested the supplier to deliver the items. Anything entered in this field becomes a default for all lines added to the purchase order. Such a requested delivery date can still be manually edited for each line if required.
By default the Requested delivery date will be today's date but you may edit this to request deliveries at the times you require.
This is optional unless you have turned on the preference to make it mandatory (see Purchase order preferences for details).
Colour
In the top right hand corner, there is a box where you may select a particular colour from a range of colours - in the window shown below, blue has been selected.

The purpose of this is to distinguish this particular Purchase Order in the Purchase Order list - see the example below where PO number 5 is shown in the selected colour (blue):

Adding Items to the PO
Once a supplier(Name) has been chosen you may add the item(s) you are ordering by clicking the New Line button.

Item
In the Item field type the beginning letter of the item you want and hit the Tab button. You may then choose the item from the displayed list. If you want to see the entire list of items available type @ and then Tab.
For more information on the other tabs in this window see Editing Purchase Order lines.
Please note that items that have the Never order this item checkbox checked cannot be added to a manually created purchase order.
Saving a suggested Purchase Order
Once you have chosen Items and entered the appropriate details clicking OK will return you to the Edit Purchase Order screen where you will see the line you have created. Below we have ordered 300 Packs of Chlopromazine.
![]()
The Original and Adjusted Quantities columns show the number of packs you ordered multiplied by the number of units in the pack.
Clicking OK here will save the PO with a status of 'suggested' (sg). It can be edited later and then confirmed for issue to the supplier.
Finding a purchase order
To find a recently created order choose Show Purchase Order… from the Supplier menu.
Choosing this menu item shows a window where you can enter either the number of recent orders to display or the order number (this is printed on an order if you have printed it out). If you click OK without changing any information you will be shown a list of the 15 most recent orders.

You will then be shown a window with a list of Purchase Orders. (If you entered a Purchase Order number you will be taken straight to the Purchase Order details window, bypassing the Purchase Order list, as shown above).
Buttons in the purchase order list window

New PO (purchase order)
When you click the New PO button, a Purchase Order details window is displayed . See “New Purchase Order” below.
Delete
Clicking the Delete button will delete any highlighted POs, with some exceptions - see below.
You can delete multiple Purchase Orders by highlighting more than one line. To do so, control-click (command-click on Mac) the lines you wish to highlight, and then click this button.
- Confirmed POs need to have each line deleted on the PO before the PO itself can be deleted. If you try to delete a confirmed PO and it is not empty, you will get an alert message like this:

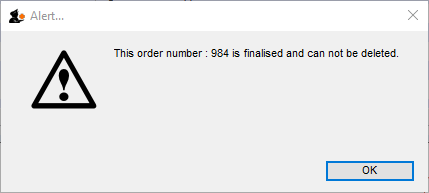
- Finalised POs can not be deleted. If you try to delete a finalised PO, you will get an alert message like this:


Report
Clicking on the Report button presents you with the quick report modifier window, from which a simple report can be constructed. This report can be viewed, saved to disk or printed.
Find
This button is very useful for quickly finding a group of Purchase Orders. when you click on the Find button, you will be presented with a window with the same functionality as if you chose the Menu item Supplier > Show Purchase Orders (above).

Order by
The Order by button allows you to sort the orders by multiple fields. Otherwise simply clicking on an individual column will also sort the order list by that column.
This allows you to print the displayed list of purchase orders. When you click on the Print button, it shows two windows. The first is the page setup for your printer, the second allows you to specify how many copies to print. The column sizes set in the list window are reflected in the printed output.
Customise
This button allows you to change the columns that are displayed in the list and what order they are displayed in:

See Working with lists for more details.
Duplicate
If you wish to duplicate any orders, highlight desired orders from list and click the “Duplicate” button.
Split
This button allows you to split the selected order between two or more suppliers, and may be used only on orders with a status of sg.
Finalise
This button allows you to finalise multiple purchase orders at once. Simply highlight a selection of purchase orders in the list and click on the button.
Only Confirmed status purchase orders will be finalised; purchase orders of any other status will be ignored. After finalisation has been carried out you will be told how many were successfully finalised and how many couldn't be updated because they weren't confirmed or because they were in use by someone else.
Editing a purchase order
After searching for a Purchase Order, double-click the order in the list you want to modify.
You will be presented with the General tab of the Edit Purchase Order window:

You can resize the order modifying window to show more lines, or to show more of the item name. To do so, drag the handle in the lower right corner to a new position.
If the entire order qualifies for a discount, either the discount percentage OR the cash value of the discount should be entered.
Split deliveries
There may be occasions when you want to arrange for split deliveries - for instance if you are placing a single order for a year's supply, but you want certain items to be delivered in, say, four consignments, at three monthly intervals. The order as generated lists the total quantity to be ordered, and you need to modify this; what you are actually doing is modifying a Purchase Order line. The procedure is described in Split deliveries in the order_menu
Editing purchase order lines
To modify an order line, double click on the line you wish to modify.
When you double-click an order line (or when you click on the New line button) you will be presented with a window allowing you to modify the item, quantity and pack size:

Information in the Edit order line window
Item
Here you can modify the item that is being supplied. To change the item, type as much of the item name as you know, then press the tab key. If only one item matches your entry, it will be filled in automatically, otherwise you will be presented with a list where you can double-click the item you wish to enter.
Number of packs
The original quantity ordered from the supplier. This information is not modifiable once you have confirmed an order.
Pack size
This is the pack size you are requesting the supplier to provide, or the pack size the supplier has said they can provide. Normally you will want the supplier to supply the item in your preferred pack size, which is what will appear here by default.
Units
The units that the pack is measured in.
Supplier item code
The Supplier's item code for this item can be entered here. This field is optional.
Price before discount
The price quoted by the supplier for one pack (of the pack size shown in the Pack size field) of this item. If you enter it here, it will be carried through onto the goods received note and then the supplier invoice. Of course it can be edited on the supplier invoice if the delivered price turns out to be different to what is entered here). Entry of this field can be made mandatory if the preference is turned on (see Purchase order preferences - unit cost (price before discount) for details).
Discount
Enter any percentage discount that applies to this order.
Extension
The price multiplied by the quantity ordered.
Volume per pack
In this field, you can define the volume per pack for the pack size chosen. If you are entering a new line the volume and pack size you have entered for the item will be used.
Note the mSupply always stores volumes as m3 (cubic metres), but you can enter a volume as millilitres (ml), litres (L) or cubic metres (m3)
Shelf location
Type the first few characters of location name or code as you know, then press the Tab key. If only one location code matches your entry, it will be filled in automatically, otherwise you will be shown a standard choice list with the option to create a new location.
Adjusted quantity
The total quantity you now expect to receive from the supplier in all consignments. You can adjust this figure so that the amount received is reduced or increased due to changes agreed with the supplier.
Refresh buttons
The refresh button (to the right of Volume per pack), on clicking, displays the default volume of the selected item if it has been set previously. Similarly the refresh button next to Shelf location displays the default location.
The refresh button in the “Pricing for this item” frame reloads the price data from a preferred quotation. The price from the most recent quote is used if there are no preferred quotations. If you have received an updated quotation after generating the original price, use this button to apply the updated details to this line.
Requested delivery date
The Requested delivery date for each PO line is inherited from the PO. It can be manually overwritten for each PO line. For example, you may have a PO with a Requested delivery date of 30 June, but you have agreed with the supplier to deliver one of the lines a month earlier, on the 31 May.
Expected delivery date
The Expected delivery date can be entered manually at the time of originally populating the PO line, but it would normally be entered once a response from the supplier has been received.
Comment
Put anything you need to have recorded for this purchase order line in here. It will print against the line when the purchase order is printed out.
Notes
Any important notes you need to make about this purchase order line should go in here. These notes will not print out when the purchase order is printed but, if you check the Show notes on Goods Received checkbox, the note will be displayed on the goods received note line and the line will be coloured red when the goods are received into mSupply - see Goods receipts for details.
Other information in the Order line details window:
On hand: This is the quantity of stock on hand of the item
On order: This is the quantity of stock in other confirmed orders awaiting delivery.
On backorder: The quantity of stock you owe to customers on backorders
Quantity received: The total quantity of this line that has already been received on this order.
Tabs in the Order line details window
Usage tab
This tab shows the usage for the last 24 months of the item being viewed. This is useful for deciding if reported usage is consistent from month to month, or is due to one or two very large supplies to clients.

Quotes tab
This tab shows quotes from suppliers for the item being viewed.
You can double-click a quote to view and/or modify details.
View quotations for the item in question. You can double-click a quotation to modify its information.
Note that the supplier of the quotation that is marked as “preferred” will be the supplier selected when using the “split” command to break a general order into orders for each supplier.
The New button allows you to add a new quotation.

Receipt history tab
This tab shows all goods receipts for the item being viewed.
If you double-click a line the associated goods receipt transaction will open in a new window.

Ledger tab
- This tab shows supplier and customer invoices for the item being viewed.

- You can display a sub-set of the transaction lines by choosing options from the drop-down lists.
- The option Received ledger for this Purchase Order line shows all supplier invoice transactions for the current Purchase Order line item. This is particularly useful if you want to see the history of prices paid for this item.
- Goods receipts are shown on the Receipt history tab.

- Unordered List ItemThe Dates drop-down list allows you to show only recent transactions….

- If you double-click a ledger line, the associated invoice will be opened in a new window
Buttons in the Edit purchase order line window
OK & Next
This button will take you to the next order line, unless you have reached the last line in the order, in which case you will be taken back to the order modifying window.
OK
Will exit the window saving changes to the current window.
Delete
If you click the Delete button, the order will be deleted and the order number will be reused for the next order.
Purchase order status explained
Purchase orders generated from a tender will start with the status “tn” (for “tender”). For more information on purchase orders from tenders see the 18.07. Analysing supplier responses and creating purchase orders page for details
- When a purchase order (PO) is first created it has status “sg” (for “suggested”)
- POs with status sg can be modified in almost every way, including changing the supplier.
- Once there are no more lines to add to a PO, it can be confirmed and sent to the supplier. A PO is confirmed by clicking on the Confirm button.
- Once a PO is confirmed, it has status “cn” (for “confirmed”) and an appropriate log entry is created.
- Confirmed POs have the order amount added to the “on order” field for each item, so that if another PO is created for the same item, this quantity already on order will be taken into account.
- Confirmed POs can have new lines added to them but only with an adjusted quantity, not an original quantity. This is to allow for amendments made by the supplier after they have received the order.
- Some restricted details of existing confirmed PO lines can be amended. Their adjusted quantity can be amended (to reflect changes made by the supplier) original quantity cannot be amended. Price and other details cannot be changed when the purchase order has been confirmed.
- Lines can be deleted from a confirmed purchase order as long as nothing has been received against them on a goods received note. If any part of a line has been received on a goods received note then mSupply will show an alert and will not allow you to delete the line.
- Once no more stock is to be received against a PO, it can be finalised. An order becomes finalised by clicking on the Finalise order tick-box at the bottom left of the PO window.
- POs that have been finalised have status “fn” (for “finalised”) and an appropriate log entry is created.
- Finalised POs can no longer be modified in any way.
- No more goods can be received against a finalised PO. The `unsupplied' lines will not appear when you look for outstanding PO lines (Supplier>Show outstanding PO lines) and the `unsupplied' quantities are ignored in any of mSupply's subsequent Stock on order calculations.
Estimated order costs explained
From version 1.7 onwards, mSupply displays a new column (Price Ext) in the order modifying window that shows the cost of the order line.
Tabs on the Edit Purchase Order window
The General tab
Refer Editing a purchase order above for details on adding lines to this.
Buttons on the General tab
New line
Click this button to add a new line to the Purchase Order. You will be shown this window:
You may enter the quantity of the item either by number of packs or by total quantity. mSupply will automatically fill in the other fields for you.
Delete lines
Select one or more lines in the Purchase Order and then click this button to delete the lines from the Purchase Order.
Update EDD
Select one or more lines in the Purchase Order and then click on the Update EDD (Estimated Date of Delivery) button to enter a new date when delivery is expected.
Info
Click the Info button to display information about the Purchase Order including the name of the initials of the Purchase Order creator and modifier - refer figure below.

Notes:
- If the Purchase Order has not been modified, then a modify date of 00/00/00 will be displayed.
- If there is no name against the Created by and Modified by entries, then this Purchase Order was created / modified on the Primary Server in a synchronised mSupply system.
Clicking the Print button will print the complete Purchase Order form for sending to a supplier. Note that you should fill in relevant details on the Details tab before printing the order.
Confirm
See the section above on “order status” for an explanation. Orders should be confirmed once the order has been placed with the supplier.
Check boxes on the General tab
Locked
When the locked check box is checked, the Purchase Order cannot be processed to the next status (confirmed or finalized) - refer Order Status explained.
Auto calc usage
When the Auto calc usage check box is checked, each time you modify an item line, the usage for that line will be calculated. This is slower, but gives useful information upon which to base your ordering . Note that this option can also be turned on within the order line modifying window.
Print my signature
When the Print my signature check-box is checked, the user's signature will be printed on the Purchase Order if it has been loaded - refer Managing users.
Details tab
This tab allows you to record a range of information that will be entered on the Purchase Order when it is sent to the supplier.

PO sent date
Enter the date the Purchase Order was sent to the supplier. When you print a Purchase Order mSupply will offer to fill in this date for you, but you should modify it if necessary to reflect the exact date.
Contract signed date, Advance paid and Received at port fields
Enter dates in these fields as appropriate. They are all optional unless any of them are made compulsory by turning on the appropriate preferences on the Purchase orders 2 tab of the File > Preferences… menu item. See Purchase order preferences for more details.
Minimum expiry date field
This field is only turned on if the Items received from a purchase order must be within a minimum expiry date store preference is turned on (see the 26.07. Virtual stores page for details on how to turn it on).
If a valid date is entered in this field, stock received on a goods received note must have an expiry date that is later than this date. Otherwise, you will not be able to finalise the goods received note. Please note, this setting does not affect supplier invoices.
Heading message
Any text you enter here (e.g. Urgent or Supplementary order for PO 183) will be printed in a large font across the top of the Purchase Order so your supplier will (or at least should) notice the message.
Expected delivery
Enter the date you expect the order to arrive
Goods received date
Fill in the actual delivery date. Leave the date blank for Purchase Orders that have not been delivered
Invoice received
Enter the date when you received the invoice from the supplier
Hint: you can find all orders that have not had an invoice supplied by querying on this field.
Comment
You can enter any appropriate comments here.
Supplier's agent
Enter the name of the intermediary party here - if there is one.
Delivery method
Enter a delivery method (eg “Air”, “Courier” …)
Authorizing officers
Enter the names of the people who are required to sign off the Purchase Order. These names are printed on the Purchase Order.
Freight conditions
Enter the delivery address, shipping marks, etc. here.
Additional instructions
Enter any further information you wish to appear on the Purchase Order.
Commissions and charges fields
Fill in any relevant charges agreed between you and the supplier. Note that any charges that are zero will be skipped when printing the Purchase Order.
Ad hoc items tab
Here you can display a list of items that have been assigned to the supplier, but not yet added to a Purchase Order.

Click on a line, then click the “Add selected line to order” button to add a line to the current Purchase Order.
Warning: if you delete a line from a Purchase Order it will not have its status updated automatically- it is your job to do so using the Items > Manage Ad Hoc items menu.
New ad hoc line button
Here you can add an ad hoc item “on-the-fly”. This is useful if you want to process a Purchase Order for a single Ad Hoc item that has not yet been entered into mSupply.
Note that the Items > Manage Ad Hoc items menu is the normal route to add, modify and delete Ad Hoc items.
Goods received tab
This is a record of the receipt of the order, and, where multiple deliveries have been made, records each instance.

Supplier invoices tab
This tab displays a list of invoices related to this Purchase Order.

There are two types of invoice that are created directly from Purchase Orders:
- Supplier invoices are created each time an associated Goods Received Note is processed.
- Customer invoices are created when a supplier invoice is created that contains Ad Hoc items.
Log tab
This tab records a log of actions that have been performed on this purchase order. The below image shows that the Purchase Order has been confirmed for sending to the supplier and printed by the user Margaret at the date and times shown:

Location tab
This tab displays the locations of the items received, if this feature is used. Where details of the volume of available space in any location has been entered, and where details of the area/volume of item pack has also been entered, the remaining available space will be displayed.
Lines will also be coloured red/orange/green to indicate greater than 100%, 90 to 100% or less than 90% of space used. showing which lines are likely to cause space problems on receipt.

Custom data tab

This tab contains all the custom fields created for the purchase order table in the preferences. See the 16.11. Custom fields page for details on how they are set up.
You can enter any data in the fields as appropriate. When you click on the OK or OK & Next button the information in the fields is saved.
Documents tab

This tab allows you to upload any documents you wish to the purchase order. The table shows you the documents already uploaded.
To add a document, click on the Add button. A new window will open for you to select the file from your computer. Double-click on the file or click on it and click on the Open button to add it to the purchase order.
To delete a document from the purchase order, click on the file in the table to select it and click on the Remove button.
To view a file or download it, double-click on it in the list.
Order menu
When the order modifying window is being shown, an extra menu is added to the menu bar:

Copy order to clipboard
Copies the order details to the clipboard, so you can paste it into an email or text document.
Export html...
If you want to produce an order which can be saved as a file in html format, use this option. . If you have Excel installed, the report will open in Excel. Note that if you want to keep the Excel file, you should choose File > Save as.. in Excel and choose a location.
Prints the order. You will be shown the standard printing dialog boxes.
Note that if Show all lines is selected, the entire order is printed; if Show incomplete lines is selected, the printout lists only lines which have either not been supplied at all or require a balance to complete the order.
Split
Splits the order into a number of smaller orders based on the preferred supplier for each line. The preferred supplier is the quotation that is marked as “preferred” for that item. To view and modify quotations you can double-click the order line then chose “quotes” from the “show” menu. All items that do not have a quotation marked as “preferred” will be put into a separate order.
Email in body
The order will be turned into an e-mail and placed in the queue so that it is sent next time you send e-mails. You will be warned if you have not entered an e-mail address for the supplier.
The e-mail will be formatted as follows:

To check the email before sending it, choose Special > show l_formatemails , then double-click the email to modify it. Note that to make the columns line up properly, you will have to click the <|-|> button to view the text in a fixed-width font.
Email HTML attachment...
The order will be turned into an HTML attachment, and attached to a new email that is then placed in the queue so that it is sent next time you send e-mails. You will be warned if you have not entered an e-mail address for the supplier. The attachment will be stored in the export folder you have nominated in the Preferences. (For multi-user mSupply, the export folder is set as the folder “C:\mSupply\mSupply client\Export” (on the assumption that you have selected the default install location for mSupply).
Email PDF
Choosing this item will cause mSupply to generate a PDF file, create an email and attach the PDF file to the email.
Note that you must use the PDF xChange PDF driver installed on the computer generating the email for this to work. The driver currently costs US$50, and is available from Sustainable Solutions info@ss.org.np
The PDF that is created is stored in the mSupply data file, so you can create a PDF attachment on one computer and send it from a different computer without problems.
Update quotes using this order
This command allows you to check that quotation data is up to date based on actual supplied prices.
Each order line will be evaluated, and if a quotation does not exist, one will be created. If a quotation does exist and the price you have paid in the order and the price stored for your quotation are different, you will be shown a window to compare prices, and you can decide whether to keep the existing quotation or update it.

Note that you need to have your user permissions “Can add quotations” and/or “Can modify quotations” set before this command is available.
Split deliveries
Creating split or multiple deliveries will now be described using the following example.
It is important to note that the Purchase Order should not be finalised before this procedure is performed, as a finalised order may not be modified or altered in any way.
A store is placing an order for Normal Saline and, having followed the normal procedures, mSupply has created the Purchase Order displayed: below.

The store does not have the storage capacity to hold 1250 packs of Normal Saline, so the supply of this item needs to be made in multiple deliveries; it is decided that 500 be requested for delivery at the beginning of January, followed by 250 at the beginning of each of the months of April, July and October - i.e. at three monthly intervals.
The Purchase Order is modified as follows:
- Click on New line, and add the item
Normal Saline - In the Number of packs field, enter
500 - In the Requested Delivery date enter
1/1/17 - Click OK & Next
- In the Number of packs field, enter
250 - In the Requested Delivery date enter
1/4/17 - Click OK & Next
- In the Number of packs field, enter
250 - In the Requested Delivery date enter
1/7/17 - Click OK & Next
Repeat the last two steps, but enter 1/10/17 in the Requested Delivery date field for the final delivery in October.
To complete the process, delete the line calling for 1250 units on 1/1/17.
The Purchase Order should now look like this:

You won't see the different requested dates on this screen. Expected dates are generated upon feedback from the supplier or can be entered manually.
This feature enables mSupply to take future deliveries into its reckoning if, for example, an additional order for Normal Saline was placed in mid June, and a delivery of 2,500 had already been arranged for 1 July.'
Authorising purchase orders
If required, it is possible to turn on authorisation of purchase orders. See Authorisation for details.
Purchase order categories
Purchase order categories are useful for separating up your purchase orders when reporting. For details about setting them up and assigning them to purchase orders, see Purchase order categories.
| Previous: 6. Purchasing | | Next: 6.02. Managing purchase orders |