This is an old revision of the document!
23.06. Backup
If your data is important, then data backups need to happen, because things can go wrong (power failures, disk failures, ransomware, etc.)
- You can perform a backup manually and/or automatically. Automatic backups should be scheduled to run frequently (every day), manual backups should be done before updates or other potentially risky changes.
- It is not necessary to quit the database before performing a backup.
While a backup is running, all user activity will be paused until the backup is complete. They won't even be able to log out of mSupply. So:
- Make sure you only run a manual backup when users are not using mSupply.
- Make sure you configure your automatic backups to run at a time when the system is not busy e.g. lunch time, the end of work or, if your system will stay up 24/7, the middle of the night.
- The Backup function works in both single user and client / server (multi-user) environments. The main differences are that in client / server (multi-user) environments:
- The configuration of the Primary backup is done on the Server computer.
- The backup can be configured to include other files, such as the Index and log files, which is very handy when providing support.
- The backup takes place on the server. A progress window will appear on the client to show how the backup is proceeding.
- Restoration from a backup must be run from the server computer.
Running a backup manually
Choose File > Backup… to run a manual backup of your data. The backup will be carried out according to the configuration of the Preferences > Backup tab.
Backup: best practice
We recommend you set up your mSupply backups in the following manner
Disk configuration
If your machine has the capability (e.g. it is a server with multiple storage volumes), then there is additional data security in configuring a RAID array.
Use RAID 1
- RAID 1 is two disks mirrored, so data is written to each disk
- Advantages
- if one disk fails you continue work from the other disk
- if the RAID controller fails, you can directly connect one disk and continue work.
There are other forms of RAID, but their advantages are outweighed by their disadvantages, considering that even a large mSupply database will be of the order of 10 GB in size.
Use a hot spare
This is a spare disk that the RAID controller will use if a disk in the RAID set fails.
Add another single disk to receive backup data
This disk is not part of the RAID
Configure a secondary backup location in mSupply
- Configured a secondary backup to a destination on the same machine, or elsewhere on the network that will be synced off-site (e.g. Dropbox, OneDrive, Google Drive, etc.) - refer Preferences > Backup 2 tab.
Configure off-site backup
Use Spideroak™ or Dropbox™ to backup your secondary location to their internet servers.
If needed configure an off-site computer to also synchronise with the backup service provider so you have an off-site copy as well as the “cloud” copy.
Mirrored servers
We have the technology to provide mirrored servers when very high availability is required. Contact us if interested. A charge will apply for implementation
Restoring your data
Choosing this item allows you to choose a backup data file, uncompress it and start using it as your main data file.
- Log in to msupply with an old data file or by creating a new data file and click menu File > Restore…
- Locate your backup file in the Open dialog that appears. Your backup file has file extension
.4BK, eg.mSupply.4BK. Hit OK. - Clicking on the small red down arrow next to the data file name will show the current destination location to where the data file will be restored. You are being prompted for a folder where the data file will be restored to. Change the destination location of the data file by clicking on the … button. Once you are happy with the destination location, hit the Restore button.
- After the file is restored, the file location is then displayed using your computer's default file manager. You can close this window.
- Now go back into mSupply and click menu File > Open data file…
- Locate the newly restored data file in the Open dialog that appears. Your data file has file extension
.4dd, eg.mSupply.4dd. - Select the data file and hit the OK button.
- You may be prompted for a log file. Click on the Create button. Select the suggested location, which is the same as your new data file location, and click on the Save button.
- You will be prompted to do a backup. It is not necessary to do this at this stage. It will take a few moments to open this new data file, particularly if it is a large data file.
- mSupply should open your restored data file and you should be presented with the log in screen to the new data file.
In client/server usage this command will have no effect.
Be very careful about restoring. We suggest you consult Sustainable Solutions before attempting a restore.
Setting up backup and a log file for single user mSupply
If you are using a synchronisation system with mSupply it's very important that you don't lose any data on the remote site. To ensure that power failures (or a dead battery on a laptop) don't cause mSupply to quit unexpectedly and therefore to lose data, you should configure mSupply to use a log file.
Use a standard place to store backups
We suggest that you store:
- mSupply data in
C:/mSupply_data/ - Backups in
C:/mSupply_backups/ - Log file in
C:/mSupply_backups/
Primary backups
We recommend that you configure mSupply to
- Use the single disk as the primary backup location.
- The Primary backup should be set to be carried out nightly.
- Use a log (journal) file. A log file records each database action as it happens. In the event of a power failure or other adverse event, all changes can be recovered from the log file.
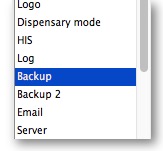
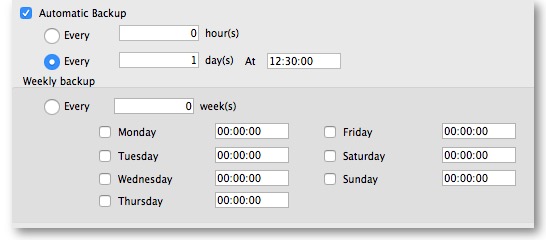
You can configure primary backups to run on a schedule that you set. To do this go to Admin > Preferences and select Backup from the left panel. You must have an existing backup to use these features (see running_a_backup).
Select Automatic Backup and schedule by hour(s), day(s) or week(s) as indicated.
Choose your backup folder and select Use log file. 
You will be prompted to specify the location of your log file.
Press Continue
When all settings are correct, press OK to save.
| Previous: 25.05. Web browser access via TSPlus | | Next: 25.07. Updating mSupply |


