4.19. Inventory adjustments
Inventory adjustments allow you to increase or decrease the stock of an item that is recorded in mSupply®. You will need to adjust the inventory if:
- Stock is discarded (due to damage or expiry)
- Stock has been stolen.
- You find some stock on the shelf that is not in mSupply and you don't know where it came from.
DO NOT use inventory adjustments for distributing stock to customers or patients or receiving stock from suppliers. Use customer invoices or prescriptions and supplier invoices for that. Otherwise, you will lose your audit trail and reporting on transactions will be difficult.
Inventory adjustments are used to deal with a problem or fix a mistake, not in the general process of entering stock transactions into mSupply. Ideally, you'll never have to use them but we know we don't live in an ideal world!
If you are doing a stocktake, it's better to use the stocktake module described here as it will create the needed inventory adjustments automatically.
Viewing inventory adjustments
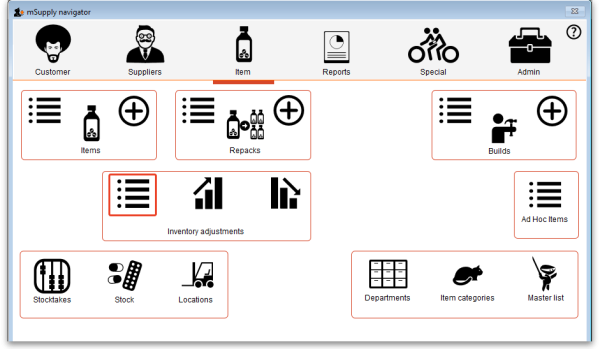
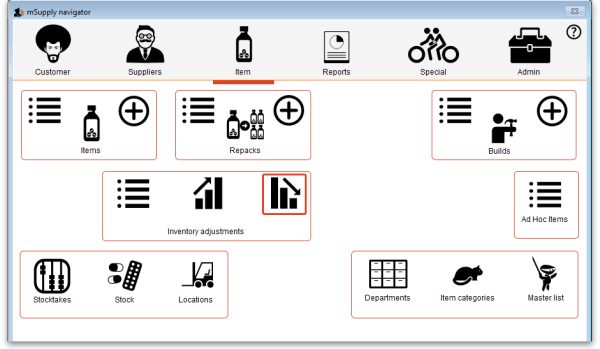
Choose Items > Show inventory adjustments or click on the Show inventory adjustment icon on the Item tab of the Navigator:
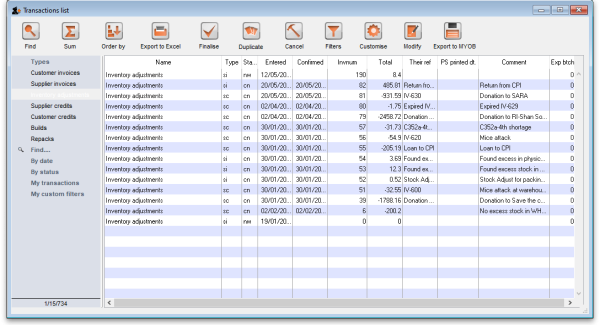
This will open the usual transaction filter window for you to choose which inventory adjustments you want to see. Make your filter selections (or leave them alone to see the 15 most recent inventory adjustments by default) and click on the OK button to see the list of matching inventory adjustments:
You can double-click on any inventory adjustment in the list to view or edit it.
Note that si type inventory adjustments add stock and sc types reduce stock (si means “supplier invoice” and sc means “supplier credit”).
Add stock
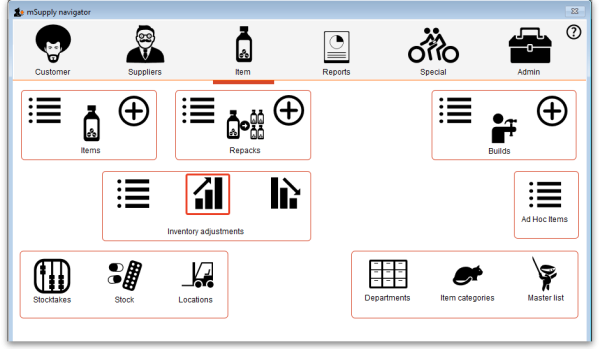
Choose Item > Inventory adjust- add stock to create an inventory adjustment to add some stock into mSupply or click on the Inventory adjustment (add stock) icon on the Item tab of the Navigator:
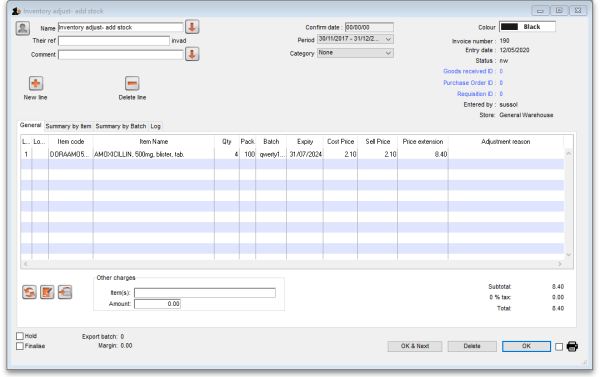
The Inventory adjustment (add stock) window will open:
This transaction is almost exactly the same as a supplier invoice and you enter data in exactly the same way (see 7.01. Supplier invoices for details), except:
- The name (Inventory adjust- add stock) is filled in automatically for you and cannot be changed.
- There is an additional Adjustment reason column (see below for details).
Because an inventory adjustment represents a correction for some problem or other incident, we strongly recommend that you enter a comment in the Comment field of each inventory adjustment you create, whether to add or reduce stock, so that the reason for the correction is not forgotten.
Use the New line button to add a line to the transaction (and the Delete line button to remove them), just as you would on a supplier invoice.
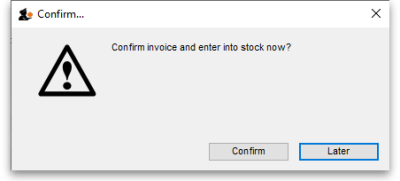
When you have finished adding lines to the inventory adjustment, click on the OK button. You will be asked to confirm what you want to do:
If you've finished with the inventory adjustment and want to enter the lines into stock now, click on the Confirm button. If you don't want to enter it into stock now (because you want to add more lines later, for example) then click on the Later button.
Adjustment reasons
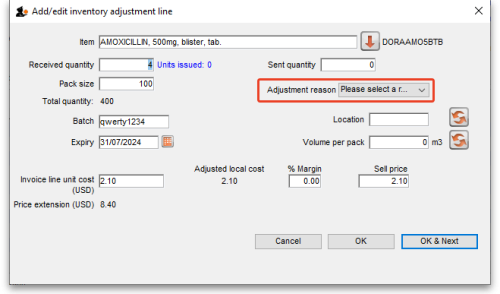
If you have added any active Positive inventory adjustment reasons on the Options tab of File > Preferences (see 16.10. Options (standard reasons)) then, when adding a line to the inventory adjustment (by clicking on the New line button), an Adjustment reason drop down list is displayed and you must select one of the reasons in the list before you can save the line:
Note that existing lines that do not have a reason selected can be left with no reason seleted if you click the Cancel button on this window.
Vaccines
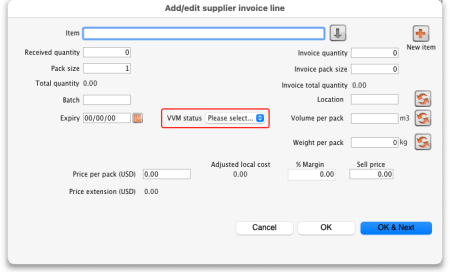
If the Able to specify VVM status when receiving items store preference is turned on (see the 26.07. Virtual stores page for details) then an additional VVM status field will be displayed on the supplier invoice line entry/edit window as shown here:
The VVM status field is populated with the statuses set up in the system. See the 20.01. Vaccine Vial Monitoring (VVM) page for details on how to do that.
If you are editing an existing line on the inventory adjustment then the VVM status field will display the status selected for the invoice line or Please select… if it doesn't have one set already.
Reduce stock
Choose Item > Inventory adjust- reduce stock to create an inventory adjustment to remove some stock into mSupply or click on the Inventory adjustment (reduce stock) icon on the Item tab of the Navigator:
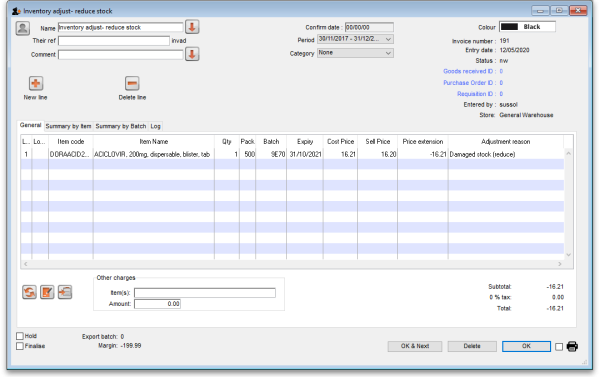
The Inventory adjustment (reduce stock) window will open:
This transaction is almost exactly the same as a customer invoice and you enter data in exactly the same way (see 8.01. Issuing goods to a customer (customer invoices) for details), except:
- The name (Inventory adjust- reduce stock) is filled in automatically for you and cannot be changed.
- There is an additional Adjustment reason column (see below for details).
Use the New line button to add a line to the transaction (and the Delete line button to remove them), just as you would on a customer invoice.
When you have finished adding lines to the inventory adjustment, click on the OK button. You will not be asked to confirm what you want to do, the inventory adjustment will be confirmed and the lines will immediately be removed from stock.
Adjustment reasons
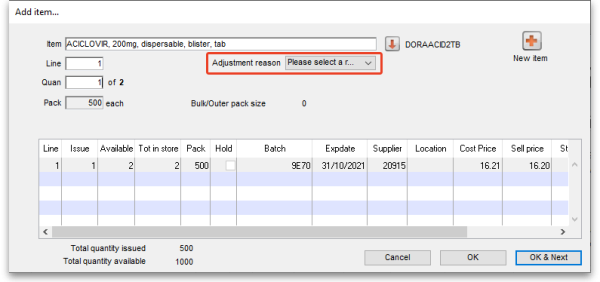
If you have added any active Negative inventory adjustment reasons on the Options tab of File > Preferences (see 16.10. Options (standard reasons)) then, when adding a line to the inventory adjustment (by clicking on the New line button), an Adjustment reason drop down list is displayed and you must select one of the reasons in the list before you can save the line:
Note that existing lines that do not have a reason selected can be left with no reason seleted if you click the Cancel button on this window.
| Previous: 4.17. Stocktakes | | Next: 4.20. Units |
