8.05. Transferring goods to another store
This feature is available only to those users who are managing more than one store in their mSupply system e.g. a central warehouse that supplies district or regional warehouses, or a general store for holding stock and you supply a dispensary with their day to day needs - see Virtual stores.
- If you are transferring goods to the receiving store in response to an Internal Order or Purchase Order from that store, DO NOT Create a new Customer Invoice as described at the top of this section. Instead process the Response requisitions.
- Remember to take care to Finalise the Customer Invoice.
Create a Customer Invoice
If you're not able to perform a transfer, there are several possible reasons:
- The customer you're trying to use is not set up as a store in your copy of mSupply.
- You don't have the user permission to perform transfers.
- The store you're transferring to is not visible to the store you're logged into. To make it visible choose Special > Show stores and double-click the store you want to transfer to, then on the preferences tab click the View name button and set the visibility on the Stores tab.
This procedure follows closely the steps as described under Issuing Goods to a Customer (Customer Invoices); to avoid unnecessary repetition, please make sure you are familiar with that procedure.
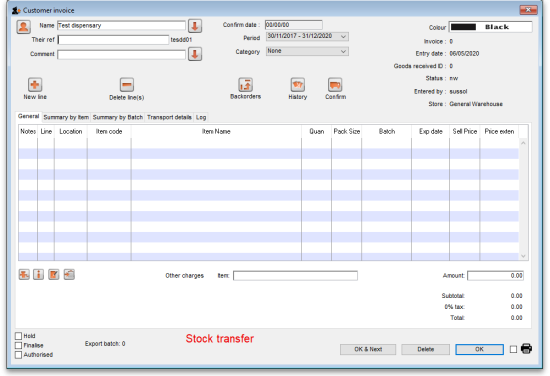
You must be logged in to the issuing store (the store you're transferring stock from); the 'customer' in this process is the receiving store. So, you create a new invoice from the Customer menu, and in the Name field you put the name of the receiving store in the normal way (i.e. type the first few letters of the store's name, press the Tab key on the keyboard, and select the store in red colored text from the list displayed)
As soon as you select the receiving store name a red Stock transfer label confirms that you are creating a stock transfer:
The procedure from this point is identical to that described under Issuing Goods to a Customer (Customer Invoices).
Need to finalise Customer Invoice
It is necessary to finalise the transfer when you have finished entering the items to be transferred. Only after finalising the transfer will the new invoice appear on the system, as a supplier invoice in the receiving store, linked to the customer invoice in the issuing store. The status of the supplier invoice in the receiving store will either be confirmed and on hold or finalised, according to the setting you have for the “For stock transfers, the supplier invoice in the receiving store should be…” store preference. See here for details.
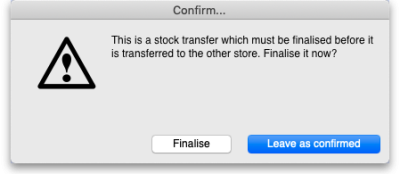
If you confirm the stock transfer but do not finalise it, you will be shown a warning if you try to close it, just in case you have forgotten the finalise step:
 If you did forget to finalise it then click on the Finalise button and mSupply will finalise the invoice for you (and create a supplier invoice in the receiving store). If you want to keep the invoice at confirmed status (and not create the supplier invoice in the receiving store) then click on the Leave as confirmed button.
Visibility of items in both stores
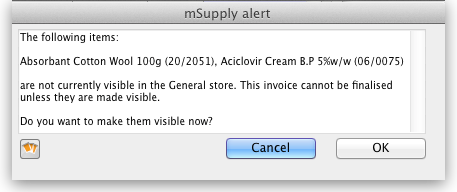
If the item(s) you are transferring are not visible in the receiving store the following message will appear:
 Check whether there is any reason for the item(s) in question not to be visible in the destination store. If there is no reason to prevent visibility click OK.
If you are running a syncing system (see Remote Synchronisation) and the receiving store is active on another site, the receiving site will send back a confirmation log message to confirm that it has received the transfer. This will show up in the Log tab of the sending customer invoice.
On a syncing system, the sending site does not have access to the item visibility records in the receiving store if it is a transfer store, so it cannot do the item visibility check above. In this case, the primary server will automatically make the items visible in the receiving store when it receives the transfer.
Reversal of stock transfer
Should a reversal of a stock transfer be necessary, this may be achieved by the operator at the sending store, and only if the receiving store has not issued any of the transferred stock.
Receiving the goods (customer store)
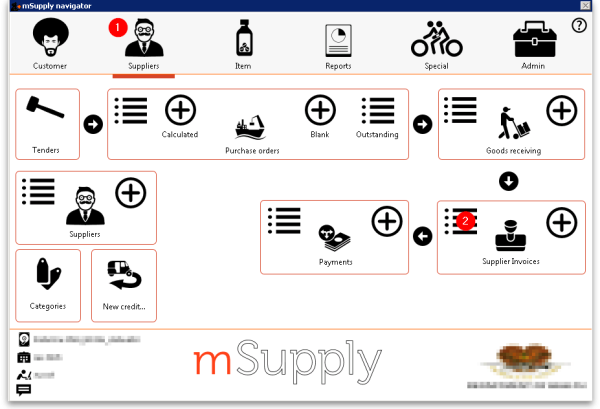
When a Customer Invoice (CI) is created and finalised (see above!) in a Supplying store, a Supplier Invoice (SI) will be automatically generated in the customer store. You can view the customer invoice via the Suppliers tab on the Navigator or via the Supplier > Show invoices… menu item:
- Double-click on any supplier invoice in the list to open it.
- On the supplier invoice, the lines from the customer invoice will have been filled in automatically.
For instructions on processing the stock from the Supplier Invoice in to your store, refer Processing supplier invoices
| Previous: 8.04. Electronic invoices | | Next: 8.06. Box management |

