19.02. mSupply web server
About the mSupply web server
When mSupply's web server is running, it allows you to access mSupply data from any networked computer that has a web browser.
Security warning: We have had thousands of uses of our mSupply web server on the public internet since 2005. To date we have not had a security problem reported. However, we recommend you use SSL and a proper SSL certificate if your mSupply web server is publicly accessible. mSupply fully supports SSL. Contact us for certificate installation instructions.
The advantages of accessing mSupply in this way are:
- It's easy. Most people are familiar with using a web browser.
- It's low maintenance. You do not need to install any client software.
- It's cost effective. Once you have purchased a web server licence an unlimited number of people can connect.
- it's secure. The web server supports access using SSL, the standard for securing internet connections, stopping any malicious snooping of passwords or data.
- It allows customer access to information. The web interface built into mSupply can easily be customised to allow clients, supplier or other interested parties to have restricted access to the mSupply information you wish to show them. We are also able to include order submission by customers, making it easy for them to place small orders, and have real time information on stock availability.
- You can access mSupply from anywhere on the internet. Once we supply you with a password protected version of the web interface, you can access mSupply data from any internet connected computer.
- It's fast over low bandwith connections. The mSupply web server allows you to provide access to mSupply from locations with only dial-up access.
mSupply web server functionality is being continually expanded according to client requirements. We welcome suggestions for more features.
Turning on the web server
The mSupply web server feature is not included in the regular mSupply licence; in order to use this function, an additional license is required. On application to Sustainable Solutions this can easily and swiftly be arranged.
For practice purposes, an evaluation version is available on our server - should you wish to access this, please contact us for instructions.
Choose File > Preferences, then click on “Web server” in the list.

You can choose to start the web server or have it start automatically when mSupply starts (see General preferences for more details on these preferences).
Technical note: By default mSupply is set to use port 8080. This is because the default port number for http access (80) on unix systems running mSupply can only be used by applications that have root privileges, and we don't want you to have to run mSupply as root! If this is a problem, we can supply you with an application that redirects traffic on port 80 to port 8080.
Setting up mSupply desktop users for mSupply Mobile (browser)
Your mSupply server needs to be set up for mSupply Mobile (browser) use. Follow these simple steps to get started:
- Create a virtual store to hold the remote facility's stock.
- Create new users for the store or give some existing users permission to login to it. Note: Make sure that only the users who will use the mobile interface have permission to login to this store.
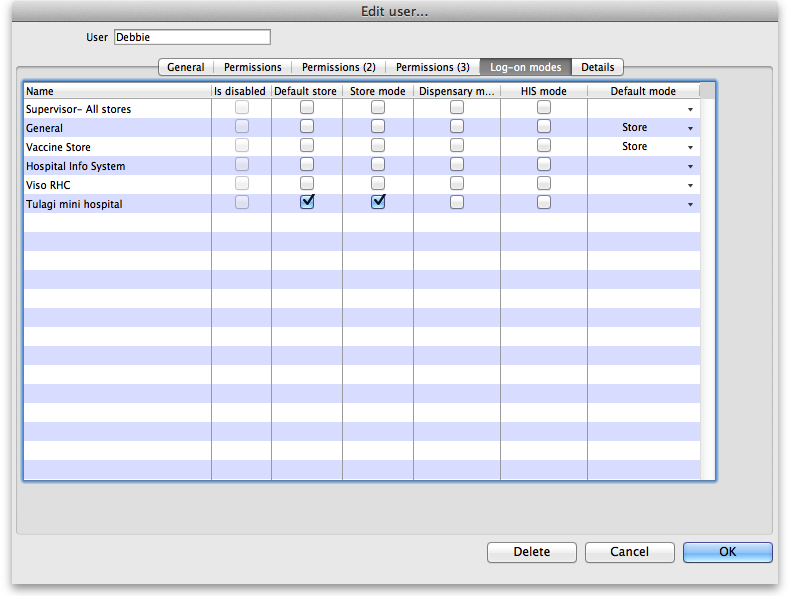
- Note that the important setting for mobile access is the “Default store.” You'll need to turn on “store mode” for the store too, else you can't turn on “Default store.” For example, here's user Debbie set up so that when she logs into mSupply mobile she'll be logged into Tulagi Mini Hospital:
- Note that other user permissions (on the Permissions, Permissions(2) and Permissions(3) tabs) only apply to mSupply Desktop Users, not to mSupply Mobile Users.
- For the steps below, refer to Virtual stores for detailed instructions
- Make only the items which the remote facility will use visible in the new store.
- Make only the names which the remote facility will use visible in the new store.
- Ensure the store can receive transfers from the store that will be supplying it (This is done by ensuring that the receiving store's name record is visible to the sending store)
- Ensure “Pack to one” is turned on for visible items in each store.

Now you're ready - have fun!
| Previous: 19.01. Introduction to web interfaces | | Next: 19.03. mSupply customer web interface |