This is an old revision of the document!
10.12. Patient type and Ward setup
Patient types and Wards are two fields that are enterable on a prescription. But before they will appear on a prescription for display, you must set them up. Have no fear, the instructions are here 
Patient types
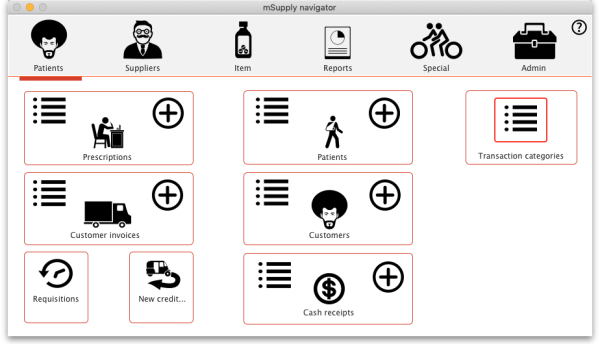
Patient types are actually transaction categories. To set them up, choose Special > Transaction categories… from the menus or click on the Transaction categories icon on the Patient, Customer or Special tab of the Navigator:
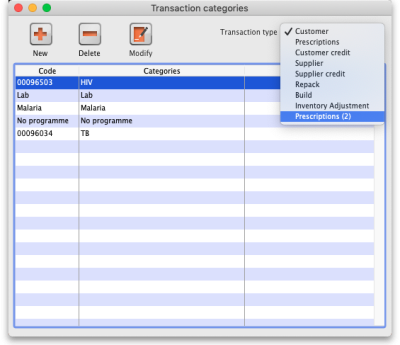
On the Transaction categories window that opens, click on the Transaction type drop down list and select Prescriptions (2):
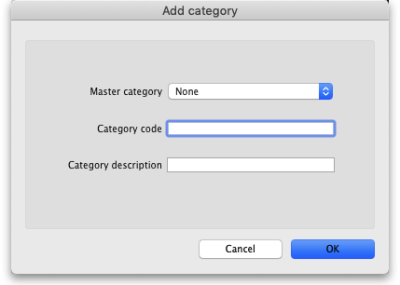
Click on the New button to add one or double-click one already in the list to edit it. This window opens (populated with the current details of the category if you're editing one, empty if you're creating a new one):
- Master category: You can ignore this, it isn't used for patient types.
- Category code: Enter a short code for each patient type. If you are wanting to enter wards for patients then you need to add an Inpatient category with a code of IP and a Discharge category with code DI.
- Description: The name of the category as it will be seen throughout mSupply (if you are using wards then two of these will be Inpatient and Discharge).
Click on the OK button to save your changes.
Wards
If you want so select the patient's ward on a prescription you must first turn on the Allow users to select ward on prescriptions preference. See the 15.01. General preferences page for details on that.
In mSupply, wards are names with a tag of Ward.
For details on creating names, see the page.
For details on creating name tags, see the 5.05. Name tags page.
For details on assigning the Ward tag you created to the ward names see the Tags tab section of the #tags_tab page.
| Previous: 10.11. Printer setup for Remote Desktop Client | | Next: 11. Payments and Receipts |


