This is an old revision of the document!
8.07. Stock control methods for your customers (requisitions)
Stock supply philosophy
mSupply is designed for situations such as a central supply facility within a country or region, or within a hospital where the supply of stock to customers is controlled by the supplying facility. That is, supply of stock to customers is managed by the supplying store.
Regardless of who controls the supply of stock, it needs to be made principally on the basis of information about the customer's anticipated usage. mSupply has several ways of arriving at quantities to be supplied to customers, in rough order of sophistication:
- If there is NO information from the customer about item usage (AMC) or stock levels, then the supplying store can only 'push' stock to the customer by Creating a new Customer Invoice with quantities derived from some other sources.
- If the customer has sent a manual (paper or email) 'order' or 'requisition' for stock, containing just the quantities of each item required, then the supplying store is informed by these quantities when preparing the Customer Invoice. It is often helpful to keep a record of the quantities that the customer has ordered, especially if the issued quantities are different to what was requested. To achieve this, a New customer requisition can be created, recording these requested quantities. The Customer Invoice can be created easily from this requisition.
- The imprest method is common in hospitals where the customer can provide the current Stock on Hand (SoH) and there is a long and relatively stable track record of item consumption, from which 'Imprest values' have been calculated manually, outside of mSupply.
- The stock history method is similar to the imprest method, but lets mSupply calculate the 'imprest values' automatically.
- Response requisitions is more accurate method for cases where the customer's SOH and AMC for each item are known. This should be the case if the customer is an mSupply store.
- Full Entry of Request & Requisition Forms by the Supplying Facility is an enhancement to the standard response requisition method. This feature was developed for Côte d'Ivoire but can be activated for any country on request.
With the exception of the 'Push' method, collectively, these are grouped together as different types of requisition. When editing an item, you can view all types of requisition records for that item. More information is available on the requisitions page.
- If the customer is an mSupply store which is being operated correctly (issuance is being recorded, and so mSupply records of the customer's AMC and SOH for each item are realistic), then Response requisitions is the appropriate method to use.
- If the customer is not an mSupply store, then the customer's SOH and AMC are not populated through mSupply and a New customer requisition is appropriate.
- If the customer is an mSupply store but is not being operated correctly (issuance is not being recorded), then the customer's SOH and AMC for each item are likely unrealistic. In these cases, you can still process any Response requisitions, but be extremely cautious about the customer's SOH and AMC values. If they have not submitted an internal order to create the Response requisition, then it is generally appropriate to use one of the more basic requisition types: New customer requisition, (The imprest method or The stock history method).
It is possible for all of these methods to be done by programme if required - see the 4.05. Programs page for details.
Defining the list of items to be included in the re-supply
The lists of items that a customer can receive can be dfined by master lists.
See the 4.04. Item master lists page for information on managing master lists and see the Assigning a list to a customer section for how to assign a master list to a customer.
Viewing existing requisitions
Choose Customer > Show requisitions… from the menus or click on the Requisitions icon on the Customers tab of the Navigator:

This window will open, showing you a list of the requisitions already in the system. The Status column shows you know the Requisition status. The Type column shows the Requisition type:

Columns in the table:
- ID: Unique identifier of the requisition.
- Name: The name of the customer the requisition has been entered for.
- Program: If the program module has been enabled.
- Period: This is displayed as part of the program module.
- Date entered: The date the requisition was first saved in mSupply.
- Requisition date: The date the requisition as given by the customer.
- Status: The status of the requisition (sg, cn, or fn nomally, web requisitions can also be wf or wp).
- Type: The type of requisition; sh for customer stock history, im for imprest or response for a response requisition.
* Authorisation: If the Authorisation module is used, then we see option like none, pending or finally authorised.
- Comment: The comment entered on the requisition.
Buttons and fields in the window:
- Show drop down list: Use the Show drop down list to filter the requisitions by status.
- Search field: If the list of requisitions is too long to find a particular requisition you are interested in then you can type something in the Search field. If you type anything in the Search field, only requisitions with a customer name, requisition number, program or comment that contain what you typed will be displayed.
- New XX buttons: To create a new requisition of a particular type (see below), click on the appropriate
 button - a new, blank window will open ready for you to enter the requisition.
 - Delete button: To delete a requisition, click on it in the list to select it then click on the Delete button. You will be asked to confirm the deletion before it is carried out. Please note: You cannot delete a requisition if a customer invoice has been created from it - mSupply will tell you if this is the case. You can still delete the requisition but you must delete the customer invoice first.
- Finalise button: This button allows you to finalise multiple requisitions at once. Simply highlight a selection of requisitions in the list and click on the button. Only Confirmed status requisitions will be finalised; requisitions of any other status will be ignored. After finalisation has been carried out you will be told how many were successfully finalised and how many couldn't be updated because they weren't confirmed or because they were in use by someone else.
To edit a particular requisition, double-click on it in the list. A window will open, populated with the requisition's details; the window will be different depending on the type of requisition (see sections below).
With the passage of time, entries on the list will rapidly grow in number, and so mSupply allows you to apply a filter selecting exactly what will be displayed. The default display is for Suggested, as these are most likely the ones you will be processing; other options include All, Confirmed, Web entries to be processed - this covers histories submitted via the web customer interface - and Entered today
New customer requisition
While viewing existing requisitions, click the New customer requisition button to create a new one. This will open a new 'manual' customer requisition, which is the most basic type. See an example here:
When you click the new New customer requisition button you may be presented with a choice of whether to process a Program order or a General order. You will only get this choice if your mSupply system has been configured to use 4.05. Programs. The rest of this page will discuss General requisitions, which is what you will experience when you choose to process a General order.

mSupply will present a requisition window in which you will need to choose your customer. You select a customer in the usual way. Below a customer has been chosen.

To add items that the customer has ordered, you can either manually add one item at a time or you can add a list of items from the master list.

When a single or multiple master list are chosen, the requisition is populated by the items that is part of the chosen master list.

- Enter/update the customer Name in the same way as a customer stock history (i.e. enter the first key characters and hit the Tab key to find matches), but note that changing the customer will invalidate any other data that you've already entered.
- If necessary, update the Requisition date, Order received and Required date - these will default to the current date.
- Select a Category if required - see Requisition categories for setting these up.
- Use either the New line button to manually add a single item, or Add from master list to add items from a master list.
When you click on the Add from master list button you will see a list of all the master lists assigned to your store and your customer (see the 4.04. Item master lists page for details on master lists and how to assign them). Whichever master lists you choose to add items from, only the items that are both on that master list and visible in your customer's store will be added to the requisition. This will avoid the situation where you send a store an item that they didn't previously have visible to them!
If, for any of the lines, there is already a value in the Customer current stock on hand cell, then this is because the customer is actually another store in your mSupply system, mSupply already knows their current stock, and is displaying it here. While it is possible to process a new 'manual' customer requisition for such customers, mSupply is designed for these facilities to place an internal order to your store through mSupply. You can then 'respond' to these by processing a Response (internal) requisitions. Please check to make sure that there isn't an existing response requisition waiting for you to process, rather than creating a new 'manual' customer requisition.
- Each line on the requisition will have four editable fields:
- The focus will first go into the Customer current stock on hand cell, where you can enter the customer's current stock for that item.
- Hitting the Tab key will move the focus into the Customer requested cell, where you can enter the value of what the customer has requested. This is not necessarily the quantity that you intend to supply; it is just what the customer has requested.
- Hitting the Tab key will copy the quantity from the move the Customer requested cell to the Supply this invoice cell and the focus will move to the Supply this invoice cell. You can amend the Supply this invoice value if necessary and, optionally, hit the Tab key to enter a Comment (e.g. the reason why the amount supplied is less than requested).
- If necessary, use the Delete line(s) button to remove selected item lines.
If the requisition has a lot of item lines, you can filter them by typing into the Filter items field. If you do that, only the lines with items beginning with the letters you have typed in the field will be displayed. The text X/Y will be displayed after the search field to indicate that X lines of the total Y lines in the requisition are currently being displayed (2/8 in the following screenshot):

Note that, while a filter is active, some of the other buttons are disabled e.g. you can't create an invoice or save the sort order unless all lines are visible. To make them active again, simply delete any text in the Filter items textbox (which will remove the filter).
Once you are satisfied, the Create customer invoice button should be clicked, and you will proceed to creating the customer invoice. The Supply this invoice values will be used to populate the new customer invoice and the requisition status will change to cn (confirmed).
Finalise Checkbox
Clicking on the “Finalise Checkbox” finalises the requisition form. After this no changes can be made and no additional customer invoices can be created from it. Finalised requisitions will no longer appear on reports that show “Remaining Quantities” as pending. Finalised requisitions are be considered as fully processed.
Reference documents
The Reference documents tab on a requisition enables you to save documents and other files relating to the requisition. The tab looks like this:

The table shows you all the files currently uploaded to this requisition.
- Upload document button: Click this to upload a document ot the requisition. This will open a window enabling you to search for and select the file on your computer. After you've selected it, click on the Open button to upload it. If you upload a file with the same name as one already uploaded, mSupply will upload it as a new version of the already uploaded file.
- Delete document button: Select a file in the table by clicking on it and click this button to remove it from the requisition.
- Download document button: When you click on this button you are presented with two options:
- Download: this will download the file to a location you select on your computer.
- Download and open: this will download the file to a location you select on your computer and then attempt to open it using the default application on your computer for that file type. If there is no application associated with the file type on your computer then mSupply will tell you that the file could not be opened.
Requisition categories
You can assign requisitions to a category for reporting. To setup the categories that users can select from, choose Special > Requisition categories from the menus. This window will open:

This window shows a list of all the requisition categories currently setup. The ones with a tick in the Is active column are the ones that can be selected on a requisition. If there is a long list then you can type in the Type here to search field to show only categories that contain what you type.
To add a new category, click on the New button. This window opens:

Enter a Description, click the OK button and the new category is added to the list.
To edit a category, double-click on it in the list and the same window as creating a new one will open but populated with the selected category's settings. Edit the category's name or the active status and click the OK button to save your changes.
You can quickly set a category as inactive (which means that it will no longer appear in the drop down list for selection on a requisition) by selecting it in the list and clicking on the Set inactive button.
Requisition status
Summarising from above, the status of the requisition has the following meanings:
- Status =
sg(suggested): No customer invoices have been created yet - Status =
cn(confirmed): At least one customer invoice has been created from the requisition - Status =
fn(finalised): No changes can be made to the requisition and no additional customer invoices can be created from it. It will no longer appear on reports that show “Remaining Quantities” as pending. Finalised requisitions are be considered as fully processed.
Requisition type
There are a number of different types of requisition:
Type = im (Imprest), created through a
Type = sh (Stock History), created through a
Type = response (Requisition), created automatically from an internal order from a customer's mSupply store or manually through a
New customer imprest
A typical use case of imprest is for a hospital pharmacy that has to stock it's ward or departments with items and stock on a weekly basis. Here the master list items will have the order quantities specified and the hospital pharmacy will aim to top of the ward or department with stock when the levels are low. Click here for further guidance
Customer stock history method
The Stock history method is particularly useful for customers that:
- Are not using mSupply to manage their store
- Are able to report stock on hand for each item
- Do not receive stock from suppliers other than your store
Theory
The theory behind the stock history method (sometimes referred to as the Historical Logistics Method) is based on the assumption that future customer usage will be similar to historic usage.
We can calculate the customer's average usage over time if we know their stock levels at two points in time, and what stock they received from us in that intervening period. We assume that this average usage rate will continue over the coming supply period.
There are three more variables that need to be estimated:
- The number of months in the coming supply period
- The lead time required to supply them (that is, the time lag between the customer doing a stocktake in order to trigger re-supply, and receipt of the stock)
- The number of month's worth of buffer stock they need
With this data, the calculation is like this:
- A = Stock on hand on date1
- B = Amount supplied to customer between date1 and date2
- C = Stock on hand on date2
- D = Quantity used in period between date1 and date2 = A+B-C
- E = number of months between date1 and date2
- F = Usage rate = D/E
- G = Number of months in coming supply period
- H = Number of buffer stock months desired
- I = Lead time (months) between date2 and delivery of stock
- J = Amount to supply = F*(G+H+I)-C
Using the stock history method:
- A and C are reported by the customer on date1 and date2 respectively
- B is calculated by mSupply based on mSupply records
- G, H and I are entered by the user
- D, E, F and J are calculated by mSupply
mSupply uses stock issued by the supplying store to arrive at the parameter B.
Obviously, if the customer has received goods from other sources during the calculation period, B will be a lower figure than reality. This will result in D, F and J being calculated as less than reality!
First stocktake record
In order to calculate the usage rate, mSupply requires stock on hand figures of the items recorded on an earlier date (date1) = A, above. This becomes the initial stock history record.
If you have access to this earlier stock record for your customer, you can create this initial stock history record prior to processing their regular order. To create such a record, follow the procedure described below for New customer stock history, with the following changes:
- Enter the correct Stocktake date. That is, the date when the customer undertook the stocktake. If you don't know the exact date, estimate it, accepting that there may be some error in resulting calculations. You will see this alert. Just click No (or press Enter):
- Ignore any figures that appear in the table, except for the Customer current stock on hand column. In this column, enter your customer's stock figures as reported on the date entered above.
- Click the Confirm checkbox.
- Close the window using the OK button.

If you don't have this earlier stock record for your customer, you can just proceed to create a New customer stock history requisition, ensuring that you do enter the Customer current stock on hand values. These values will then be used as the initial stock history record when you enter the next customer requisition as a New customer stock history.
Regular use
Once your customer's first stocktake record has been entered, and a period of time has passed with some customer stock usage, re-supply can be be generated on the basis of this usage.
A re-supply using the stock history method is normally initiated by a customer stocktake. If your customer is set up with mSupply customer web interface, then this process can be initiated by the customer directly, and then completed in the supplying store as described below.
If your customer has not used the mSupply customer web interface to report their stocktake, then their stock data needs to be entered in manually to the supplying store as a new customer stock history.
Add new customer stock history
Click the New customer stock history button, to display the Enter new customer stock history… window:

Select the customer in the usual way (by typing the first few letters of customer's name in the Name field, then press the Tab key to call up the list of customers' names from which the required customer may be chosen.)
Once you have chosen a customer, the window is populated with all of the items that match the following conditions:
- If the customer is a store: the items that are on any Item master lists assigned to the store - refer Master list - In use by tab.
- If the customer is a facility: the items that are on the Item master lists assigned to the customer with `Requisition` box ticked - refer Customer - Item lists tab
- The items are visible and active in the supplying store (your store) where the `customer stock history` record is being created. It is quite possible that your customer can handle items that your store can not. These items will not appear on the customer stock history requisition.
You are presented with this window:

The contents of the columns are:
- Line Sequential numbering of the lines.
- Item code, Item name, Unit: Item details
- Our stock on hand: mSupply's record of the stock on hand in 'Our' (this) store.
- Their Previous Stock on hand mSupply's record of the customer's stock hand on the previous Customer stock history requisition. If you see zero here for all items, then check that you did actually carry out the First stocktake record for this customer.
- They received from us: mSupply's record of what was sent by us to the customer since the previous Customer stock history requisition.
- Customer Previous balance The customer's report of their stock balance after they received the previous order.
- Customer Received stock The customer's report of the stock that they have received between orders.
- Customer Current Stock on hand The customer's report of the 'current' stock on hand, at the time of placing their order.
- Their usage mSupply's calculation of the customer's usage over the period between the date of the Customer Previous balance and the date of the Customer Current Stock on hand : Their Previous Stock on hand + They received from us - Customer Current Stock on hand. If the usage is negative then we can assume that mSupply does not have the data.
- Their Daily Usage This is Their usage divided by the number of days.
The Hide Internal Column Checkbox
The Hide internal column when clicked will simplify the window by displaying less columns. If the customer is also a store within the mSupply system then mSupply can show you mSupply's record of the customer's Stock on Hand, usage (total over the period and daily) owe do have the opportunity to retrieve historical data. Within mSupply it is possible to compare the system data with what the customer is telling us.

- Their Previous Stock on hand If the system has this information then the previous stock hand will be populated.
- Their usage Here mSupply will tell you the usage according to it's usage. If the usage is negative then we can assume that mSupply does not have the data.
- Their Daily Usage This is the usage calculated according to the customer. The three fields below are used to calculate this.
- Customer Previous balance This the stock balance specified by the customer after the previous order.
- Customer Received stock If stock has been received between orders.
- Customer Current Stock on hand This is the remaining stock on hand specified by the customer.
When the Hide Internal Column is ticked, we get the requisition window with less columns.

Further column info :
- Our Suggested Quantity mSupply will calculate this according to the usage stated by the customer.
- Customer Requested This is the amount that the customer would like.
- Actual quantity given This is what we have decided to supply bearing in mind our own stock level.
- Customer quantity used The number of stock used in between orders. Again this value is calculated using the stock status provided by the customer.
The Our SOH column is the stock on hand in our own store, while figures in all subsequent columns are the customer's data.
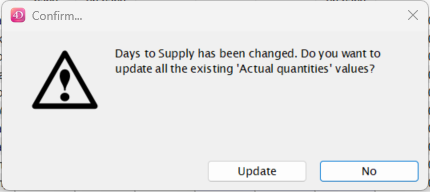
The first entry to be made is in the Days to supply field, where the appropriate figure should be entered - e.g. 30 if the ordering frequency is monthly, 90 if it is quarterly, etc.
You will see in our example that
- 13 days have passed since the last stocktake
- As figures are entered, mSupply calculates a suggested quantity to order, and this appears in the Suggested quan column. These suggested quantities should be reviewed, and any adjustment entered in the Actual quan column to reflect, for example, pack sizes and to ensure that actual quantities match exact multiples of the pack size.
All that remains is to make adjustments in the Actual quantities column. This includes the pack sizes.
Once you are satisfied, the Confirm box (bottom left corner) should be checked, the Create customer invoice button should be clicked, and you will proceed to creating the customer invoice, which is the same for all requisition types.
Printing forms
Clicking the Print button provides several options for printing forms:

- Customer stock takes: This form you can give to the customer (for example, if they are a ward in a hospital that has mSupply running in it's pharmacy store), and they can fill out the quantities they have on hand, and then values are entered into mSupply.
- Customer stock supply: This form provides information to give to the customer about the quantity they will be supplied.
- Customer stock request and issue: This form provides information for the customer comparing what was requested with what was actually supplied.
The second two reports are for use after you have entered quantities to be supplied into the customer stock history window.
Imprest method
The Imprest method is probably the most commonly understood and used method of stock control, and has been used for many years (centuries?).
As can be seen by the discussion below, the Imprest method is a simplification of the Stock History method discussed above. We argue that the Stock History method is superior to the Imprest method because it dynamically calculates a number of values based on live customer consumption data, rather than relying on some historic calculation that is likely out of date. It is quite understandable why the Imprest method is the standard approach in hospitals - because it was developed before the computer age, and its hard to change old habits. However, now that you have mSupply ready to do the number crunching, we suggest that you seriously consider using the Stock History method instead of the Imprest method… 
With the Imprest method, the quantity to be ordered is the quantity necessary to restore the stock on hand to a pre-agreed fixed quantity. This imprest stocktake must be carried out on a regular fixed frequency (daily, weekly, fortnightly, monthly, whatever.) This pre-agreed fixed quantity is arrived at on the basis of a number of simplifications to the stock history method:
A = Stock on hand on date1B = Amount supplied to customer between date1 and date2- C = Stock on hand on date2 THE ONLY INFORMATION COLLECTED
D = Quantity used in period between date1 and date2.E = number of days between date1 and date2- F = Usage rate PRE-DETERMINED AND FIXED
- G = Number of days in coming supply period PRE-DETERMINED AND FIXED
- H = Number of buffer stock days desired PRE-DETERMINED AND FIXED
- I = Lead time (days) between date2 and delivery of stock =
0
The Imprest Quantity = F*(G+H+I)
- J = Amount to supply = Imprest Quantity -C
If stocktakes are not taken at the pre-determined frequency, and particularly if they are missed, the system will fail. It is a fairly rigid system, in that once set, F, G and H must remain constant. It is suitable for supplying wards in a hospital setting, where operations are generally more rigidly controlled.
Using the imprest system
The imprest system operates in this way:
- The stock of a particular item which a customer (usually a clinic, ward or department) should hold is agreed. This is the Imprest quantity.
- A stocktake is carried out at the facility, giving us a Stock on hand.
- The amount to be ordered by the facility is calculated as:
Order quantity = Imprest quantity - Stock on hand
For example, take the case of a rural clinic which receives a monthly order from a central store:
- It is agreed that the clinic, when fully stocked, should hold
10,000paracetamol 500mg tablets. This is the Imprest quantity. - At the end of a particular month, a stocktake shows that the Stock on hand is
2,400paracetamol tablets. - To restore the stock of paracetamol tablets to the Imprest quantity, the amount to be ordered is calculated as:
Order quantity = 10,000 (Imprest quantity) minus 2,400 (Stock on hand)
= 7,600
This feature caters for mSupply users who operate an imprest system, where a central store supplies goods on a regular basis to a number of customers, who may/may not be mSupply users themselves. We advise that the customers should be provided with a list - perhaps for a 12 month period - of the dates on which they should perform a stock check and submit the figures, ideally on a customised form, to the central store acccording to the prearranged schedule. It is important to note that the customer needs to supply only the current stock on hand figures, a relatively simple task; customers are not required to submit details of what they perceive to be order quantities.
It should be remembered that the items to be included in the list and their imprest quantities must be defined for each customer individually. The imprest quantity defined for a particular customer is unique to that customer, and has no bearing on imprest quantities defined for other customers.
Processing the order from the customer
The central store, on receiving the stock on hand details from the customer, selects from the Navigator or Customer menu the item Show requisitions, which displays this window:

If you are working with a customer for whom no imprest list has been defined, clicking on the New customer imprest will display the Enter new imprest window, where appropriate entries are made.

Continuing to use Highland Health Centre as our example (for whom we have created an imprest list), double clicking on that entry displays this new window on which the imprest list appears:

You will note that there are no entries in the Their current stock column, and the figures supplied by the customer should be entered; click on each line, and then edit the zero appearing in that column with the supplied figures.

There is an important exception here: if the name you entered in the Name textbox is actually another store in mSupply then the Their current stock column will be automatically filled in with the stock in the store. Very useful time saving feature!
Simultaneously, mSupply completes the next two columns, Suggested Quantity , and Actual Quantity. The Actual Quantity entries may be edited to reflect, for example, pack sizes, to ensure that actual quantities match exact multiples of the pack size. After editing, the window may appear like this:

Should you have any reason to identify one or more lines, this may be performed by highlighting the line(s), and changing the colour of the font. Black is the default, but other options may be selected from the drop-down list:

Selecting 5 or more lines brings up an alert requiring confirmation of your intention.
Once you are satisfied, the Create customer invoice button should be clicked, and you will proceed to creating the customer invoice, which is the same for all requisition types.
Response (internal) requisitions
These work in much the same way as a New customer requisition, but with some notable differences:
- Most importantly, you don't need to create it! A response requisition will be automatically created in your (supplying) store as a result of an internal order created in another mSupply store where most of the data will have been entered already by them.
- The customer Name is already filled in and cannot be changed.
- The Customer current stock on hand and Customer requested columns are already filled in and cannot be changed i.e. only the Supply this invoice and Comment columns are editable.
- If necessary, you can still add and/or delete item lines manually.
- It is possible to generate multiple customer invoices from a single response requisition e.g. if not all of the requested stock is available at the time the requisition is entered, this allows for an initial customer invoice to be sent to partially fulfil the request and another to be sent at a later date when more stock becomes available.
The Response requisition is a more accurate way to track demand vs supply.
You can create a new manual customer requisition for a customer that is an mSupply store one. This is especially useful if the customer's mSupply system is not functioning.
Creating the customer invoice
Regardless of the requisition type, when the Create customer invoice button has been clicked, and the following window appears:

If the customer invoice has been generated from an original internal order in another store, the customer invoice window will have a red Stock transfer label.
Similarly, if the customer invoice has been generated from an original internal requisition in another store, the customer invoice window will have a red Internal requisition label.
All the entries appear as (red) placeholder lines. The operator needs to allocate stock to each of these placeholder lines before a pick list can be printed. The operator can either manually allocate stock or by using the Grinder button.
Manually allocate stock
The next step is to double click on each entry and allocate stock. In the example, the 1st item on the invoice, Ibuprofen 200mg tablets, is being processed; there are several batches in our store, some of which have reached their expiry; although line 4 indicates there are sufficient to meet this order in the store, you will note that only 106 tablets are available, so we select line 6.

Clicking on OK & Next displays the next item on the invoice, Prednisolone 5mg tablets.

Click Redistribute all, which is the normal procedure. There is only one batch available, but there is insufficient stock to meet the order, so mSupply® creates a placeholder line for the outstanding amount.

When the final item has been processed, clicking on OK will display the completed invoice.

The Grinder button
If your store is organised well, particularly by use of location priorities, you can automatically allocate stock to all placeholder lines by use of the grinder icon at the bottom left.

Make sure the Hold checkbox is not checked, and at this stage the invoice may be confirmed.
If the customer invoice is for another store (i.e. if it has a red Stock transfer label or red Internal requisition label), it must be finalised in order to transfer the goods to the other store:
- For a stock transfer, this will generate a supplier invoice in the other store - see Transferring goods to another store
- For an internal requisition, this will generate a goods received record in the other store - see Receiving goods from another store
After creating a customer invoice
- The Already issued column will be updated to reflect any non-placeholder lines (i.e. those not coloured red in the customer invoice) in any customer invoices which have been generated from the requisition regardless of the customer invoice status (i.e. it doesn't have to be confirmed).
- The Remaining to supply column will be reduced by the amount already issued, and Supply this invoice will be updated accordingly:

In the example above, a single customer invoice has been created to supply most of the requested stock, apart from two items. You can then create a second customer invoice to supply the outstanding amounts.
Details of the related customer invoices can be seen in the Invoices created tab:

Double-clicking on any of these lines will open the corresponding customer invoice.
Danger of failing to re-supply in time
Obviously, regardless of the calculation method employed, if the supplying store fails to re-supply the customer within the supply period (G) then the customer will start eating into the buffer stock and is in danger or running out of stock!
| Previous: 8.06. Box management | | Next: 8.08. Customer budgets |