4.01. About items
An item in mSupply is usually a product that you purchase from a supplier, hold in stock and supply to a customer. However, there are also other types of items:
- A service item has no stock, but can still be added to customer invoices and charged for. Service item examples are a freight charge, a consultation fee, an express delivery fee, etc.
- A cross reference item points to another item, so that when it is chosen in a list, it is substituted with the item to which it refers. This allows you to have items in your system that are referred to by trade name, but are only issued according to their generic name.
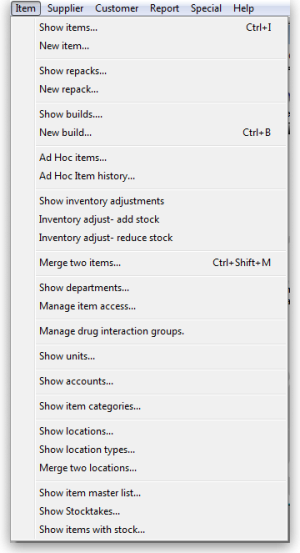
Managing items is mostly done from the Item menu or Item tab on the Navigator. The item menu also contains commands for managing lists related to items such as accounts, drug interactions and units.
For how to add a new item, see 4.02. Adding a new item.
Item menu
Show items
Use this command for viewing or editing just about any information about an item.
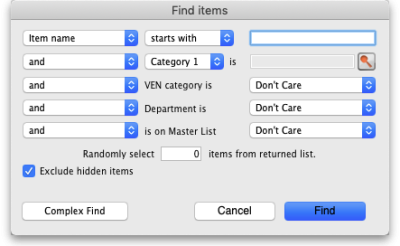
First you are presented with a window asking you to enter search criteria to find the items you are interested in:
If you click on the Find button (or press the Enter key on the keyboard) without changing anything you will be shown a list of all the visible items in your store. But you can refine the search by entering and selecting different values in the different filter lines shown in the window. If you enter no value for a filter then that filter is ignored.
is on Master list drop down list: the drop down list will contain a selection of master lists defined in the system for you to choose:
- If you are in supervisor mode (25.01. Miscellaneous topics) all master lists will be in the drop down list.
- If the Automatically update item visibility in all stores to match master lists used by each store preference (15.01. General preferences) is turned on, you will only see master lists that are set to be used by the store you are logged into (25.08. Virtual stores).
- If the Automatically update item visibility in all stores to match master lists used by each store preference is turned off then all master lists will be in the drop down list.
Randomly select x items from returned list text box: If you enter a number in here mSupply will randomly select that number of items from the items which match the search criteria you have entered in the filters above. Beware: if there are less items returned from the search than the number you enter in here mSupply will return all the items it found with no random selection.
Exclude hidden items checkbox: This is checked by default and means that only items that are visible in the store you are logged into are included in the search. If you uncheck this box then all items in all stores in your datafile will be included in the search.
There might be items in your store with stock that have been made invisible (by removing them from a master list controlling visibility, for example). If an item has stock, it will show in any search it is matched by, regardless of the setting of the Exclude hidden items checkbox.
Stock cannot be hidden in mSupply!
If only one item is found by your search then its details are displayed, otherwise you will be shown a list of matching items.
The Complex find button gives you access to a more powerful query editor where you can find a very specific set of items. A tutorial on using the query editor is to be found in section 13.14. Custom reports.
To do a “contains” search, use the wildcard character '@'; e.g. entering “@250” will find all items with “250” anywhere in their name.
Here's an example of a list of items displayed after clicking the Find button:
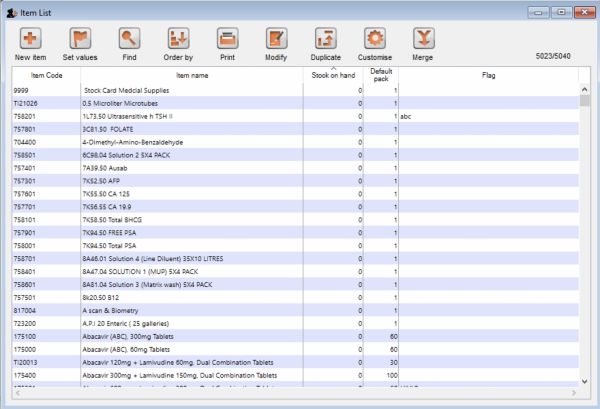
Double-click the item in the list to view its details.
Buttons on the Items list view
New item
Click the New item button to enter the details of a new item you are adding to your inventory. You can find out how to do this here
Set values
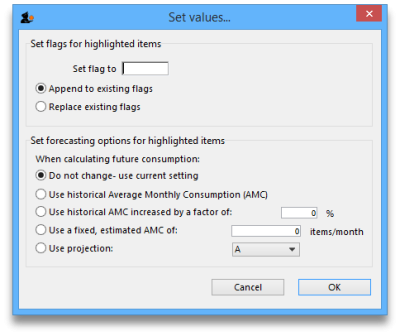
Click the Set values button to do either (or both) of the following for all the highlighted items:
- Set the flag
- Set forecasting options
You can highlight multiple items at the same time by holding down the control key (command key on Mac) and click on the lines you wish to flag. They will become highlighted.
The flag field is limited to 16 characters in length. Particularly when mSupply allows multiple strings of text in a single flag, We recommend you use just a single character (or two) as the flag.
If you choose Append to existing flags, any items with existing flags will have the new flag added to the end of the flag. If you choose Replace existing flags, then the selected items will have their flags cleared.
You can clear all flags for all items by selecting all items (control - A) then leaving the Set flag to field blank, clicking “Replace existing flags”, and then clicking the OK button.
Find
Clicking the Find button displays the Find window, the same as if you had chosen Items > Show items.
Order by
Clicking the Order by button will bring up the standard Order by window, where you can choose fields by which to sort the displayed items
Click the Print button to print the items currently displayed in a list.
Modify
Click the Modify button to show details for the first record that is highlighted. Clicking the OK and Next button in the item details window will jump to the next highlighted record. To select multiple records, hold down the control key (command on Mac) while you click on the records you wish to select.
Duplicate
Click the Duplicate button to create a new item with the same details as the selected item. A message box like the one below will appear. Click on button Duplicate to confirm creating the duplicate. Note that the only difference you will see between the existing item and the newly created item is the name of the new item ends with the text '(copy)'. The new item will be added to the end of the currently displayed list of items.
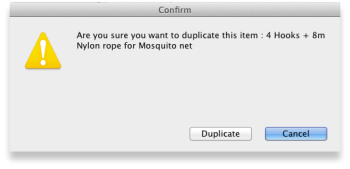
Note that for recording and audit purposes a Log event is created when an item is duplicated. For more information on log events see section 25.19. The system log.
Customise
Clicking the Customise button will show a window where you can choose which fields from the items table are shown in the list view. See Working with lists.
Merge
Click on the Merge button to merge two highlighted items.
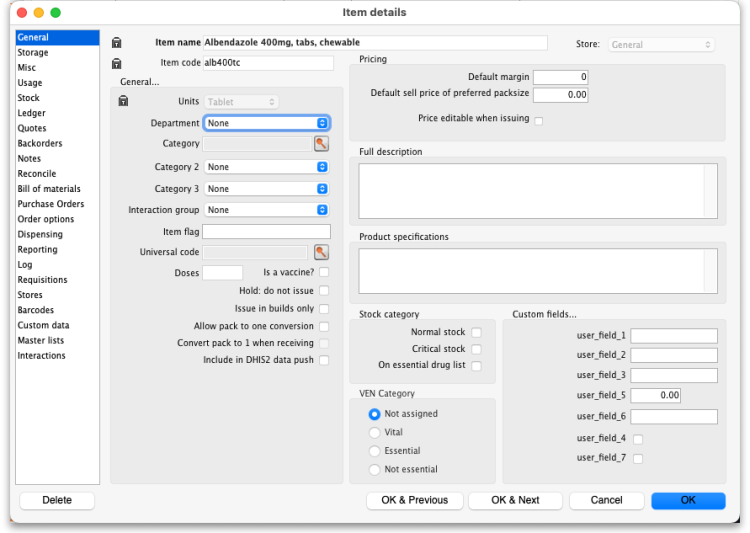
Item details window
Buttons in the item details window
Delete: Provided that an item has no transactions, quotes, order lines or backorder lines, it can be deleted, and this button performs that action.
Once you have received stock for an item, it cannot be deleted. You can delete an item immediately after you have created it or imported it. Note that if you have imported an item and stock, you can delete it, and it's associated stock will be deleted too (but not once it has been used in a transaction such as an invoice or build).
OK & Next: Saves changes, exits the window, then brings up the next item in the item list. If you did not have an item list open, or if you have reached the last item in the list, you will be returned to the list or the initial menus, depending on your starting point.
Cancel: Exits the window without saving changes.
Changes you have made to quotes, notes and backorders will be saved, even if you click Cancel .
OK: Saves changes then exits the window.
Tabs on the item details window
The item details window displays a vertical list of 'tabs' down the left side. Click on the appropriate item to view a 'tab' displaying particular information about an item. The Item Details Window normally opens at the General tab.
| Previous: 4. Items | | Next: 4.01.01. Items - General tab |
